When Page Builder Sandwich was launched in 2016, we were using Easy Digital Downloads. In 2017, we moved to Freemius. Here’s why we switched:
What is EDD and why did we choose it?
Easy Digital Downloads (EDD) is a popular self-hosted eCommerce / WooCommerce alternative for WordPress. Out of the box, you can’t really sell a WordPress product using EDD, but its Software Licensing extension makes it perfect for selling plugins. The extension handled the creation and verification of license keys, too.
EDD also worked well because it allowed customers to purchase our product directly from the website, while also giving them their own account page where they can log in and view their purchase history.
Since it worked well, and since we’re a big fan of Pippin Williamson, this was Sandwich’s first option.
How does it work compared to Freemius, and when did we switch?
In 2016, Vova Feldman, lead developer and co-creator of Freemius, emailed us a rundown of Freemius, explaining that it’s more than an eCommerce solution — It provides other features like analytics and insights solution, a marketing automation tool, and built-in support tool so customers could contact you directly from the WordPress Dashboard.
Initially, we only used ‘Freemius Insights’ — one of Freemius’ features — because we were curious about the analytics. It did help us understand the common reasons why people were uninstalling our plugin at that time.
It also helped us make more data-driven decisions through quick surveys for customers. For example, if a user were to uninstall our plugin, a quick feedback form pops up and asks why they chose to uninstall. These feedbacks helped us understand our customers’ needs.
In this exercise, we found out that users were uninstalling because they didn’t know what to do after they activate. We simply added a welcome screen and tutorial video to decrease the uninstall rate. Easy.
Analytics aside, Freemius platform was built that you can readily use it for selling your WordPress products more effectively!
After weighing pros and cons, we moved to Freemius in January 2017. Here’s why:
Freemius lets customers purchase your product directly on their WordPress Dashboard
Instead of being redirected to an external website, Freemius allows customers to purchase straight from their WordPress Dashboard. This made huge impact on sales of course! Generally, the fewer things the user has to do to purchase something, the more likely it is that they actually make the purchase.
With EDD, people who interested in Sandwich had to jump out of their page building experience to an external website to purchase a license key. They would go through several clicks — and several more distractions — before they could finally purchase.
In contrast, with Freemius customers purchase right out of their own WordPress Dashboards while they’re trying out Sandwich — no need to navigate away to a different site to purchase.
The convenience of it all made purchasing ten times smoother and easier for customers, leading to a significant increase in sales.
The developers are also invested in your success
Selling your product using Freemius isn’t free. For each sale, they gather a small share of your revenue, that goes into payment and processing fees. That’s their business model.
But the important thing to note here is that their business model revolves around your WordPress product’s success.
Vova and his team are very accommodating. They gave us their own tips and tricks on how to generate more revenue, how to improve our plugin, and how to use Freemius to our advantage. Their generosity with information contributed to Sandwich’s growth.
Conclusion: If you’re a WordPress product author who wants to monetize, Freemius is the way to go.
Page Builder Sandwich aims to heighten intuitiveness and user experience through page building. Freemius does this, too: It effectively smoothens the experience for both customers and sellers alike.
Since switching to Freemius in 2017, we’ve had happier customers, lower uninstall rate, and overall a better sales. If you’re looking to monetize your WordPress plugins or themes, Freemius is definitely the way to go.
Its features are better than the competitors. It helped us make smarter decisions for improvement. Their team offers outstanding support. If you are a WordPress product author, we hope you experience the same impact we had with Freemius.
The more important question, though, is how and why do you need to do it?
My business is small. Can’t I just wing it?
Email marketing has an average ROI of 3,800 percent. For every dollar invested, the average return is $38, according to Salesforce.
In other words, it’s definitely something worth investing your time in.
Because while there are tons of ways to market your products and capture leads– you can still try to make use of the less-popular cold call, for example– the most sure-fire way to connect and communicate with your target audience in the 21st century is through e-mail marketing.
So if you’re running a business –any kind of business, whether small, big, online or otherwise– digital and e-mail marketing is an absolute must.
Aside from cutting on costs (e-mail is free, after all), businesses rely on it not just because it’s been proven to be successful, but also because it yields results that are both measurable and flexible; you can track your audience’s responses to your e-mails, for example, or note how many clicks and opens your e-mail marketing campaigns get.
How you can do it with Page Builder Sandwich
There are lots of available software you can use to help you market your products and content digitally, like Hubspot’s E-mail Marketing Software, or Mailchimp, which gives you a management system that helps you create, organize, and analyze your newsletters.
But did you know that using Sandwich, you can actually integrate some of the popular software mentioned via the Newsletter Element?
The Newsletter Element (and how it works)
You can find the Newsletter Element by hovering over to the Elements Inspector over to the left side of the screen, and selecting Newsletter from the bottom area.
Using the Properties Inspector, you can also choose which newsletter integration you’d like to use with the Newsletter Element. For this exmple, we’re going to use MailChimp (highlighted in blue in the dropdown below).
And, using the Input Field button, you can try to play around with the Newsletter Element’s settings as well, so you can change colors, customize success message options, and other settings, like so:
By trying your hand at the different available settings for the Newsletter Element’s options, you can end up with something like this:
While other noteworthy marketing trends still exist today, one thing’s for sure: E-mail marketing is definitely here to stay, and it’s important that you utilize it when you can. Who knows? Through e-mail marketing, your business could just get that big break it’s been looking for.
Design in less time!
Get access to Sandwich’s Pre-Designed Sections, Templates, and a whole lot more.
In other words, if they don’t like what they see within that timeframe, chances are they’re going to close their browser windows and direct their attention elsewhere.
Fortunately, there are a lot of ways to prevent this from happening; one of them is to familiarize yourself with good web design practices. And the good news is you don’t need to be a professional web designer in order to do so.
Because while it’s true that not everyone has a good eye for design, preventing bad design becomes easier once you know what to avoid.
That said, make sure you keep these 4 common web design mistakes in mind. This way, you’ll have one less thing to worry about when you finally start building your website.
Mistake #1: Using More Than 3 Fonts
A rule of thumb when designing websites? Try not to have too much visual elements going on within your space. Having more than 3 fonts on your site design is a surefire way to break this one rule. It’ll also overwhelm your site visitors.
Keeping your website fonts to a minimum of 3 is a general design practice observed by professionals. Plus, it increases your site’s level of readability and consistency, which are key to your site traffic’s success.
DON’T DO THIS:
Don’t use more than 3 fonts and try to avoid “fancy fonts” as much as possible. These tend to make your site look unprofessional and outdated.
DO THIS:
Use only 2 fonts, or a maximum of 3 if you have to. Notice how the page below looks clean and sleek, all while keeping readability and consistency all throughout the design.
Try comparing the differences between this example and the previous one. The example below with only two fonts is a website that your visitors will likely take seriously. This previous one above with the overwhelming amount of fonts isn’t.
Put simply, white space is literally the emptyspacebetween elements in a composition.
In other words, it’s negative space.This pertains toanything on your website that isn’t filled with text, photos, or other design elements.
Now, the problem arises when website owners want to fillall of the white space in, which is an absolute no-no.
White space matters because it gives your site visitors and readers some breathing space when going through your site. Just how it was mentioned in the first design mistake to avoid, overwhelming your website with too much design elements is more than enough reason for your site visitors to leave and for your traffic to decrease significantly. It also makes for poorly executed design.
DON’T DO THIS:
In the example below, take a look at how the text is nearing the edges of the purple section’s margin. Notice as well how all elements leave almost zero room for white space.
DO THIS INSTEAD:
Give your site readers some room to breathe. If adding in long paragraphs is unavoidable, just remember to always take the rules of spacing into account—they’re pretty easy to remember anyway ?. It will leave your page looking cool, crisp, and professional.
Mistake #3: Designing Websites With Zero Flow in Your Site’s Content
It’s important to pay attention as to how information on your website is presented. Moreover, site content should generally follow a logical flow, taking the site viewer’s intuition into consideration.
Check out the two examples below to see what we mean.
DON’T DO THIS:
Unless you’re a graphic designer by profession, it’s probably not a good idea to experiment with the standard flow of your website’s sections.
Below, you can see that the site’s design lacks both visual and logical flow; everything is all over the place. You don’t want your audience having a hard time navigating through your site, either. This is another surefire way to do it.
DO THIS INSTEAD:
Notice how the sections of the website flow depending on what actions the visitor is most likely to take.
The design is intuitive and has a logical flow: First, the organization introduces itself and fills the audience in on the basics; like what it’s about and what it does. Second, it adds in reliable figures to establish credibility. Lastly, the website gives the audience its contact numbers and a list of events, prompting them to take action.
Mistake #4: Trying to Fit in Every Bit of Information Onto Your Website
Adding in walls of uncessary text where white space should can drive your audience away. Remember to only keep important details.
Studies find that readers only visit 20% of your webpage; everyone else outside that percentage will probably just scroll through your site.
DON’T DO THIS.
Don’t overwhelm your visitors with inconsistent, giant walls of text,especially if it means having to sacrifice your website design’s cohesiveness and structure.
DO THIS INSTEAD:
Keep your copy short and concise, and take out chunks of unecessary text if you can help it. Only keep vital information that your site visitorsabsolutely need to know.
Conclusion
Website design is important, and can be a huge deciding factor in whether or not you gain site traffic.
Remember not take it for granted. Always alot time to research, and look up design articles to guide you along the way. Before you know it, you’ll be seeing your site traffic moving upwards. ? Good luck!
Design in less time!
Check out how much faster Page Builder Sandwich let you design your web pages.
CANVA has hundreds of resources that you can access on their website. Apart from useful and easy-to-follow design tips, they also have photo editing tools, graphs, and a wide range of useful resources you can use for your creative projects.
Check out this cool Color Guide from Canva for your next design venture.
In 2017, we began expanding Page Builder Sandwich’s features. This year was a huge leap for us, and we couldn’t be happier.
We’ve gotten tons of feedback and support from our users, as well as our friends from WordPress. And because of this, we were able to create something big, something that let you create wonderful things with us.
So without further ado, let’s look back at Page Builder Sandwich’s 2017. Here are our favorite updates and releases from this year.
Parallax Scrolling
Parallax Scrolling is a background effect that gives your page a a 3D layered look while you scroll. We made adding this effect easy for our users- simply select the Parallax Scrolling option in your row’s background to add the parallax effect.
Video Backgrounds
Just like with Parallax Scrolling, Page Builder Sandwich lets you add fancy Video Backgrounds by simply copy-pasting Vimeo or YouTube links, or manually uploading videos.
Ken Burns Backgrounds
You notice the way that archival footage is shown in most documentaries? How they show an image on the screen, slowly zooming in? That’s called the Ken Burns effect. And yes, Page Builder Sandwich released that in 2017, too.
Blank Page Template
Want to start with a blank slate? Page Builder Sandwich’s got you covered. We also released the Blank Page Template in 2017, which lets you design your website on a completely blank canvas.
Full Page Templates
Page Builder Sandwich released its very first set of Page Templates in January 2017. Niche-based and professionally designed, these templates also allow for manual editing so you can customize them the way you’d like.
Mobile Responsiveness
2017 was the year we introduced Mobile Responsiveness to our roster of features. Now you can view your website through mobile, seamlessly.
All 800+ Google Fonts
We gave you the ability to add spice and flexibility to your website with all 800+ Google Fonts.
Page Builder Sandwich has been the truly user-friendly, truly intuitive, and truly front-end page builder. Our vision to give you the best webpage-making experience grows as you guys share your needs.
From your ideas we built something better for 2018!
Frontly Builder is the next step in our evolution and we’re at the final stages of development!
Leave us your email to get first dibs on updates!
’til relaunch
We wouldn’t have gotten this far without you guys’ support, so a huge, huge thanks to everyone by our side this 2017! Here’s to creating even more amazing things in 2018. We’ll see you there!
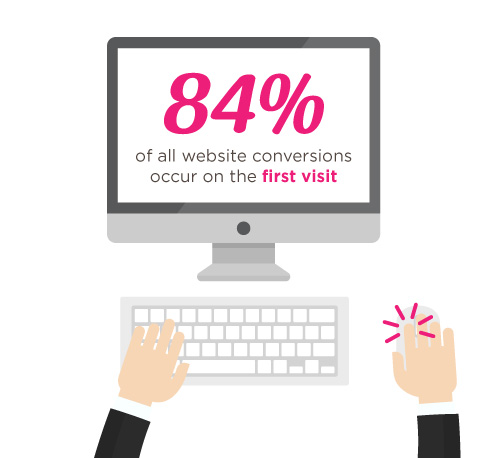
In a previous article, we mentioned that 84% of website conversions occur on the first visit. And during this first visit, the average site visitor is only going to stay on your website for about 10 seconds.
That means that’s all the time you have to make a good impression, convince your visitors to stay on your site, and to (hopefully) convert that site visit into a lead.
Kind of puts on the pressure when you think about it.
But not to worry- landing pages help you do just that. More specifically though, well-crafted landing pages help you to do just that.
So what are they?
In the simplest terms, a landing page is any page that gets traffic from anywhere other than the usual pages on your site (like your Homepage, FAQ, or Contact Us page).
The difference between these “usual pages” though, is that landing pages reel in your audience using content that creates a sense of urgency – like call-to-action buttons and promo pages, for example – and they do it all in one page with a specific goal set in mind: They make your audience take action.
And if all goes as expected, you get to convert your audience and site visitors into leads. This is called lead generation.
Landing pages are a crucial part of any website, especially when you’re trying to build an audience, and generate leads. They’re a huge factor in generating revenue as well.
What do they look like and when do I start making one?
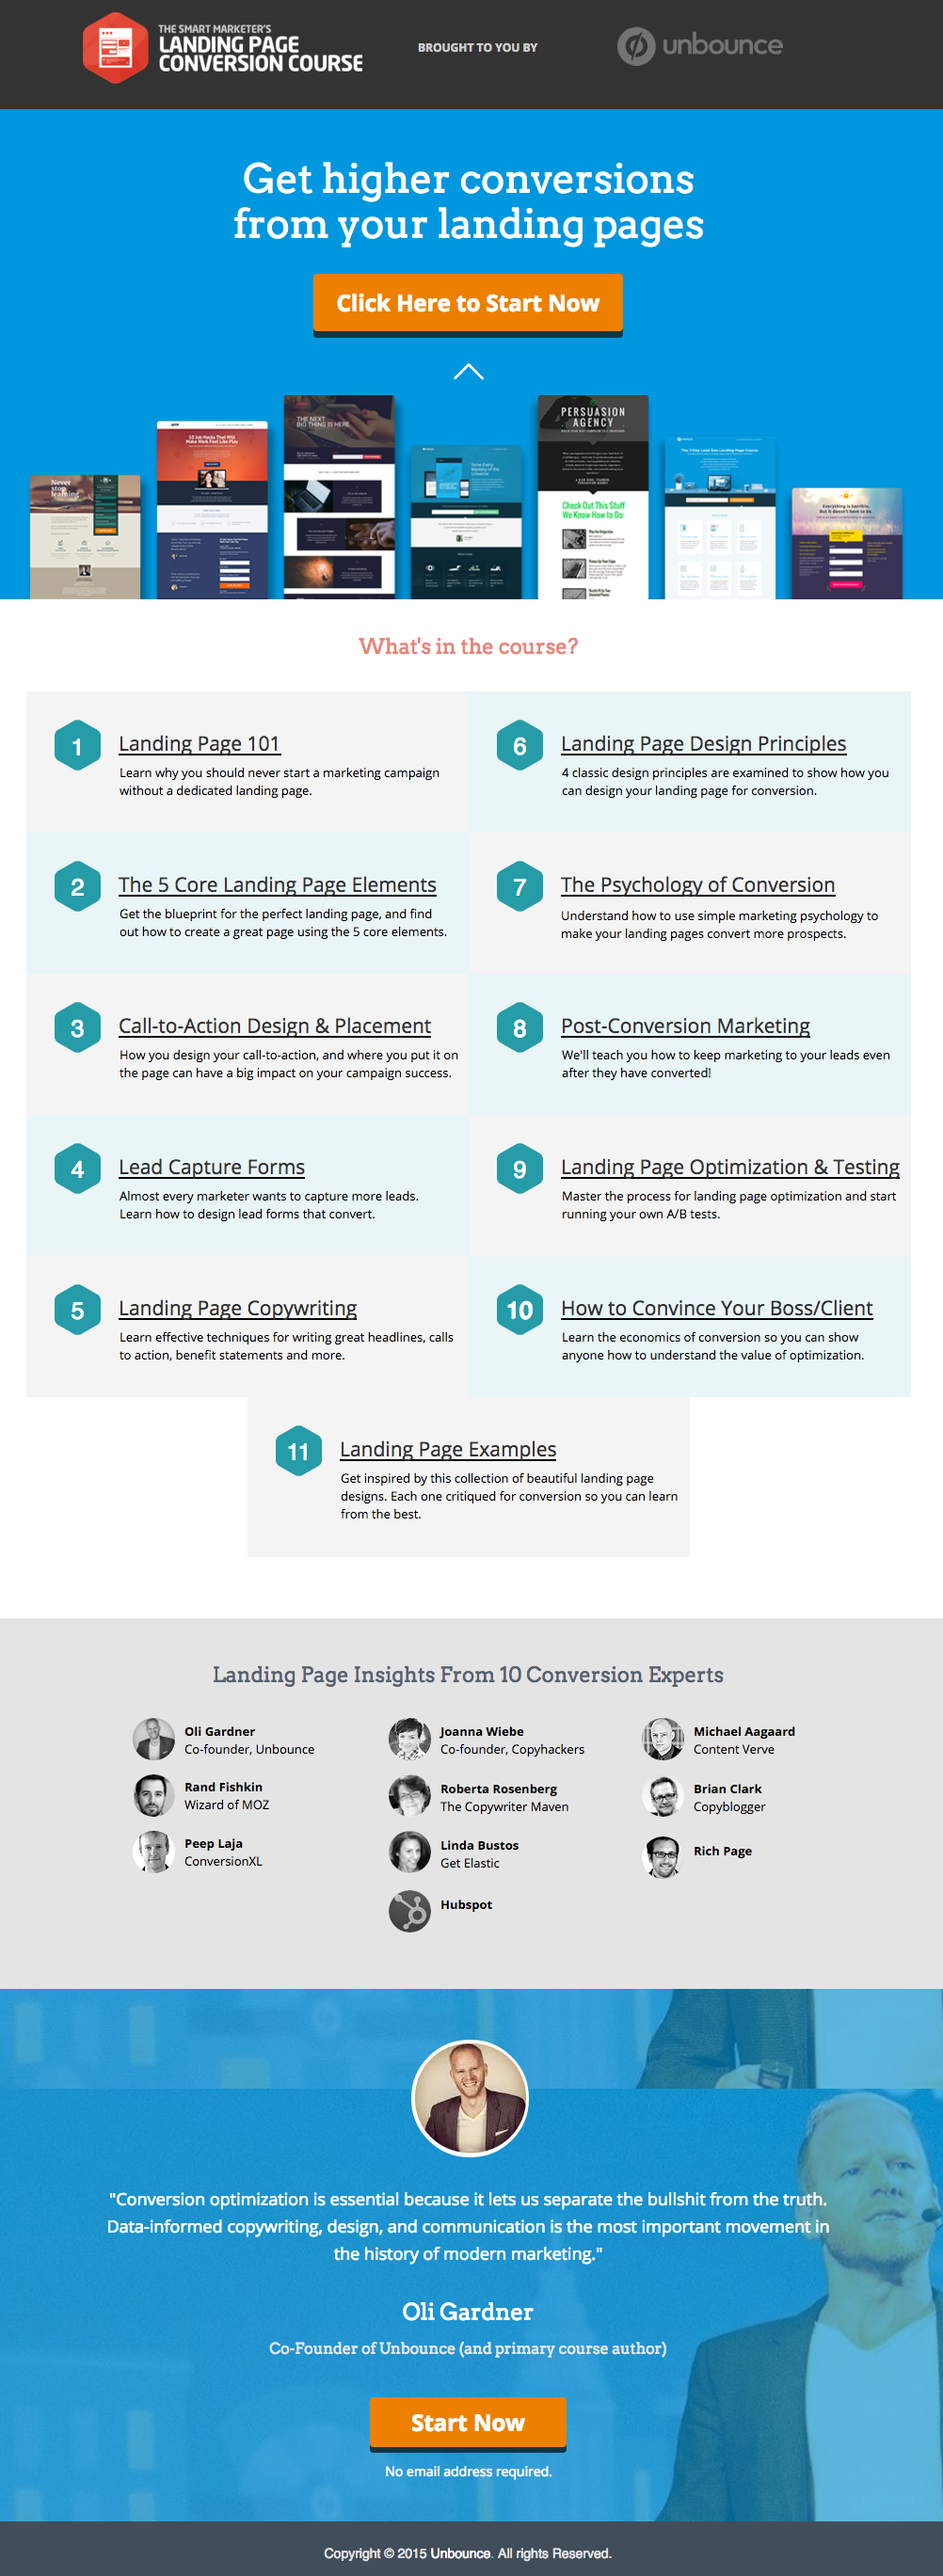
Here’s an example of a great landing page from Unbounce, which we really like:
This has all of the right elements you need to execute the perfect landing page: it’s got just the right amount of text (which is really helpful for boosting SEO), and it’s packaged in a way that it’s not too heavy or intimidating for site visitors.
The imagery is great as well, and the placement of the two call-to-action (or CTA) buttons give the visitors just enough cues to sign up for their service. Not too little, but not too much either.
(Tip: the Unbounce landing page looks pretty fancy – maybe even a tad intimidating if you’re trying to replicate a similar style on your own landing page – but you could actually create page that’s similar and as awesome-looking using PBS).
MAKE YOUR OWN LANDING PAGE: If you’re new to design, First Site Guide’s Elements & Principles of Design Cheat Sheet proves to be friendly and reliable for beginners.
Take note though, that Unbounce’s example isn’t the only way you can create your landing page.
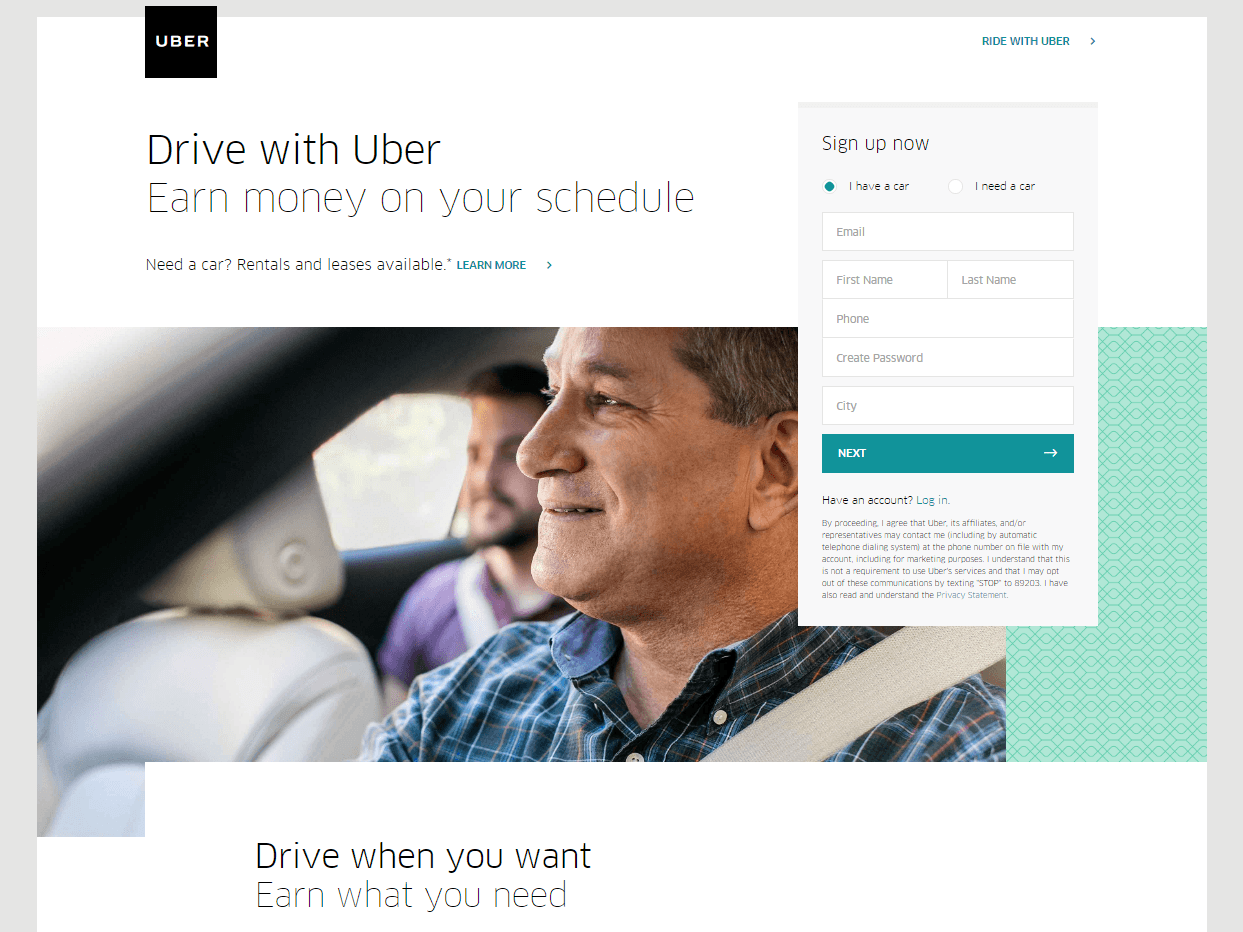
You can always go for a simpler, cleaner look, like Uber’s landing page below:
The text’s placement, along with the sign-up forms look crisp and clean. There’s also minimal distractions on this landing page, which prompts its visitors to sign up right away.
MAKE YOUR OWN LANDING PAGE: First Site Guide’s Psychology of Color Cheat Sheet is a huge helA, which can help you balance out the right kind of colors that create a minimal yet classy effect for your landing pages.
You can have more than one
This is a little tricky because you have to learn how to strike a balance, but if you think it’ll help generate more leads, you can actually build more than one landing page. Again, different landing pages cater to different needs.
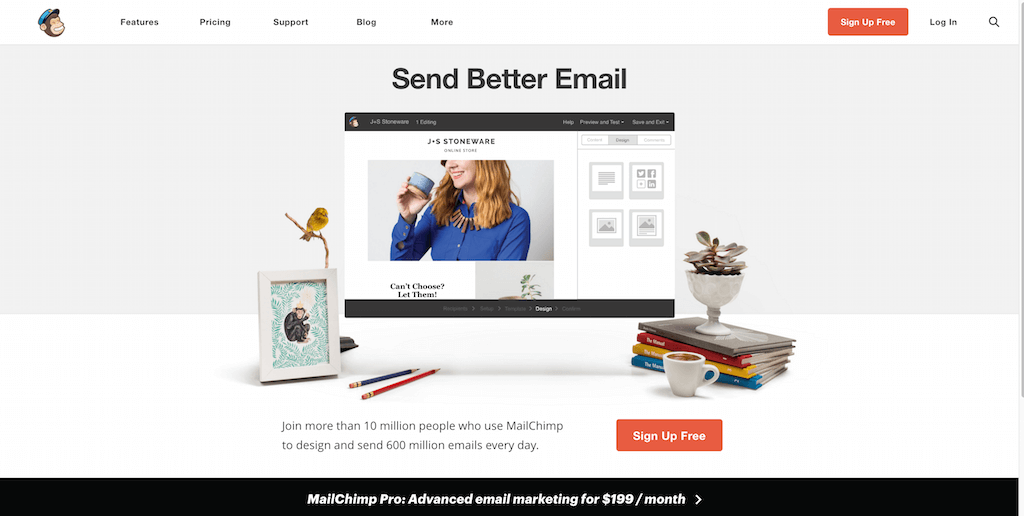
Take this one (out of many) from MailChimp for example, which urges its audience to sign up to their services for free:
(It worked by the way, as we use MailChimp for our newsletter service, too).
Take note of the text – it’s straight to the point, and addresses the target’s audience needs in just three simple, albeit powerful words; enough to catch the visitor’s attention, and convert into a lead.
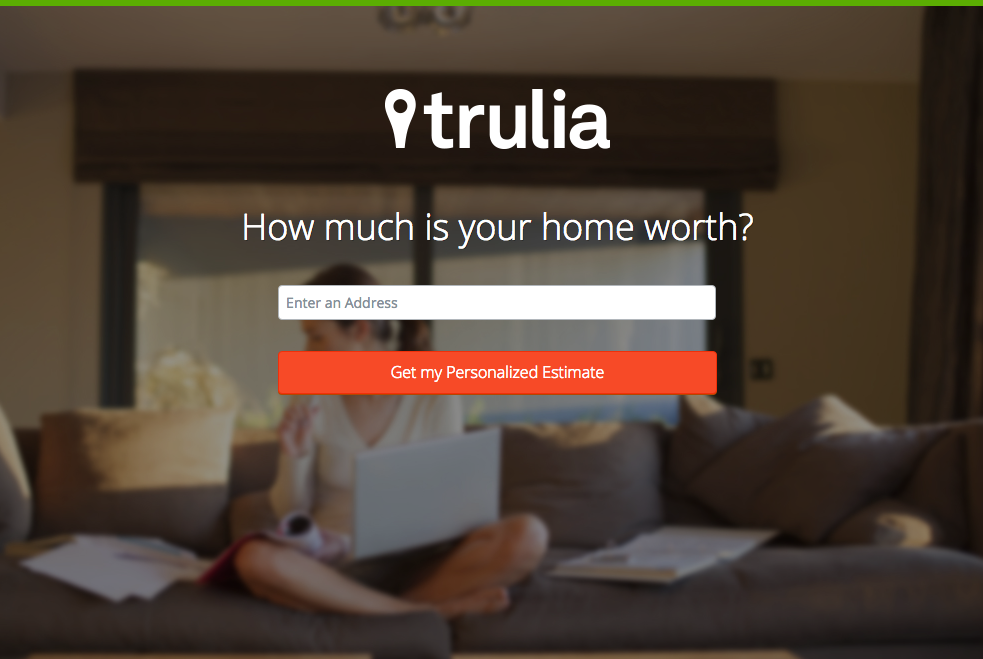
Here’s another from Truila, which helps its users get an estimate of how much their houses are worth.
Unlike the previous examples, Truilia doesn’t offer a catch to their customers in this particular landing page. They simply offer to give the visitor a chance to test out their service.
Again, take note of the copy: no fluff, and it gets straight to the point.
Usually, landing pages like these direct you towards another, one that has more information about what the website is offering. This is also a great technique used to capture more leads.
MAKE YOUR OWN LANDING PAGE: Did you know that “Under Construction” pages count as landing pages, too? This blog post by First Site Guide teaches you how to make one.
More doesn’t always mean merrier
It’s important to remember that the problem isn’t the lack of landing pages per se – but the lack ofwell-created, successful landing pages.
Any website can make a bunch of them, but that doesn’t automatically render successful lead conversions.
Again, the business of landing pages is very tricky– so if you can afford to invest in studying the art and science behind it, it’s highly recommended that you do.
Here are some websites that’ll be really helpful in your journey to creating landing pages
Landing Folio
http://www.landingfolio.com/
Landing Folio is an extensive gallery that’s really useful when it comes to getting inspiration for landing page designs. They also offer some kick-ass, friendly courses on how to perfect the art of creating landing pages. Plus, all the designs are pretty and fun to look at as well.
First Site Guide is one of the most resourceful websites on the internet, especially if you’re new to the web and want to make something out of it. They have resources ranging from lists of tools that create content, product reviews and comparisons, infographics, friendly video tutorials, and more. Definitely helpful if you’re just starting out on creating your first landing page.
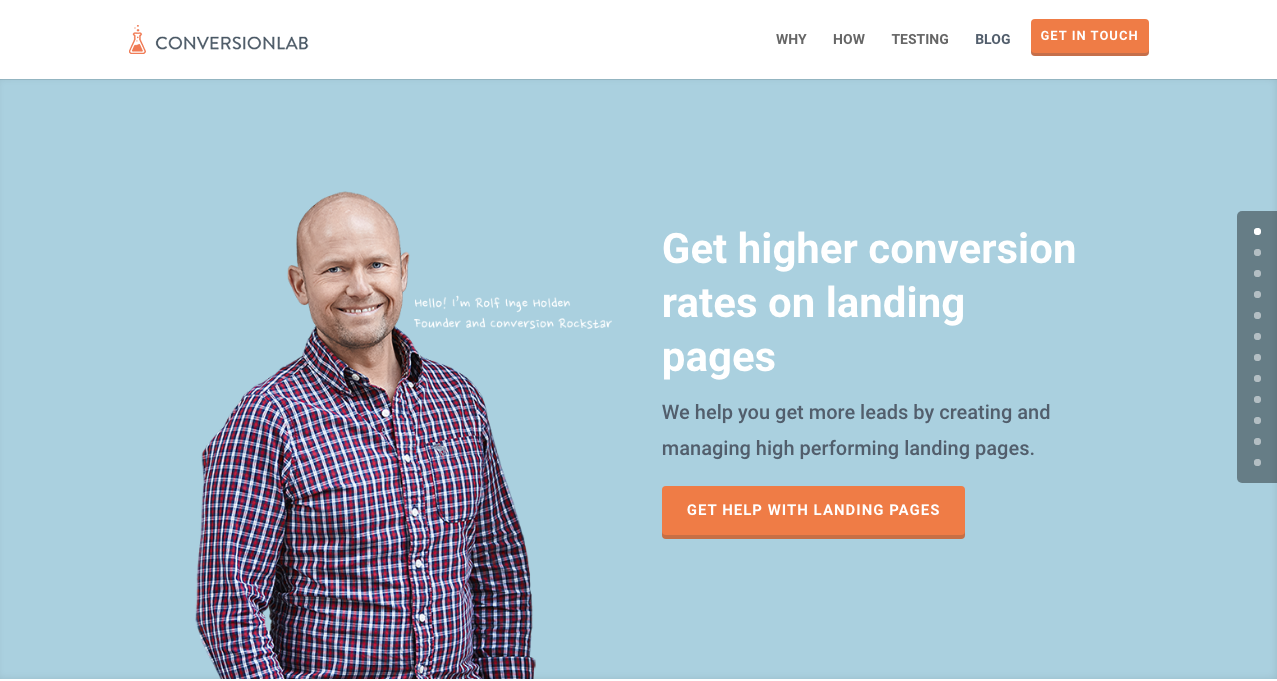
Apart from the fact that their own landing page is pretty well-crafted itself, Conversion Lab does exactly what they say they do: they help you get conversions. They also help out with testing too, which is crucial to any website that’s trying to raise their conversion rates.
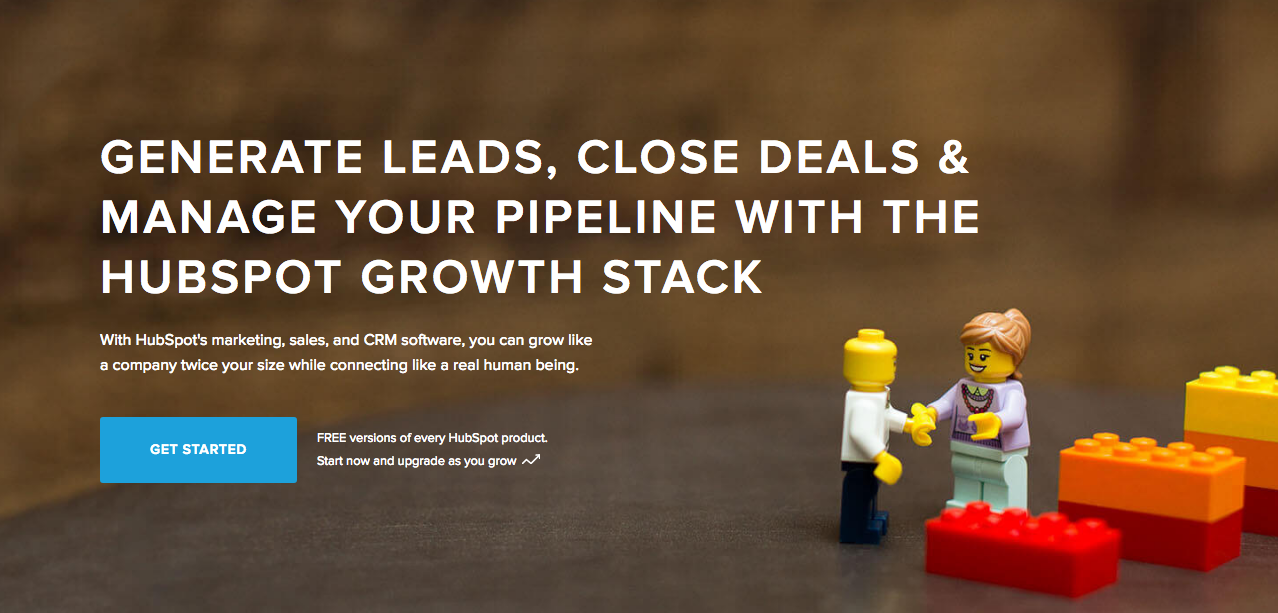
Hubspot is an all-around help site that lends you a hand in almost anything and everything related to online marketing.
They have a diverse collection of articles that range from creating business plans, to content and inbound marketing, and of course- landing pages. It’s a great resource for anyone still new to the realm of digital marketing.
Conclusion
Landing pages can be really tricky, especially if you’re just starting out in any kind of business.
But remember that it’s worth your time to invest into learning how they work and how to make them. Why? Because they generate leads, and leads generate revenue.
Take note that digital marketing trends are changing rapidly. You have to keep with these trends in order for your business to not only survive, but to also thrive.
Do you have any other tips or resources that you’d like to share with us? Comment below, or send us an email at [email protected] if you’d like to get featured as a resource in one of our articles.
But what does a 403 error mean, and why is it occurring in Page Builder Sandwich in the first place?
The 403 Error Explained
The most common cause of the 403 error is when security plugins aren’t configured in a particular way or standard.
Like WordFence, most security plugins from WordPress restrict some actions if they’re suspected or proven to be malicious. These scenarios usually occur on your WP Admin or WP Login page, or show up as pop-ups alerting you that you don’t have authorization to view your page.
Here’s what the pop-up will look like if you ever encounter it on Sandwich:
So what does this mean? Is Sandwich safe to use? Is WordFence bad? And does the 403 error warrant bad points for both Wordfence and Page Builder Sandwich?
Well, no.
All of this just means thatWordfence is extra careful when scanning your external plugins.
And that’s actually a really good thing, especially since they’re a security plugin.
WordFence is Legit…
WordFence is one of the most popular security plugins for WordPress. It has over a million active installs, so chances are, it’s probably installed on your WP website, too. They exist for a great cause: Not just tokeep your website safe, but to also reduce security risks, and improve your website’s security overall.
tl;dr WordFence is legit.
…And So is Sandwich. But Why Does It Need Whitelisting?
It’s not just Sandwich that WordFence blocks.
Other plugins and URLS require whitelisting (the inverse of blacklisting) on WordFence, too. Some more popular plugins might have been allowed already by Wordfence.
So what’s happening behind the scenes, and where is the 403 error coming from?
Ajax Functions and Page Builder Sandwich
Page Builder Sandwich performs ajax functions throughout your editing experience. Certain plugins do, too.
W3Schools expounds on ajax a little further:
AJAX is a technique for creating fast and dynamic web pages. It allows web pages to be updated asynchronously by exchanging small amounts of data with the server behind the scenes. This means that it is possible to update parts of a web page, without reloading the whole page.
Chart taken from W3Schools
In Page Builder Sandwich, the ajax calls range from getting shortcode mappings, rendering shortcodes to saving your changes. This might cause you to experience problems , such as the 403 error, problems with saving your output, or unrendered shortcodes. This is the time that you might need to whitelist ajax calls specific to Page Builder Sandwich.
Whitelisting Page Builder Sandwich on WordFence
To white list PBS in Wordfence’s Firewall, add an entry in the Whitelisted URLs area with these parameters:
URL: /wp-admin/admin-ajax.php
Param Name: main-content
Param: POST Body
For multisite WordPress installations, it’s a good idea to include your site’s folder name in the URL above. For example: /my-multisite/wp-admin/admin-ajax.php
After adding these values, the 403 Error should be properly addressed, and you should be able to save your output and generate rendered shortcodes again.
This is what it should look like under your WordFence Firewall settings:
Ta-da!
Conclusion
Yes, Page Builder Sandwich is safe to use.
More than that, it only performs ajax actions when in editing mode, and it’s compatible with external plugins and themes (as long as they’re at par with WordPress’ coding standards).
WordFence Security is no different.
But what’s great about them is they give WordPress users the opportunity to keep their sites safe and secure, with the additional option to let you decide which plugins are, and aren’t.
Keeping your audience reeled into your page (and successfully generating leads) is a different story altogether, though.
Don’t get us wrong. Lots of sites can achieve this without a worry, but that’s usually because they spend a significant amount of time and research doing just that.
In contrast, some sites admittedly have a little trouble pulling it off, and more often than not, some of them don’t know where to begin. But don’t worry – Page Builder Sandwich will try to lend you a hand with that very same thing.
Why is it Important to Generate Leads?
One crucial thing to remember is that generating leads takes more than just buying a domain and setting a website up.
Now, before we get too into it, take note that Page Builder Sandwich isn’t a marketing website.
But in any case, it’s important to know that there’s a science behind generating leads, and while we ourselves aren’t digital marketers, it’s essential to note that successful lead conversion also has to do with the proper execution of design and content. That’s where we come in.
“But how can you guys help with the marketing aspect of it all?”
Great question! A few weeks ago we began corresponding with Straight North, a blog that specializes in digital marketing and lead conversion. They’ve given us some really tips which we hope you guys find helpful in your site-building journey.
Now, remember thatthere could belots of factors as to why your website isn’t generating the amount of leads you’d like. The first step is toidentify what these factors are, and hopefully, this list can help you out with doing just that.
TIP #1: Create Content that Stimulates Action
According to Straight North, 84% of website conversions occur on the first visit, and only 11% convert in the second.
In other words, first impressions matter.
Much like how bad auditions don’t result in actors getting lead roles, someone’s first visit to your website could either make or break you.
That’s why it’s you and your team’s job to try and convince people to stay glued to your page.
Straight North suggests that posting copy and content (both text and images) is a great way to catch your visitors’ attention. Remember to always allot sufficient time to research on what makes good copy and good content, and never underestimate either.
Here are a couple of websites that might help you on your journey towards creating successful leads:
Wow your site visitors by using interactive PBS elements like the Carousel, or use Parallax Scrolling, and Video Backgrounds to catch their attention. Remember to execute their placement in a balanced way though, as to not overwhelm your audience.
TIP #2: Intuitive Navigation
In the realm of web development and site-building, intuitiveness in the user interface (or UI) is key.
This means that when your visitors or users find their way around your site byintuition (i.e. easy site-navigation and straightforward instructions), they’re more likely to stay glued on your site.
Now, if navigating around your website proves to be a frustrating experience, chances are your visitors might not stick around long enough to hear what you have to say, and what you have to offer them.
Straight North adds thatgetting too “clever and creative” with navigation labels is a bad idea,and suggest that you use terms like “Contact Us” for call-to-action buttons, rather than using vague labels like “Interact!” or “Dialog.” Remember thatbombarding your site with too much jargon can cause frustration to your audience as well.
So as long as navigating through your website comes to the user assecond nature, then you have one less thing to worry about when trying to convert leads.
How PBS Can Help:
Page Builder Sandwich’s UI is highly intuitive, and is akin to using a Word processor (like Google Docs and Microsoft Word). Check out ourdemo to get some inspiration on how you can apply intuitive changes to your site, too!
OTHER PAGE BUILDERS
…have too much stuff going on.
PAGE BUILDER SANDWICH
…gets straight to the point.
TIP #3: Use Relevant, Custom Imagery
Your images and how they’re presented also matter, and they matter a lot.
While it may seem trivial to some, uploading boring stock images, stretched out/pixelzed photos, or badly-presented typography is a huge factor that dictates whether your visitors stay on your site, or move to a better, more credible-looking alternative.
How PBS Can Help:
Because it’s WordPress-run,PBS lets you post high-quality photos in your website. As long as you have the right image dimensions, you shouldn’t have a problem with posting photos.
Additional lifehack: You can also check out Pexels.com and Unsplash.com to get awesome, high-quality stock photos!
TIP #4: Persuasive Credibility Elements
Skepticism is ahuge conversion killer.
That’s why more often than not, it’s always a good idea to add in elements that back up your credibility as a website (or business), like testimonials from credible sources, and logos of reputable companies or groups that you’ve worked with.So use customer testimonials, show logos of well-known customers, and include third-party mentions in your content.
How PBS Can Help:
Use PBS features to vouch for you. Display your customers’ testimonials in a Carousel, or use the Featurette element to showcase third-party mentions, or make use of the column element to effectively display logos of your well-known customers (like in the graphic above).
TIP #5: Get Personal!
Straight North says thatusing a lighter, casual tone makes all the difference when writing content (such as articles and bio’s) on your site. This lets your users know that you’re human too, and not just some bot trying to get a run for their money (which we hope you aren’t).
How PBS Can Help:
While this part is entirely up to you and your team, it wouldn’t hurt to use elements such as the Featurette, Gallery, and Image Box to liven up your bio’s as well. Adding in other PBS elements like Social Media Icons can help put a personal touch to your pages, too.
PBS’ Industry Template makes full use of the Image Box Elements for its About Us and Feature Sections.
TIP #6: Irresistible Calls-to-Action
Calls-to-Action (CTA) are a crucial part of generating leads.
You will FAIL to capture first-visit conversions unless you ASK. – Straight North
Just asking isn’t enough, though. According to Straight North, your calls-to-action should be executed both “skillfully and persuasively”.
The trick is to have effective Calls-to-Actions plus a good combination of smart consistent placement, offers that give off substance, time-sensitive offers (giving them offers for a set, limited time will give them a sense of urgency), and most importantly, guaranteed offers.
You want your site to trust you. “Take away all arguments for delay, and conversions will increase”, Straight North says.
How PBS Can Help:
PBS’ Call-to-Action Button – as well as other elements such as the Countdown and Page Heading element – can help ease your burden regarding this task.
Executing them correctly is up to you and your team though, so make sure to give time to research about CTA placements and other marketing tips.
Here are some resources that can help boost your CTA game:
A person submitting their information to you via a form on your website is ultimately what measures a successful lead conversion.
This is why placing user-friendly contact forms on your site is of the utmost importance. They’re the ultimate “make-or-break stage of a great conversion opportunity”, says Straight North.
A couple of PBS’ third-party plugins available for shortcode mapping
So don’t intimidate your site visitors by overwhelming them with too many question forms, or have them exhaust too much energy, like having them type long sentences instead of choosing their answers from a drop-down list.
Letting them know that you value their privacy is also a must. Be sure to place clean, good-looking forms on your site so as to boost credibility.
TIP #8: Prominently Displayed Phone Numbers (or Contact Details)
Contact number and social media buttons displayed prominently in PBS’ Restaurant Template
A consistent, prominent display of phone numbers is a must if you’re a type of business that offers support through phone calls. Straight North adds that investing in toll-free numbers can also give you a good boost in conversion.
If you’re a tech company like us, then it’s also a good idea to display your e-mail address (or other ways your visitors can reach you) on your website.
How PBS Can Help:
PBS’ Full Page Niche-Based Templates have fields that let you feature phone numbers and other contact information more prominently, so that your visitors can reach you right away.
TIP #9: Continuous Testing
Straight North attests to the importance of site maintenance and testing: “No matter how good your website is in converting leads, it can always be better.”
This is true for any website, and not just one that’s attempting to convert leads. Making sure your site is in tip-top shape and that your customers are always pleased will help your business go a long way.
How PBS Can Help:
This one is up to you, but if you’d like a tip: the PBS Team continuously tests the site and page builder for any bugs, and always work to make sure you guys are satisfied. We don’t exactly have a feature for making sure you do regular tests on your site, so this one’s entirely up to you and your team.Do it, and do it well!
TIP #10: Mobile-Friendly Design
Almost everyone has a cellphone or tablet; but whileonly 23 percent of lead conversion rates comefrom mobile devices, it absolutely will not do to ignore any sort of potential conversions, no matter the percentage (leads are still leads, after all).
“Users converting from desktop view may have seen the site initially on a mobile device,” Straight North says. “Mobile conversions are (also) likely to grow as mobile Internet access continues to soar at the expense of desktops.”
You can preview your site on mobile view directly on desktop
How PBS Can Help:
Page Builder Sandwich is Mobile Responsive. You can view PBS-built sites on mobile, as well as check previews of your mobile site directly through desktop while editing. This way, you won’t have to keep switching to your phone in order to check if your site looks good on mobile.
Everything Matters in Site-Building
At the root of it all, it’s very, very important to understand that everything on your website – down to the smallest of details – has an impact on your audience.
The quality of your copy, images, your layout – all of it matters, and it matters a lot.
And one of the biggest mistakes people make when trying to trying to generate leads is this very thing: Taking small aspects of what makes up the website (like design, text, and other content) for granted.
Hopefully your website garners the success it very well deserves; it’s been built with PBS, after all.
Best of luck to you and all your endeavors, and thank you, as always, for using Page Builder Sandwich!
Last February 2, 2017, Ann Taylor wrote the article 12 Things We Need to See From WordPress Page Builders in 2017 + Who Already Gets It Right in CodeInWP. We’ve been continuously improving Page Builder Sandwich for more than a year now: we do our research, listen to our customers, so we thought Page Builder Sandwich was gonna make it to CodeInWP’s “Who Got it Right” article. We didn’t, though, because of performance.
So we asked Ann about it, and she replied:
…I played around with a free version a bit. It shows a lot of promise: lots of modules, pretty intuitive UI, great WYSIWYG experience, everything is dragged around easily. However, when I had around 10 modules on the page, it became hard to continue working with it because of low editing speed…
So according to her, Page Builder Sandwich has performance issues. And since we always listen to feedback, we checked it out.
Testing the Performance
We needed a way to check out PBS’s performance; since PBS mostly runs on the browser via Javascript, Chrome’s Timeline profiler was the right tool for the job. The timeline profiler can identify and measure which processes are taking place in a webpage during runtime, which is perfect for finding speed bottlenecks.
We figured we should test out the most simple of steps first – running our mouse across multiple elements and rows. Simple right? We were confident that we wouldn’t run into performance issues with something as simple as this. Unfortunately, we were wrong.
Once we hit the record button, we ran the mouse for around 2 seconds on the screen, then hit the stop button. Here’s the resulting timeline from the profiler:
Lo and behold. It’s chock full of performance bottlenecks!
There’s a lot of stuff happening in the graph, but the most obvious issue is that there’s a lot of purple areas in it (which shouldn’t be the case). On top of that, these purple areas are visibly that very wide, and all seem to hit the peak of the graph. You’ll also notice that the graph is always full too, and that the purple areas almost never go down to zero. It seems like the browser is always busy doing something, and almost never resting.
But what do all of those purple areas really mean?
The profiler was kind enough to tell us that they’re called reflows. Here’s the definition of what a reflow is from the Google Developer site:
Reflow is the name of the web browser process for re-calculating the positions and geometries of elements in the document.. reflow is a user-blocking operation in the browser.
So this means that running your mouse around in PBS triggers a ton of reflows. What’s what’s worse it that each reflow pauses the browser momentarily so that it can finish doing its calculations. More reflows mean more browser pauses, and the experience becomes even more janky. In simpler terms, lots of purple areas = bad.
So it turns out Ann was right: we do have a huge performance bottleneck, so our team immediately got down to business to fix it right away.
Fixing Our Reflow / Jank Problem
Before anything else, we needed to do some research to find out just what causes this reflow in the first place. We found out that apparently, a lot of common things in Javascript can provoke the browser to cause a reflow.
Almost any function that you can use to get the width, height or position of a DOM element can trigger a reflow. Paul Irish wrote an extensive list of all the properties and functions in Javascript that can do this. The bad news is that Page Builder Sandwich uses a lot of these properties and functions, all of which cause reflow:
elem.getBoundingClientRect()
window.getComputedStyle()
window.scrollY
and a lot more…
Fix #1: Caching Expensive Reflow Processes
The most obvious solution is to NOT use those properties and functions. However, PBS relies heavily on them and we cannot make do without them.
The solution we’re left with is to trim down as much calls to those functions as possible. The hard part here was that we used those properties and functions a lot of times in different parts of PBS, and most of the time, we used them on the same DOM element multiple times. To fix this, we created our own caching mechanism for each problematic property/function.
For example, the getBoundingClientRect function gives us the current top, left, width, height, right, and bottom pixel measurements of a DOM element. We use this function all the time to calculate the location where to draw the element outlines in PBS. Here’s the caching function we created for this:
// Cache: Our client rects are kept here, we can use this to clear them later.
var elemsWithBoundingRects = [];
window.pbsGetBoundingClientRect = function( element ) {
// Check if we already got the client rect before.
if ( ! element._boundingClientRect ) {
// If not, get it then store it for future use.
element._boundingClientRect = element.getBoundingClientRect();
elemsWithBoundingRects.push( element );
}
return element._boundingClientRect;
};
Instead of calling getBoundingClientRect , we now used pbsGetBoundingClientRect . Now every time client rect gets queried, we store that value for future reference, thereby limiting the number of reflow triggers.
We also needed a way to clear the cache when the stored client rects become invalidated. The values of the stored client rect changes when the user scrolls the page or adds/changes/removes elements in the screen. So we created a cache clearing function that we can call whenever we need fresh client rect values:
var clearClientRects = function() {
var i;
for ( i = 0; i < elemsWithBoundingRects.length; i++ ) {
if ( elemsWithBoundingRects[ i ] ) {
elemsWithBoundingRects[ i ]._boundingClientRect = null;
}
}
elemsWithBoundingRects = [];
};
We also did this same caching mechanism for other expensive function calls that we usually use.
Fix #2: Grouping Together Reads & Writes Using FastDom
Implementing fix #1 increased the performance of PBS, but it wasn’t enough.
Googling a bit more, we came across an article by Wilson Page on Preventing ‘layout thrashing’. Wilson says:
Layout Thrashing (reflow) occurs when JavaScript violently writes, then reads, from the DOM, multiple times causing document reflows.
Apparently, it isn’t enough to limit your calls to specific reflow-triggering properties and functions. When you perform multiple successive “reads” and “writes” on the DOM, it also triggers a browser reflow. Here’s a typical scenario, straight from Wilson’s site:
The example above triggers 3 reflows because the dimensions of the entire page gets invalidated after a write. The suggested fix for this is to reorder the code to bunch up all the reads and writes together so that the whole thing would only trigger 1 browser reflow:
// Read
var h1 = element1.clientHeight;
var h2 = element2.clientHeight;
var h3 = element3.clientHeight;
// Write (invalidates layout)
element1.style.height = (h1 * 2) + 'px';
element2.style.height = (h2 * 2) + 'px';
element3.style.height = (h3 * 2) + 'px';
// Document reflows at end of frame
The snippet above makes fixing the problem look easy. But in reality, In PBS, reading and writing reflow-triggering stuff happens in a lot of different places in a lot of different times during the life-cycle of PBS. Re-organizing thousands of lines of Javascript code isn’t feasible.
Luckily for us, Wilson also provided a solution in his article. He created a small utility script to help with bunching together those reads and writes, called FastDom.
Here’s some code from Page Builder Sandwich that uses FastDom and also includes our Fix #1 above:
// Bunch together the reads from other threads.
fastdom.measure( function() {
// Use our cached client rect.
var rect = window.pbsGetBoundingClientRect( elem );
// Bunch together the writes from other threads.
fastdom.mutate( function() {
elem.style.top = ( rect.top + window.pbsScrollY() ) + 'px';
elem.style.height = rect.height + 'px';
elem.style.left = rect.left + 'px';
elem.style.width = rect.width + 'px';
}.bind( this ) );
}.bind( this ) );
What FastDom does is that it groups together all the fastdom.measure calls and all the fastdom.mutate calls and executes them asynchronously, effectively grouping all the reads and writes together to lessen all the reflows in the browser.
Fix #3: Accessing Style Objects Are Costly
We also found out with the help of jsPerf that some style-getting functions were faster than the others.
In PBS, we usually need to get the current value of a specific style of an element. For example, we normally use this to get the top margin:
var styles = window.getComputedStyle( elem );
var marginTop = styles.marginTop;
But, we found out that doing this is way faster:
var marginTop = elem.style.marginTop;
However, elem.style.marginTop and getComputedStyle are very different. The first one only gives us the inline styling of the element, and doesn’t take into account any stylesheets; and the second one takes into account both inline styles and stylesheets.
What’s more is that even when the getComputedStyle result was cached, it was still really slow. As it turns out, accessing the style object itself is the slow process.
Luckily for us, PBS appends inline styles to elements, and since inline styles take precedence (most of the time) than stylesheets, there will be cases where getting the inline style value would be enough. So if we combine the two methods above, we can come up with a much faster running code:
var marginTop = elem.style.marginTop;
if ( ! marginTop ) {
var styles = window.getComputedStyle( elem );
marginTop = styles.marginTop;
}
The Results of the Code Improvements
Our 3 fixes above took a lot of research, testing and actual implementation (and delayed our Fonts feature from being released), but in the end it was all worth it.
Going back to our initial test of moving your mouse across the screen for 2 seconds. Here’s the old ugly/janky timeline:
And here’s what our new timeline looks like after the performance improvements:
As you can see, there’re less purple stuff in the graph. And there’s a noticeable difference on the amount of processes being performed by the browser. The rectangular stuff on the bottom are thinner also, which means processes are being run faster than before.
If you compare the amount of tall/wide purple areas in the old and new graphs, we’re looking at a whopping 200% performance increase! We’re also seeing performance increases across the board. Not bad at all!
Take Aways & Learnings
To be honest, we didn’t think PBS had performance issues before Ann brought it up. Mainly because we were using development-centric machines and the performance bottlenecks weren’t that apparent. Looking back, checking for the performance should have been one of the top priorities. But at least now, as of version 4.3 it’s been taken cared of.
For those wanting to improve their own WordPress plugin performance, especially if you’re also using heavy Javascript, here’re my take aways from this experience:
It’s been 10 months since we’ve unleashed Page Builder Sandwich to the public. We now have around 6,000 active installs, and that’s quite an achievement for us. We’ve gotten a ton of feedback because of it as well, both good and bad. The consensus however, is that people enjoy how easy it is to build layouts and create their content compared to the other page builders out there.
A large amount of the feedback we got were feature requests, and we’ve added in a lot of those features the past few months. But as we kept doing so, we were also began slowly changing the user interface in the process. And, consequentially, we were also changing the user experience… for the worst. It had come to the point though that we needed to rethink the interface, because it simply did not work smoothly anymore, and the different features did not jive together with it too.
The Defunct Interface
In the previous versions of PBS, we wanted everything to be in the form of buttons. Why? Because buttons are easy to use. You just… click on them. On the older versions of the inspector (the sidebar on the image above), clicking a button would increase a value, then shift+clicking a button would decrease it. That sounds easy enough. But with the addition of carousels, tabs, maps and other new elements and features, all those buttons became a mash of different icons with different designs, and kinda started looking more like hieroglyphics than a cool interface. This wasn’t a problem for seasoned users, but it’s quite intimidating to look at if you’re new to PBS.
Next, there were a couple of problems showing up on the inspector. The original idea was to make everything simple and available inside the inspector. And by everything, I meant everything – from turning text into headings, to changing background colors, font colors, you name it. In its current state however, the inspector now contains a lot of options that will have you use the mouse wheel to scroll up and down consistently. Quite different from the inspector I formerly hoped to make for users.
Lastly, we recently introduced shortcode mapping for your favorite plugins. This feature required us to create text fields, number sliders, checkboxes, and additional new option types needed to make your shortcode editing experience more pleasant. Initially, it was a good idea, and yes, it made manipulating shortcodes easier for you. But again, this feature deviated from our “buttons only” interface. In retrospect, it was really impossible to use only buttons for changing shortcode attributes. Now, in the latest version, we ended up with 2 types of controls:the buttons and the shortcode fields.
There are a few more reasons that made us decide that our interface was no longer effected (or suited for our needs), but the above points are the major ones. One thing was always for sure though: we knew that had to update the interface.
Defining How A Page Builder Should Ideally Work
Instead of jumping in and changing things right away, we took a hundred steps back to take a look at the whole page builder experience. We wanted to bring in a new life to the interface. Truthfully, we didn’t want to keep rebuilding it year after year. It’s exhausting and definitely does not bring significant help to the WordPress community. This time, we decided to do things slowly and carefully. We’ve studied every corner of Page Builder Sandwich and what makes it a good page builder, and finally fleshed out the whole editing experience into a few core concepts.
Essential Concept #1: Typing Directly in your Content to Edit Stuff
One of the main reasons for installing a page builder is to get out from the constraints of the backend text editor of WordPress. It’s not that the backend editor isn’t good, but when creating your webpages, it doesn’t immediately show you what your webpage would look like to your site visitors, nor does it allow you to layout your content outside a one-column layout. You can only see your text there and some images, but none of the more elaborate stuff (e.g. contact forms). You can add shortcodes, yes, but they won’t show up in their rendered form*.
* There are plugins being made by others to address this such as Shortcake UI, but that’s beside the point.
That’s where front end page builders come in. They bring the editing experience out from the backend, and into the front end, with you editing your site the way your visitors would really see it. As Pippin would phrase it: What you see is what you get (WYSIWYG).
Another good thing about being a frontend editor is that it allows you to edit your text directly. Typing in headings and paragraphs gives the ease of using the usual word processor in website building. Buttons and tab labels should be also changeable by simply clicking on them and typing.
This is the area most other page builders don’t deliver well on. Most of them force you to type inside a text field to edit everything. Again, this shouldn’t be the case in real frontend page builders. Typing and editing text directly has been a strong point of Page Builder Sandwich since version 2, and we made sure that this is still upheld in version 3.
Essential Concept #2: Utilizing the Mouse for Quick Tweaks
The mouse is a powerful tool that often gets neglected in page builders. Often times, page builders use it to allow people to drag stuff around and drop them in different locations, or to click on buttons or input fields. While this is okay, there is so much more that you can do with the mouse in terms of page building.
For one, there is awesome visual feedback in using the mouse as the tool in editing the page, especially in adjust visual properties like margins, paddings and sizes. Now, tweaking your elements becomes a natural experience.
In PBS version 3, you will be able to adjust a number of things using your mouse. You can adjust margins/spacings between individual elements, the paddings within your columns, as well as the sizes of images, icons and maps. We’ve also replaced buttons that allow you to change numerical values into sliders.
Essential Concept #3: Text Should be Easy to Style
If you take a step back from your monitor, you’ll notice that most of what you add in your webpages are text content. Yes, we do have images and icons in there to accompany them – and lately we tend to add in larger images in our sites. But the majority of the important content are all text: headings, bullet lists, paragraphs, quotes, etc. Alongside it is how we style our text to suit our designs. We either change their sizes and colors, or make it bold or italicized. This is for our content more readable, relevant, and attractive to our respective readers.
Because we style the text often, buttons which allows us to change styles should be very accessible. They shouldn’t be tucked inside a pop up box that we need to open up first. Most page builders suffer from this sickness. In order for their user interface to be labeled as ‘clutter-free’, even the most-used options are shielded in plain view.
To solve this, we took a look at the most commonly used word processors. We noticed that they usually have a row with a ton of buttons near the top of the screen used to format text and copied the same layout for version 3. We now have a row of all the text styling buttons always present on the top of your screen. This makes styling really quick and close to your second nature in text editing.
Essential Concept #4: Advanced Styling Options Should be Flexible Yet Easy to Understand
The bottom line with a page builder is that it should allow people to create stunning designs easily. This means that we should provide a lot of different settings and options without compromising a difficult learning curve. Being able to adjust margins, paddings and styling text are great, but those can only do so much. You’ll need much more elaborate options to get the job done, options like background images, patterns, borders, fixed backgrounds and more. Stacking in all of those different settings can get a little overwhelming, so we’ve simplified some of them and organized them in categories to make things friendlier in version 3.
Essential Concept #5: Shortcode Support
Lastly, let’s not forget that our page builder stands on top of WordPress. We should embrace the platform and its features and not restrict them or deviate from them. One huge feature that WordPress provides are shortcodes. It doesn’t mean that the whole content should be composed of shortcodes – that would be messy – but instead we should just be compatible with them. A lot of plugins and themes use shortcodes, and it would be such a loss if ignored them all. In fact, shortcodes gives the users utmost flexibility when it comes to creating pages.
We introduced a few weeks ago our shortcode mapping system, and because of it we have mapped hundreds of shortcodes from hundreds of plugins. We have prioritized the most popular plugins found in the WordPress plugin directory, so chances are you’ll encounter them in your own sites. This has only strengthened in version 3, and we will continue to improve this on the way forward.
Conclusion
We’ve taken all those essential properties above and built them into Page Builder Sandwich version 3. It’s the best page builder we have built for WordPress so far. It’s more intuitive and more natural to use, it performs faster, easier to use, and more friendly than ever.
If you have any thoughts on an essential page builder feature, let us know by commenting it below.
A month had passed since we’ve released the newest feature of Page Builder Sandwich – the Shortcode Mapper. We’ve integrated more than 100 plugins (144 plugins to be exact) regardless of the number of shortcodes they have. It was a tedious task but wedid it!
In order to let you know more about it, we’ve started featuring the plugins fully integrated with Page Builder Sandwich. First stop: WP Job Manager by Automattic.
WP Job Manager at a glance
Basically WP Job Manager serves as the plugin for you to generate money – either you have a client who needs a job board function for their website or you simply found yourself needing more people in your growing company.
What makes this plugin a very good-buy would be that your possible employees are not restricted to using their laptops. WP Job Manager has a mobile support feature that makes revenue flow. It is also easy to use with a search and filter interface. Along with it is the job and company information, which means no need to search the validity of the company. In one job search, everything is provided.
If you need jobs filled in, WP Job Manager makes accepting applications an easy thing.
Page Builder Sandwich Makes Using WP Job Manager Easier
You don’t have to squint your eyes and squeeze out info from anything to connect the page builder and the plugin. Here are 3 things why these two are compatible with each other:
Overview of how Page Builder Sandwich and WP Job Manager work together
Insert job shortcodes faster
PBS Shortcode Mapper detected 6 shortcodes used in the plugin, and we’ve integrated them all. Each shortcode has different arguments which allow you to display a job search form, or specifics of a job placement. Each shortcode’s details are available in their site’s shortcode reference. Now you won’t have to check the docs on how to tweak these shortcodes, all the shortcodes and their attributes are presented in PBS complete with descriptions.
Available shortcodes from WP Job Manager
Jobs Shortcode Attributes
It works with any theme
Using Page Builder Sandwich as your page builder editor, by default, does not destroy the theme that you’ve chosen to use. Plus to ensure total website optimization, we’ve created the PBS Shortcode Mapper. Same principle goes with the WP Job Manager! Astoundify, one of the themes developers in ThemeForest, supports the said plugin in their Listify – WordPress Directory Theme. For more themes with WP Job Manager fully integrated, look into their official list.
Manage jobs in the frontend
Lessening the effort of switching between frontend and backend plus refreshing the page to see the changes made is the thing that we are against. With PBS, you can edit the jobs you picked without checking the backend, you will also be able to edit the plugin’s settings while editing your page. Without PBS, users will have to exert more effort, and it requires too much time that could be allotted for developing other WordPress projects. This feature of WP Job Manager is the one we like the most!
Final thoughts
Being built by the same company who created WordPress.com, this plugin has already the advantage of being on the spotlight. But it also bears a lot of expectation, from WordPress developers to loyal WordPress enthusiasts. So far, it met everyone’s needs – as far as light-weight job-board functionality speaking. WordPress developers liked the plugin so much that they even made extensions to enhance the utility of the plugin.
More plugins would be featured in the coming weeks! If you have suggestions who and what we should write next, leave a comment below.















 Lo and behold. It’s chock full of performance bottlenecks!
 As you can see, there’re less purple stuff in the graph. And there’s a noticeable difference on the amount of processes being performed by the browser. The rectangular stuff on the bottom are thinner also, which means processes are being run faster than before.

 It’s been 10 months since we’ve unleashed Page Builder Sandwich to the public. We now have around 6,000 active installs, and that’s quite an achievement for us. We’ve gotten a ton of feedback because of it as well, both good and bad. The consensus however, is that people enjoy how easy it is to build layouts and create their content compared to the other page builders out there.
 A month had passed since we’ve released the newest feature of Page Builder Sandwich – the


