Author: Neil Lock

  • 3 Things to Consider Before Diving Into Page Builders

    3-Things-to-Consider-Before-Diving-Into-Page-BuildersThere’s an off-chance you’re here because you’ve heard that PBS is quite possibly one of the quickest shortcuts to site building. While page builders, in general, exist to make things easier, there are still a few things you might want to take into account before diving deeper into this particular realm of WordPress development.

    Learning WordPress: A Crucial Page Builder Prerequisite

    This is probably the most obvious item on this list, but still the most important one. Page Builders aren’t quite purchasable on their own, unfortunately. They come in the form of plugins in WordPress, which you’ll need to install and learn in order to manipulate. Rest assured that WordPress is one of the easiest and most legitimate ways to create a website. You won’t regret knowing something technical, considering the age we are in right now. There is a difference between WordPress.com and WordPress.org, and  knowing which one caters to your need saves time too!

    If you’re a little intimidated by the abundance of some of the technical terms in this article, though, fret not. There are few helpful sites you can visit to help get you started. Some of these areWordPress Codex, and Treehouse. It houses WordPress tips  and website building, depending on your need and level of knowledge.

    You might want to test out the waters first, just to be sure

    It’s always a good idea to give free and/or trial versions a go before making any huge purchases you might end up regretting in the future. Thankfully, most page builders come with free/demo versions. Of course, we could also look into  a ton of reliable reviews about page builders while otherscompares and contrasts  page builders.  Make sure to weigh in your options carefully!

    Aside from going through articles and reviews, one of the things we like about WordPress is that it has a huge community behind it. There are individuals, teams, and even businesses, willing to lend a helping hand their fellow WordPress users, especially new ones like you! The community basically works on a pay-it-forward scheme than a give-and-take.

    Designs make a huge difference

    WordPress Enthusiast Donna Fontenot Cavalier makes a very good point regarding drag and drop Page Builders, and the importance of basic design. While drag-and-drop builders like PBS can save you a lot of time, basic know-how and at least some familiarity in aesthetics is another crucial thing to consider when creating websites. Imagine a scenario– let’s say you get your hands on a nifty page builder of your choice: that’s great! But then let’s say you’re a person who doesn’t exactly have the best eye for art, design and functionality: uh-oh.

    Don’t worry, though. Page Builder Sandwich isn’t just a Page Builder; our team is also dedicated to giving other WordPress users a hand, too. So if you’re dealing with a bit of trouble regarding design, don’t worry– we have a bunch of articles here on the PBS Blog with a lot of useful tips to help you get started. That way, you get to do more, learn more, and worry less.

    Remember, if you have any questions or concerns regarding page builders, or anything relating to the items above, feel free to drop us a line in the comments section below. We’re always happy to help our customers out.

    Happy Site-Building!

  • WordPress.com VS WordPress.org

    Wordpress-Com-VS-Wordpress-OrgIf you’re relatively new to building websites, chances are, you probably aren’t familiar with the great WordPress.com vs WordPress.org debate. You might not have even known that one of the other exists, and the different pros and cons of each one. So what is, pray tell, this great debate between using WordPress.com, and WordPress.org? Is the other one just a cheap rip-off waiting to get sued?

    Well, no.

    The debate, in a nutshell, is about which of these two WordPress services is a better fit for the website you’re trying to build. Neither is a rip-off of the other, and both sites are owned by WordPress; it’s just that one (.com), is a more non-developer-friendly version than the other, and .org has a lot less limitations when it comes to site building, compared to .com.

    “How do I know which one I need, though?”

    The answer to this question all depends on your future website’s needs. There is no one WordPress entity that’s objectively the “better” or even “best” version to use. The two have their own unique features, and an equal amount of pros and cons.

    WordPress.com: Why and When Should I?

    WordPress.com takes care of the basic essentials for you, which lets you focus more on your site’s content. It’s a site builder that’s completely run and hosted by a group of company called Automattic. You get premium hosting, backups, security, and the like. This means that you can focus on your site’s content a lot easier, compared to having to spend hours on end building it from scratch.

    Take note though, that WordPress.com also comes with its own limitations. While you may not have to worry as much about maintaining the inner workings of your site, you may have to keep in mind that you probably aren’t going to have as much freedom with it as you’d like. While customizing your site’s interface may not be an issue (WordPress.com comes with a ton of themes, for instance), adding certain features and elements in the form of plugins may become a problem, especially if your site needs specific features that aren’t available at WordPress.com.

    How to maintain a website is an entirely different story. It greatly depends on 1.) you aren’t a WordPress developer 2.) you have no intention of learning code, or 3.) have little or no time to.

    WordPress.org: When Is It Time to Consider?

    One rule of thumb when it comes to considering WordPress.org is when you’re at least a little familiar with the workings of code, or are willing to invest some time in learning how to. Since WordPress.org is a self-hosted version of WordPress, you can get your hands as dirty as you want them to be. Plus, you have the freedom to tinker with it as much or as little as you’d like. You’d be in-charge of finding your own host, of setting up your own security backups, and overall maintain the website by yourself– and more importantly, on your own terms.

    “But wait, why would I want that? Isn’t the point of WordPress to make site-building easier?”

    …Not exactly. Think of it this way: The Daily Post creates an excellent analogy between WordPress.org and WordPress.com, in a way that even the noobest of noobs (such as myself) get the gist right away.

    According to them, you have to think of WordPress.com as something you don’t have full ownership to. Take for instance, your 15-year old self, still living with your folks. If you wanted to paint your bedroom, you’d have to ask your parents’ permission first (who of course have full ownership of the house, including your room). Technically, the room is yours, but at the end of the day, well…it kind of isn’t.

    So if you need or want to make any drastic changes (like painting your walls, or having the room extended), you’d still have to talk it out and/or work up a compromise with the actual owners of the house, a.k.a. mum and dad. An upside to this though, is that when the fuse in the basement crashes, or the AC stops working, your parents get to take care of it, and you don’t have to worry about a thing.

    WordPress.org, on the other hand, is something you can freely customize and tinker with on your own accord. This can be compared to when you finally get to move out at 18, and get a flat of your own. Since you have full ownership of your residence, you don’t have to compromise with anyone to paint your walls in that color your mum’s always dreaded; you have the freedom to make the decision, and/or hire someone who fits your standards to do it for you. Additionally, you also have the liberty to choose exactly which AC unit you want for your living room. It’s just that if it happens to crash, you’re going to have to hire a mechanic to fix it, or figure out what’s wrong and how to repair it on your own (which isn’t too bad, because hey, lesson learned, and learning is good).

    By now, you’ve hopefully gotten a clearer picture of just what the stark differences between WordPress.com and WordPress.org are. But in a nutshell:

    install as much or as little as you want themes are limited only to WordPress themes, you have to pay a certain fee to get rid of ads.You have near full-control of your site; you can add, customize, or even build your own themes.

    Content control is limited;

    WordPress.com WordPress.org
    Fully hosted by WordPress; all essentials are covered. Self-hosted; choose your own essentials, or choose better ones.
    Features are limited to what WordPress.com offers Thousands of features in the form of plugins;

    These are a few of comparisons that come with weighing in the differences between the two. Choosing between the two ultimately comes down to the amount freedom you want in creating your site, and how much resources (time, effort, money, etc) you’re willing to give up for it. Remember, that these are both very crucial options to weigh in before you decide which WordPress platform suits you best. So, don’t rush the decision process!

    Happy Website-Building!

  • Why WordPress?

    Why-WordpressOne important thing to consider when building your first website– whether you’re a business, a freelancer, or anything and anyone, really– is that not everyone is adept in the language of code and software development. You could be, for instance, a chef who wants to publish his recipes online. You could also be a Fine Arts undergrad who needs a professional-looking portfolio, or a start-up business that needs a site of their own. Whether it’s one or the other or anything in between, the fact remains that while some of us may be familiar with the basics of code, we aren’t all full-time developers, and that not everyone who needs or wants a site knows how to make one from the bottom up. This is where WordPress might come in handy. Enter the question: “Why WordPress?”

    REASON #1

    WordPress is a Content Management System, Making It Totally User-Friendly.

    The first thing you need to know is that WordPress is a Content Management System (or CMS). In simpler terms, this means that WordPress allows its users to create websites without having to build code from scratch. It has a systematic, organized interface that lets you constantly keep things in check without having to tinker with code every now and then.

    Compared to building a website from scratch, which would typically start out like this:

    screenshot-1 With a Content Management System, you get to start out with something like this:

    WordPress
    WordPress ‘s back-end interface. Managing and creating websites becomes easier with CMS.

    You might ask yourself, though: “WordPress seems great, but what if it doesn’t have the features I want for my site?”, or “what if I want a map, a music player, or a caching engine, or a more reliable security system?”

    …Technically speaking, WordPress probably does have that feature you want, and it will come in the form of a WordPress Plugin.

    REASON# 2

    Plugins: The Cherry on Top of the WordPress Cake

    If you’re worried that WordPress doesn’t include that particular feature you might want on your site, don’t worry: it probably does.

    Plugins are “extension features” that exist to increase your WordPress site’s functionality. If you’re an entrepreneur who needs a contact form for your site, you might want to take note that WordPress in itself doesn’t have that feature, but there are tons of plugins that do. And since WordPress is open-source—meaning just about anyone can contribute to its development—new plugins are created regularly. You can get that contact form you want, and more. You get the freedom to add other plugins ranging from social sharing buttons, to maps, and even additional security measures for your site, among many, many other features and extensions. Now tell me that doesn’t sound neat.

    As of now, WordPress has about thousands of these plugins—and some of them are even available for free and/or have free versions, including PBS.

    REASON #3

    Open Source: The WordPress Community

    WordPress is Open Source. This means that anyone is free to contribute to its development, and anyone is open to study its backbone code to learn more about software development, and even WordPress itself. There are even businesses that are solely dedicated to creating and developing WordPress-related products, such as the plugins and themes (like us!)

    Because WordPress is open source, there are tons of users, developers, and even designers that constantly collaborate and even help each other out with WordPress-related problems. This way, you get real help from real people, and at the same time, learn from each other. This is something that your typical customer relations services hardly ever get to do.

    REASON #4

    WordPress is Legit.

    CNN, The Official Star Wars Blog, Time Magazine, and even (GASP!) Beyonce all have WordPress-run sites, among many others. These big names aren’t the only thing that backs up WordPress’ legitimacy, too– according to Treehouse.com, about 25% of all sites up on the web are run by WordPress. Considering how many millions and thousands of websites exist… well, 25% is a pretty big number.

    REASON #5

    Customizations Galore!

    WordPress has a ton of themes available for you and your site. You’re free to choose from free versions, premium ones, or even build one on your own (or hire someone to build it for you!).

    REASON #6:

    It’s Free.

    Yep, you read that right. Through Local Development, WordPress is totally free, and you can install it in your computer with the click of a button. Likewise, instead of hiring a developer, you could use whatever knowledge you have about code to learn more about how WordPress works (and hey, learning is always good).

    …not to mention that if there is a chance you don’t have time to get too deep into WordPress and site building, you could always get yourself a nifty page builder plugin and give ours a go.

    Remember that there are endless possibilities with WordPress, and it doesn’t need to take a genius to figure out how it all works!

    Using WordPress can save you a lot of time, money, and effort. And in a time when there’s very little of those resources, bear in mind that WordPress sites, their plugins (like PBS!), their themes, and its community especially, can totally help you out and make things much, much easier for you.

    Happy Website-Building!

  • The Unspoken Problem of Shortcodes

    The-Unspoken-Problem-of-Shortcodes

    Shortcodes are one of the pinnacles of wordpress. Shortcodes are the bridge between developers and site creators, allowing people to place elaborate pieces of content almost anywhere they wish. Plugin creators love shortcodes since this allows more flexibility in the way how and where their users display their content.

    If you don’t know what shortcodes are and what they look like, they’re those archaic code-like text wrapped in square brackets. They look something like this:

    This specific one is called the embed shortcode and is built-in by default in WordPress. This specific one embeds the video from the URL into your content. Just copy and paste the above shortcode in your site if you want to give it a spin.

    Behind the scenes, what happens is that when WordPress encounters a shortcode in your content, it gets processed and converted into something else. In our case above, whenever an

    shortcode is detected, WordPress takes the URL in the shortcode and checks it against a number of content providers that it has. When it finds one, it then gets the appropriate iframe embed code and displays that instead.

    So what’s the problem here? It sounds easy enough, you just enter a short text with brackets and you’re done.

    Enter the Shortcode API..

    Shortcodes Galore

    The Shortcode API opens up the creation of shortcodes to developers. Because of this, developers can add their very own shortcodes inside their plugins.

    This is great, now with just a short code-like snippet (hence the name “shortcode”), beginners and advanced users alike can put virtually any type of content they wish anywhere.

    WordPress by default only has a handful of shortcodes. It’s easy to type them out from memory because there’re just a few of them. But if you install a few plugins, the number of shortcodes quickly jump up to a dozen or more, and in some cases more than a hundred. Each shortcode has their own set of attributes and instructions on how to use them. Each plugin most likely has some sort of documentation on how all of their shortcodes work and lists all of the parameters available in each one. But you’d be nuts if you try and memorize all of the shortcodes and their attributes.

    The problem is that there is no centralized area on which you can find out all the shortcodes available on your site and how to use them.

    Some Try and solve the problem

    Some plugins try and solve this problem by presenting all of their own shortcodes in a easy to access drop down. Then clicking on one would print out the shortcode, complete with all the possible attributes for it. There’s no more need to memorize it, which is a good thing.

    Screen-Shot-2016-06-22-at-11.27.09-AM

    Some go farther and add in a settings popup form that has checkboxes and color pickers to populate the shortcode’s attributes.

    Screen-Shot-2016-06-22-at-11.28.54-AM

    This solution sort of works. However, each plugin only enumerates their own shortcodes. So if each plugin creates their own form of shortcode picker, you’re bound to run into times when you have multiple shortcode pickers on your screen (This has happened to me before).

    Screen-Shot-2016-06-22-at-11.22.41-AM

    In other words, each plugin does their own does their own thing and implements their own solution for their own shortcodes. Some plugins add either a new button beside the “Add Media” button, or a new one inside TinyMCE.

    So now you might be thinking, “Why not just also gather the shortcodes of other plugins and include that in your dropdown / shortcode picker too?” Well, that’s exactly what I thought. But, this is easier said than done. I’ll explain why in a bit, but first let’s look at what an ideal solution would look like.

    The Ideal Solution

    The perfect plan would be to create a plugin that gathers all of the available shortcodes in your site, then presents you with the list and also help you fill up all the attributes. And every time you install a new plugin, all of those newly introduced shortcodes would be presented to you as well.

    Imagine a central place where all your shortcodes would be placed for easy access. Each shortcode would describe what they do and what plugin they belong to. Then for each available attribute, imagine each of those would have a label, a proper way to select a value for them and a description. You’ll be shown drop downs, color pickers, radio buttons, toggles and whatnot.

    Something like this would make our lives as website and content creators easier. No more checking different documentations, or different parts of your admin just to copy a generated shortcode for a slider that you want to use.

    The Caveat

    Unfortunately, it’s quite difficult to do something like that right now. There is no sure-fire way to know all the details of a shortcode. You can get a list of all shortcodes, but only their actual tags/names, you can’t get any additional details about them such as a kist of attributes, what they do and their types – like a string, a color or a number. Nor can you get a semblance of a description for each attribute.

    Note to the developers out there: yes there’s a newly added third argument for the shortcode_atts function, but it’s not a required argument. So unless every plugin developer in the world implements it, then we still won’t have a sure way to determine all of a shortcode’s attributes.

    The Shortcode API doesn’t provide any facility for adding shortcode descriptions, type casting attributes or attribute descriptions. And unless WordPress itself adds a central area for accessing shortcodes, I doubt this facility would be created.

    Conclusion

    Right now the task of organizing shortcodes is left to each developer. Unless a central method is developed within WordPress, expect to continue to see multiple “Add Shortcode” buttons in your backend. Whether something like this should be added into the WordPress Core or not is another huge discussion in itself.

    An Alternative

    There are page builder plugins that address this differently. Instead of programmatically detecting shortcodes, they have shortcode mappers where users can manually input every detail of a shortcode. Once done, it would then become available within the page builder. While  this works, those are only available in your own site.

    We here at Page Builder Sandwich are creating something that can hopefully solve this shortcode conundrum. Subscribe to our newsletter below to get notified on our progress.

  • How to Create Basic Hero Headers in 3 Easy Steps

    How-to-Create-Basic-Hero-Headers-2

    061716_PBS_Jihan_How to Create Basic Hero Headers_Done

    When your dream website finally becomes a reality, the first thing you want your audience to know is what your site’s all about. The trick to reel them in is to give them a good but quick summary of your site’s content – and the easiest way to do that is by creating a Hero Header for your page.

    What are Hero Headers?

    The purpose of the Hero Header is to visually communicate with your target audience in the fastest and most efficient way possible. You need to grab their attention quickly, in a way that it says: “Hey, this is my website, and here are the reasons it may be worth your time.”

    Typically, hero headers take up most of the space on the page, usually with large text and an equally large background image in order to give your readers a quick but firm-enough grasp as to what your website can offer them.

    To get started on your first ever PBS hero header, follow the quick steps below:

    Step 1: Insert Column and adjust Row Width

    061716_PBS_Jihan_How-to-Create-Basic-Hero-HeadersClick 1 Column below the Insert Content tab on the inspector (that thing on the left/sidebar). Make sure your caret (the blinking cursor on the text box) is inside the text box.

    061716_PBS_Jihan_How to Create Basic Hero Headers_Step-1-b_Revised-1Under the Row Properties tab, you may change the background color in order to use it as a guide for the next steps. Change Row Width from Normal to Full-Width: Retained Content Width using the toggle button shown above.

    What’s the difference between Normal, Full-Width and Full-Width: Retained Content Width?

    Row Width-Normal

    Normal – Background, text and other elements are contained within the bounds of your current theme’s row width

    Row Width-Full-Width

    Full-Width – Background, text and other elements fill the entire width of your browser window

    Row Width-Full-Width Retain

    Full Width: Retained Content Width – Only the background fills the entire width of your browser window. Text and other elements are contained within the bounds of your current theme’s row width

    In this layout, Full Width: Retained Content Width is used because the text that will be applied is centered; not full-width.

    Step 2: Adjust margin to create Whitespace

    061716_PBS_Jihan_How to Create Basic Hero Headers_Step-2-revisedIncrease the top and bottom margin by hovering the cursor on the arrow pointing to the margin you want to adjust. When the cursor turns into a double-headed arrow, click and drag down to your desired margin height. Its important to put Whitespace (also called Negative Space) between elements in a composition to create flow and help draw focus to the content on the page.

    Step 3: Add background with text and element overlays

    061716_PBS_Jihan_How to Create Basic Hero Headers_Step-3-aTo add a background image with text and element overlays, simply click the Background Image icon under the Row Properties tab, upload your desired background image, and select to apply.

    061716_PBS_Jihan_How to Create Basic Hero HeadersTip #1: For Premium users, using the Background Image Tint option, helps to provide more contrast for text, buttons or other elements. You can select a tint color and adjust its value by clicking on the Background Color icon. Both icons can be found under Background on the Row Properties tab.

    061716_PBS_Jihan_How-to-Create-Basic-Hero-Headers_Step-3-cType in the message for your header. See Text Formatting tab to adjust the style. Choose typefaces that are easy to read and goes well with the background image. Remember to show contrast from the background image.

    Tip #2: For branding elements, consider use a white or black logo so it does not clash with a colorful background image.

    061716_PBS_Jihan_How to Create Basic Hero Headers_Step-3-dYou can also add buttons by clicking on Button below the Insert Content tab.

    Don’f forget to save your work and you’re all set!

    Congratulations on making your first hero header with PBS! In case you don’t though, no need to fret; starting from scratch is arguably easier with PBS, so it shouldn’t be that much trouble.

    Happy website building!

  • Adding Stylish Maps to Your Page Is an Interactive Experience

    Adding-Stylish-Maps-to-your-Page-is-an-Interactive-Experience-2You can now place maps in your page designs using Page Builder Sandwich!

    It’s a weird thing to be excited about maps. You grab the Google Map URL then embed it. Or maybe grab a map plugin online and put in a shortcode. Or maybe your other page builder already has one and you can add one any time you want. But the reason why we’re excited is that we have brought adding maps to a whole new level.

    Here’s a preview:

    The Old Boring Way of Adding A Map

    Here’s how you add a map with your typical page builder:

    1. You drag a new map element,
    2. You enter the latitude and longitude in the fields,
    3. You enter in other values in the fields like map height, map width, tick the road style checkbox, etc,
    4. Hit preview and check what it looks like and decide that you need to change something to make it look cooler,
    5. Go back to the page builder and change the values, then repeat step 4 above.

    The Page Builder Sandwich Way of Adding A Map

    Maps in websites are interactive – you can pan around, zoom in and out the map. So we thought, why not remove all the guess work and just allow people to interact with the map directly while building your page?

    Here’s how you add a map with Page Builder Sandwich:

    1. You add a map element,
    2. You type in the latitude and longitude or address where you want the map to center on,
    3. You move the map around and zoom in or out of it to get your desired look,
    4. Add some cool colors to your maps to fit your style,
    5. Hit save.

    Our way is much more fun and intuitive. You essentially interact with the map the way you would with a normal Google Map.

    Colored Maps or Style them with SnazzyMaps

    An awesome feature we’ve placed in is the ability to tint and color your maps, and it’s super easy to do. (This is for the premium version only). If you want to colorize your map, just click on our color picker and choose a color, and your map would immediately change.

    Here’s one that we’ve tinted pink:

    Page Builder Sandwich also supports more elaborate color schemes via SnazzyMaps. They have a huge list of user-contributed color schemes, and they let you create your own if you want more control over the colors.

    Just find the color scheme that you like, then grab the code and paste into Page Builder Sandwich. The color scheme will get applied to your map right away.

    Here’s a cool color scheme called papuportal dark from SnazzyMaps:

    Put Maps Wherever You Like

    There are a lot more cool stuff that you can do with maps – like add them in full-width rows for a more dramatic effect. You can also add them inside a carousel if you like, or inside tabs (an upcoming feature).

    If you don’t have Page Builder Sandwich yet, you can try out the premium version by clicking on the “Live Demo” link above.

  • Easily Add Email Newsletter Signup Forms

    Easily-Add-Email-Newsletter-Signup-FormsAdding an email newsletter sign up form to your site is a great way to grow your website’s following and to keep your website visitors interested in your site or product. And now you can easily add and customize newsletter sign up forms directly in your designs.

    preview-newsletterNew in Page Builder Sandwich is the Newsletter Element (check the short gif above). Now you can add a newsletter sign up form for your MailChimp, AWeber or MailPoet newsletter lists directly into your designs.

    Normally, you’d have to install another plugin, then maybe add a shortcode somewhere, or you’ll have to go through a popup and fill out some fields, or maybe you’ll have to set up a widget for your newsletter sign up form to work. Now, all the complexities of adding newsletter signup forms are gone. Just add the Newsletter Element on your page, add your list API keys and it should work right away.

    You can further customize your sign up form by simply clicking on either the email field – where you can change it’s colors, size, border and plenty more, or the button – then add icons, change your button’s size, or even make it show up only when your visitor begins typing in their email address. You can fully customize the looks to suit your design. Do you want the field to change colors when the user is typing? You can easily do that with a color picker. Need a minimalist design and the field is just a border, no problem!

    One cool thing is that the newsletter element doesn’t disrupt your user’s flow within your site. Once they subscribe, the page won’t refresh and the signup form will just get replaced with a “thank you” message. This message and it’s colors are customizable as well.

    As with the rest of Page Builder Sandwich, you can place your brand new newsletter signup form where ever you like, just drag it inside your rows or in another location.

    Are Mailing Lists Important?

    The short answer is yes. You know how if you have a Twitter account, other Twitter users can literally “follow” you and they’ll see your Tweets, a mailing list is how your visitors can follow your site through email.

    Don’t Have a Mailing List Yet?

    If you don’t have a mailing list yet, now is a good time to get started. Getting a newsletter service like MailChimp or AWeber is good since they do the heavy lifting of managing your subscribers and blasting an email to your subscribers easily. They also have newsletter builders that will let you create a newsletter campaign easily. The good thing is they have free plans, so you won’t need to shell out cash in order to try it out.

    If you’re more of a I-like-to-handle-it-myself guy or gal, then you might consider using MailPoet. It’s downloadable free from wordpress.org and they have a paid model as well. With MailPoet, you’ll be able to see your subscribers within your dashboard and you can also send out emails from there. It’s easy to use as well and just takes literally less than 5 minutes to fully set up in your site (Yes, I’ve tried).

    Learn More About Page Builder Sandwich

  • How to Create a Website from Scratch for Under $100

    How-to-Create-a-Website-from-Scratch-for-Under-$100

    If you want create a website from scratch, but you only have a short budget and absolutely zero technical knowhow, then this short guide is for you.

    This article is meant for absolute beginners who just really want to create a website without all the technicalities and complications. So if you’re a startup business owner who just wants a website for his office to show off to clients, or a foodie who wants to write your restaurant reviews online, or you’re a do-it-yourself guy or gal who just needs a site, then keep reading! I will stray away from as much technical jargon to keep things as simple as possible.

    Let’s enumerate what we’ll end up with when we’re done. By the end of the article, you would have:

    1. Your own website that people can visit at http://supermegaawesomewebsite.com,
    2. Optionally have your own email address at [email protected],
    3. A certain zen-like state of mind.

    What You Need

    Okay, so before we begin with the actual steps, we’ll need the following:

    1. An idea of what your website is going to be,
    2. A credit card or a Paypal account with $100 dollars credit, and
    3. A soda or a glass of water just in case you get thirsty, it’s always good to be hydrated.

    What Is a Website?

    Before we do anything, it’s important to know what we are actually creating first. Yes, we are creating your own website, but what is it really?

    In a nutshell, a website is a bunch of files in a special computer, and this special computer can be accessed by using a special web address on your web browser. After accessing the web server, it’s going to crunch those files together and in the end we would be able to see a pretty looking web page.

    Sorta techy terms:

    • bunch of files = web pages
    • special computer = web server
    • special web address = domain name or URL

    The bold words in the previous paragraph are the stuff that we need to get. Luckily for us, there is a place where we can get all of those all at once.

    Getting a Place in The Web

    I would recommend getting the GoDaddy’s Managed WordPress Hosting – Basic Plan. This plan gives us everything that we need to create our site right away with the least amount of hassle. The best part is that we don’t have to worry about the technical details of setting everything up.

    If you’re wondering what a “Managed WordPress Hosting” plan is, I’ll break it down:

    • Managed – GoDaddy will be the ones who’ll make sure that everything runs smoothly, updated, fast and without any problems. And if you need any help, you can ask their customer support.
    • WordPress – This the content management platform that will be used. It’s what you’ll use to publish your content online. It’s awesome. If you want to know more about WordPress, WP101 has a great intro video on What WordPress Is
    • Hosting – Everything will be placed in GoDaddy’s servers, so everything can be accessed quickly and with almost no down time.

    When getting the plan from GoDaddy, they also provide you with a domain name for free. This is awesome since now we don’t have to do anything aside from signing up in order to get the full package!

    As an added bonus, you can also get email addresses by getting their Basic Plan. The first year is free, so this is a no-brainer if you’re going to use email to converse with customers and other people.

    Check out this link below for more details on their plans (and no, they’re not paying me to recommend them):

    Check out GoDaddy’s Managed WordPress Hosting Plans

    Fill up all the details, find the domain name that you want (you don’t have to use supermegaawesomewebsite.com), then continue to check out and pay for it.

    I recommend that you sign up for at least one year so that you can avail of their discounts. You can also scour the web to check if there are any promos available.

    Web Server Cost: $12.18 – $59.88 for 1 year (the key here is to find a promo) Email Cost: $0 for 1 year Domain Name Cost: $0 for 1 year

    Total Cost so far: $12.18 – $59.88

    Congratulations, You Now Have A WordPress Website!

    After you’ve gotten your GoDaddy hosting, then your site should now be working fully. You can start browsing to your domain http://supermegaawesomewebsite.com and see your site.

    Initial impressions of your site is that it might look.. empty.. and it looks normal. Don’t worry, let’s fix that up!

    Accessing Your Website

    Since you’ve signed up with GoDaddy, they’ll give you a URL where you can access the administration side of your website. If you can’t find it, you can add a /wp-admin at the end of your URL. e.g. http://supermegaawesomewebsite.com/wp-admin and log in from there. Once logged in, you’ll end up in your WordPress Dashboard.

    GoDaddy has their own “Quick Setup” system to help beginners customize their site. I recommend going through this setup process if you aren’t familiar with how WordPress works.

    Learning WordPress

    Now it’s time to get familiar with WordPress. As I’ve mentioned earlier, WordPress is the platform you’re now using to publish your content. In other words: you log into your site, create pages and blog posts and literally hit the publish button.

    The next step now is to learn how to use WordPress. If you haven’t used WordPress before, the dashboard is a bit of an information overload if you’re seeing it for the first time. I recommend that you explore the different areas on your own pace.

    If you need guidance, there are a lot of tutorials on how to use WordPress online too. One of them is WP101. WP101 makes things super easy by providing lots of tutorials in video format, and they have a huge library of videos that will teach you all the ins and outs of WordPress.

    They have a few free videos in their site. For example, you can watch WP101’s video tutorial about the WordPress Dashboard.

    Check out WP101’s Video Tutorials

    Video Tutorials Cost: $15 per month (if you can obsess over all their videos within the first month, then you’re golden)

    Total Cost so far: $27.18 – $74.88

    Making Your Site Look Pretty

    The next step is to change the design of your site to make it match your personality and/or needs. You’ll need themes for that. In short, themes are like “skins” for your WordPress site.

    There are a ton of free and paid themes out there. If you want free themes, then there’s no doubt that the WordPress.org theme directory is your number one option.

    Since there are a lot out there though, it’s sometimes hard to find the perfect one for you. Theme Friendly’s Find Themes helps by providing reviews for themes and gives them a score based on their review. They have a number of themes in their site, and probably the best thing there is that you can click on filters while browsing themes, so you can view only themes fit for portfolios, businesses or blogs, and many more.

    There are also paid themes, but for starters I would recommend the free ones first. If you decide to take the premium route check out Premium WordPress’ list of theme shops.

    If you’re wondering why I didn’t mention ThemeForest, it’s because there are a lot of themes there that add a lot of bloat (unnecessary features) to your site. So if you really want to find a theme from there, tread carefully.

    Theme Cost: $0 – $70 one time (I’d recommend looking for promos in theme shops too)

    Total Cost so far: $27.18 – $144.88

    Adding More Functionality To Your Site

    As you create your site and continue to add content to it, you might find yourself wanting to add more stuff like contact forms, maybe some icons, or a Google Map, or something else. For these kinds of stuff, you’ll need plugins.

    As with themes, there are also a ton of free and paid options. And like themes, the number one choice for free plugins is the WordPress.org plugin directory. It’s a common saying within the WordPress community that if you need something in your site, “there’s a plugin for that.”

    For premium plugins, you can also find premium ones in CodeCanyon.net. But I would recommend going through the thousands of free ones in the WordPress.org plugin directory first.

    Plugin Cost: $0

    Total Cost so far: $27.18 – $144.88

    Conclusion

    You might have noticed that the total cost indicator is a range instead of a solid number. It’s because there are various ways to push the cost down like watching out for promotions, and opting for free themes & plugins.

    So if you play your cards right, you can actually have your own site from scratch (powered on for a full year), for only $27.18

    Most likely the succeeding years won’t be as cheap as the first year, but if you have your site up and running for at least a year already, then I would like to think that it’s a success and the other future costs aren’t a problem anymore.

    Hopefully you’ve learned a bunch from this article. And if you didn’t know about WordPress before and you’re now a proud WordPress user, consider joining the numerous WordPress communities online. Just search for a WordPress group in Facebook :)

    Wait! Don’t Close the Tab Yet!

    Hold on! I’d like to mention Page Builder Sandwich before you close this tab. I’ve mentioned a lot of awesome stuff above, but you haven’t seen Page Builder Sandwich yet.

    Page Builder Sandwich will let you design your pages in your brand new site easily without knowing any piece of code. It looks and behaves kinda like editing a word processor document, but it’s for websites. With it, you’ll be able to make your site even more awesome with carousels, icons, buttons, image backgrounds and plenty more easily.

    You can try out the demo, or watch the video below. What’s cool is that we’re still below the $100 limit :)

    Try the Demo of Page Builder Sandwich

    Page Builder Sandwich Cost: $39 for 1 site

    Total Cost so far: $86.18 – $203.88

  • What to Put on the Top Part of Your Front Page – Tips For “Above the Fold” Content

    Tips-For-“Above-the-Fold”-ContentWhat you put in the top of your front page has a huge impact on the success or failure of your website. Put the wrong thing in, and you’ll probably see your visitors quickly navigating away from your site. Put the right content there and you may see your sales go up.

    This article isn’t an all-in-one guide for creating above the fold content, nor is about an all-encompassing rule on what you should put in. Rather, I will give you a few tips, recommendations and a little bit of helpful research about this topic.

    Before diving straight in, it’s good to know what the top part of your front page is called first. There’s a better name for it than the top-part-of-your-site.

    file000153814713_

    “Above the Fold”

    It’s called Above the Fold. Why? Because in the early days when mankind had these things called newspapers, they were usually folded in half so only the top portion would be visible right away. That top portion or “above the fold” portion contained the most important headline/s of the day, then when you unfold it you see the rest of the less important headlines. Similarly in websites, the top portion of your site is the first thing people see, then when you scroll down you see the rest of the site, akin to unfolding a newspaper.

    Sticking to the newspaper example, let’s say that you were walking down the street and you see a newspaper vendor. When you see the newspaper and if the headline is interesting, then you might just buy the newspaper to see the rest of it. This is essentially the same with websites, if visitors were to pass by your site and find your above the fold content interesting, then they might just buy in and scroll down or view the rest of your site to see more.

    Nielsen’s Research

    Earlier I said that your above the fold content may make or break your site. Nielsen Normal Group has written a few research articles about this across the years. I’ll quote the summary of their article The Fold Manifesto: Why the Page Fold Still Matters

    The average difference in how users treat info above vs. below the fold is 84%.

    If you just got confused about the wording of the quote, I did too at the start. Let me clarify: That study doesn’t mean that 84% of people do not scroll down, on the other hand I’ve seen other research say that most people do scroll down to the bottom of the page. It also doesn’t mean that the lower part isn’t important. Instead it means that the behavior of your visitors in your site is largely impacted by your content above the fold.

    This makes sense since the top area of a website is the first thing you see.

    So knowing how important your front page above the fold content is, what should you put in the top of your site?

    Go Straight to the Point

    Put right away what your site is all about. Your front page and above the fold area are the life blood of your entire site. If your visitors feel lost, then they’ll quickly turn away and close the tab. If you’re a new book author, write that you are one and showcase your latest book. If the you’re a wedding organizer, write that you are a wedding organizer that will give your visitor the most memorable wedding they’ll ever have. Or if you’re making a site for your small hotel, then write that you’re the best bed and breakfast place in town. (I’ll use these examples more below.)

    Your visitors shouldn’t have to guess what the site is all about. They should get it right away, only then will they scroll down to view more details.

    Purposely Engage your visitors

    Next you have to think about the actual purpose of your website. What is the reason for putting up your website in the first place? Whatever the reason is, you have to also put that above the fold.

    Let’s take the few examples I mentioned above. For a new book author, you’ll probably want more exposure. If you have a free ebook, then you can place a button for your visitors to download it. For the wedding organizer, you’ll want people to contact you about your services, put in your phone number or a contact form. Or for the small hotel, put in a booking form along with your phone number.

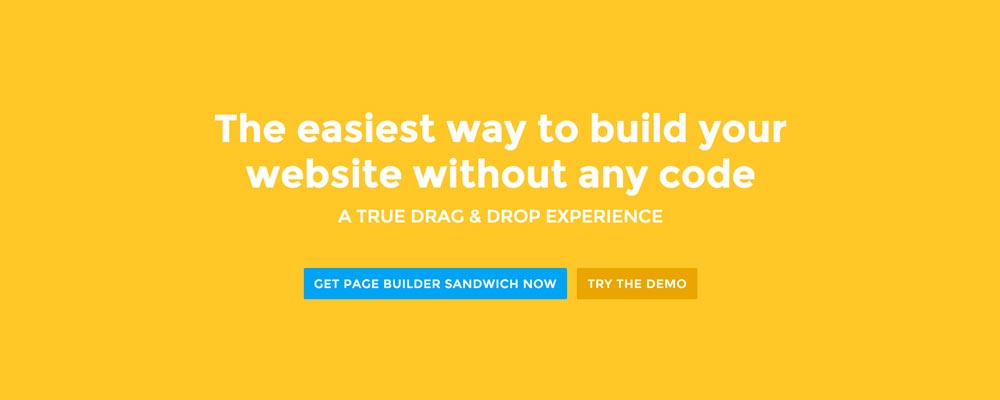
    For Page Builder Sandwich, I want people to get to know the plugin more, and eventually become a customer. So I have a button there that lets visitors try out the demo right away, and another button to purchase the plugin.

    Designing above the fold

    Now that we know what to put, it’s now time to decide about the design. Personally, I prefer clean sectioned content, hence the solid backdrop on our front page. But it’s also a good idea to accompany your above the fold content with an image or video to make to more alive.

    Screen-Shot-2016-01-29-at-12.11.19-AM_Here’re a few examples of what you can do about your front page.

    Add a background image. A large background image behind your large statement is a great eye-catcher and can further encourage visitor engagement. For new book author, maybe adding a background image illustrating the setting of his free ebook would entice people more.

    Add an introduction video. Admit it, people can be lazy, especially when it comes to reading. So if your site is a bit complicated, it might be a good idea to add a short video that introduces your site/product quickly. For the wedding organizer, then this can be a video of their latest wedding. Or for our site for example, we can add in a quick intro about the features of our plugin.

    Add a video background. This is a bit of a trend nowadays, but I find it appealing at times. If this suits your taste, then this might be a good idea.. I know PayPal had a video background before in their site. For the small hotel, you can put in a stationary video of a scenic area of your hotel as the backdrop.

    Conclusion

    Creating above the fold content for your front page isn’t hard, but it takes some thinking and testing to do right. If you already have a site and you’re set in that, but you have a high bounce rate in your Google Analytics, then I encourage you to try and re-think your above the fold content with the tips above.

    If you have tips on creating above the fold content, kindly share them in the comments!


    Page Builder Sandwich can Help You Design Your Front Page & Above The Fold Content

    Page Builder Sandwich is a WordPress plugin that allows you to create any design you want without writing any piece of code.

    Learn More About Page Builder Sandwich

  • How to Add & Embed Videos, Images, Tweets & Other Content in Your Site

    How-to-Add-and-Embed-Videos-Images-Tweets-and-Other-Content-in-Your-SiteThere may be times where you want to add supporting videos from YouTube or Vimeo into your site. Or maybe you want to add Tweets from Twitter, or content from other websites like Flickr and Instagram. You can embed these content easily in your WordPress site.

    To do this, all you need to do is find the permalink for the content. In some sites like YouTube, the permalink is simply the current URL. For other sites like Reddit or Vimeo, you’ll have to find the “permalink”, “share” or “embed” button to get the URL. In some sites like Facebook, you’ll have to click the date of the status or post in order to get the permalink.

    Permalinks have many shapes and forms, but usually they just look like this below. This one comes from YouTube:

    https://www.youtube.com/watch?v=dQw4w9WgXcQ​

    You can paste these URLs in the content editor to embed the content. If it’s embeddable, you’ll see that the URL would get converted into the actual video or content. If it doesn’t, then that means that you cannot insert content from that site.

    What Sites Can I embed in my site?

    Not all sites can be embedded into your WordPress site. The WordPress Codex has a list of sites which you can embed: https://codex.wordpress.org/Embeds

    Installing Plugins Can Add More Embeddable Sites

    If the content you want to embed isn’t in the list in the WordPress Codex, there is another way. Installing plugins can add more embeddable sites. For example, installing Jetpack allows you to embed wall posts from Facebook.

    There are plenty more out there that add more sites, do a search for “oEmbed provider” in the WordPress.org plugin repository to find more. Here’s a link to the plugin repo for your convenience: https://wordpress.org/plugins/search.php?type=term&q=oembed+provider

    Another Way to Add Content – Iframe Embed Codes

    If pasting just the URL doesn’t work, there is yet another way to embed content. Try and check the sharing options of the site you want to include, aside from the permalink, you may also be given a small piece of “embed code”. Embed codes look like this:

    <iframe width="420" height="315" src="https://www.youtube.com/embed/dQw4w9WgXcQ" frameborder="0" allowfullscreen></iframe>​

    Copy that then in your WordPress content editor, click on the text tab on the top of the editor and paste that in. After you’ve pasted that in, head back to the visual tab, you’ll see if it works when the embed code now looks like the actual content that will get embedded. You can’t do this in the visual tab, pasting it from there would just show the pasted code in your site, it won’t get converted into the content.

    Use Page Builder Sandwich to Add Content from Other Sites from the Frontend

    While adding content from other sites seem easy, doing things in the administration side of WordPress is a bit of a hassle. You have to know whether to add it in the visual tab or text tab, and you’ll have to preview your page or post in order to see how it would look like when viewed by your site’s visitors.

    Page Builder Sandwich makes things easier by allowing you to edit your actual site all from the frontend. When you use Page Builder Sandwich, you write and edit your site’s content easily. Embedding content from other sites is also much easier.

    With Page Builder Sandwich, just paste in either the permalink or the iframe embed code anywhere in the front of your site and it will be converted to the embedded content right away, no more need to know which tab you’ll need to paste stuff in.

    Get Page Builder Sandwich now.