Author: Neil Lock

  • How to Add Custom Shortcodes on Page Builder Sandwich

    How to Add Custom Shortcodes on Page Builder Sandwich

    From the word itself, the word shortcode means exactly that: A short code; a shortcut code.

    Shortcodes allow you to add things to your website (like widgets, for example), without having to add in huge chunks of code like developers normally would.

    For example, a regular piece of code, in terms of length, would probably look something like this:

    <html>Lorem ipsum dolor sit amet, consectetur adipiscing elit.
    
    Etiam id aliquam turpis. Vivamus quis arcu tincidunt, finibus urna eget, placerat risus.
    
    Aliquam arcu massa, finibus et lacinia sed, scelerisque nec augue. Quisque eu viverra sapien, vel consequat lorem. Integer vel erat tortor.
    
    Phasellus condimentum magna eget congue venenatis. Suspendisse blandit vehicula consectetur.
    
    Nullam sodales eleifend massa, in bibendum purus fermentum id.
    
    Morbi et turpis feugiat, malesuada ipsum sit amet, interdum nulla. In non ante nec nisl mattis gravida sit amet id lectus.
    
    </html>​

    For this example, let’s pretend that the piece of code above will let you add an entire paragraph of Lorem Ipsum placeholder text.

    Now, a shortcode with the same exact function as the code above will look something like this, in contrast:

    [lorem ipsum dolor estat]Lorem Ipsum[/lorem]​

    You can see how they’re miles different from each other in terms of length.

    Now imagine that both pieces of code– The original, lengthy piece, versus the shortcode containing just the word “lorem”, would both do the exact same thing: Add Lorem Ipsum text.

    This is what shortcodes do. They make adding widgets, functions, and a bunch of other cool stuff easier for both ordinary WordPress users and developers alike.

    Where can I find shortcodes?

    If you have a favorite plugin or widget, chances are, they have a shortcode available for you to use.

    Shortcodes Ultimate, for example, will let you choose from hundreds of shortcodes that you can use on Page Builder Sandwich (or anywhere, actually) by simply grabbing the shortcode of your choice from Shortcode Ultimate’s repository or documentation page.

    Adding Custom Shortcodes on PBS

    On Page Builder Sandwich, you can add shortcodes directly onto your page by just typing or copy-pasting it onto your content area.

    We did this below with a shortcode from Shortcodes Ultimate, adding a content box on the Page Builder Sandwich demo page:

    Another thing you’ll find handy when using Page Builder Sandwich is our Shortcode Mapping feature.

    From one of our previous articles on Shortcode Mapping, the definition is as follows:

    Shortcode mapping is like letting Page Builder Sandwich memorize all the shortcodes available on your site: their names, descriptions, their attributes, and what each of these attributes do.

    Part of this means that you no longer have to manually look for your shortcodes on their respective documentations or repositories.

    As long as you have the plugin that includes the shortcode installed ont o your wordpress site, it’ll be easily available for you to use on Page Builder Sandwich.

    So for example, if I wanted to add a WooCommerce shortcode on my page, all I have to do is make sure that it’s installed on my WordPress site, like so:

    And then, to actually add the shortcode, I’ll just go to my page, and drag and drop the Shortcode Element:

    Because we already have WooCommerce installed on our WordPress site, you can see that all of the shortcodes that are available on the WooCommerce plugin are already available on Page Builder Sandwich. This is what Shortcode Mapping is.

    You can also see on the upper left corner that the ACF (Advanced Custom Fields) and MailChimp shortcodes are available– because we have those instlled on our WordPress site, too.

    So if you want to add custom shortcodes, or shortcodes you’ve made on your own, you can, as long as you have them installed onto your WordPress site.
    Here are some other helpful plugins that you can use to create your own custom shortcodes:

  • Why We Switched from EDD to Freemius

    Why We Switched from EDD to Freemius

    When Page Builder Sandwich was launched in 2016, we were using Easy Digital Downloads. In 2017, we moved to Freemius. Here’s why we switched:

    What is EDD and why did we choose it?

    Easy Digital Downloads (EDD) is a popular self-hosted eCommerce / WooCommerce alternative for WordPress. Out of the box, you can’t really sell a WordPress product using EDD, but its Software Licensing extension makes it perfect for selling plugins. The extension handled the creation and verification of license keys, too.

    EDD also worked well because it allowed customers to purchase our product directly from the website, while also giving them their own account page where they can log in and view their purchase history.

    Since it worked well, and since we’re a big fan of Pippin Williamson, this was Sandwich’s first option.

    How does it work compared to Freemius, and when did we switch?

    In 2016, Vova Feldman, lead developer and co-creator of Freemius, emailed us a rundown of Freemius, explaining that it’s more than an eCommerce solution — It provides other features like analytics and insights solution, a marketing automation tool, and built-in support tool so customers could contact you directly from the WordPress Dashboard.

    Initially, we only used ‘Freemius Insights’ — one of Freemius’ features — because we were curious about the analytics. It did help us understand the common reasons why people were uninstalling our plugin at that time.

    It also helped us make more data-driven decisions through quick surveys for customers. For example, if a user were to uninstall our plugin, a quick feedback form pops up and asks why they chose to uninstall. These feedbacks helped us understand our customers’ needs.

    In this exercise, we found out that users were uninstalling because they didn’t know what to do after they activate. We simply added a welcome screen and tutorial video to decrease the uninstall rate. Easy.

    Analytics aside, Freemius platform was built that you can readily use it for selling your WordPress products more effectively!

    After weighing pros and cons, we moved to Freemius in January 2017. Here’s why:

    Freemius lets customers purchase your product directly on their WordPress Dashboard

    Instead of being redirected to an external website, Freemius allows customers to purchase straight from their WordPress Dashboard. This made huge impact on sales of course! Generally, the fewer things the user has to do to purchase something, the more likely it is that they actually make the purchase.

    With EDD, people who interested in Sandwich had to jump out of their page building experience to an external website to purchase a license key. They would go through several clicks — and several more distractions — before they could finally purchase.

    In contrast, with Freemius customers purchase right out of their own WordPress Dashboards while they’re trying out Sandwich — no need to navigate away to a different site to purchase.

    The convenience of it all made purchasing ten times smoother and easier for customers, leading to a significant increase in sales.

    The developers are also invested in your success

    Selling your product using Freemius isn’t free. For each sale, they gather a small share of your revenue, that goes into payment and processing fees. That’s their business model.

    But the important thing to note here is that their business model revolves around your WordPress product’s success.

    Vova and his team are very accommodating. They gave us their own tips and tricks on how to generate more revenue, how to improve our plugin, and how to use Freemius to our advantage. Their generosity with information contributed to Sandwich’s growth.

    Conclusion: If you’re a WordPress product author who wants to monetize, Freemius is the way to go.

    Page Builder Sandwich aims to heighten intuitiveness and user experience through page building. Freemius does this, too: It effectively smoothens the experience for both customers and sellers alike.

    Since switching to Freemius in 2017, we’ve had happier customers, lower uninstall rate, and overall a better sales. If you’re looking to monetize your WordPress plugins or themes, Freemius is definitely the way to go.

    Its features are better than the competitors. It helped us make smarter decisions for improvement. Their team offers outstanding support. If you are a WordPress product author, we hope you experience the same impact we had with Freemius.

  • How to Utilize E-mail Marketing Using Page Builder Sandwich

    How to Utilize E-mail Marketing Using Page Builder Sandwich

    Yes, you can.

    The more important question, though, is how and why do you need to do it?

    My business is small. Can’t I just wing it?

    Email marketing has an average ROI of 3,800 percent. For every dollar invested, the average return is $38, according to Salesforce.

    In other words, it’s definitely something worth investing your time in.

    Because while there are tons of ways to market your products and capture leads– you can still try to make use of the less-popular cold call, for example– the most sure-fire way to connect and communicate with your target audience in the 21st century is through e-mail marketing.

    So if you’re running a business –any kind of business, whether small, big, online or otherwise– digital and e-mail marketing is an absolute must.

    Aside from cutting on costs (e-mail is free, after all), businesses rely on it not just because it’s been proven to be successful, but also because it yields results that are both measurable and flexible; you can track your audience’s responses to your e-mails, for example, or note how many clicks and opens your e-mail marketing campaigns get.

    How you can do it with Page Builder Sandwich

    There are lots of available software you can use to help you market your products and content digitally, like Hubspot’s E-mail Marketing Software, or Mailchimp, which gives you a management system that helps you create, organize, and analyze your newsletters.

    But did you know that using Sandwich, you can actually integrate some of the popular software mentioned via the Newsletter Element?

    The Newsletter Element (and how it works)

    You can find the Newsletter Element by hovering over to the Elements Inspector over to the left side of the screen, and selecting Newsletter from the bottom area.

    Using the Properties Inspector, you can also choose which newsletter integration you’d like to use with the Newsletter Element. For this exmple, we’re going to use MailChimp (highlighted in blue in the dropdown below).

    And, using the Input Field button, you can try to play around with the Newsletter Element’s settings as well, so you can change colors, customize success message options, and other settings, like so:

    By trying your hand at the different available settings for the Newsletter Element’s options, you can end up with something like this:

    Plus, with the help of our Pre-Designed Sections and other design tips, you can actually do a whole lot more.

    Other useful resources for e-mail marketing beginners

    • 11 Types of Marketing E-mails That Actually Generate a Response

    Conclusion

    While other noteworthy marketing trends still exist today, one thing’s for sure: E-mail marketing is definitely here to stay, and it’s important that you utilize it when you can. Who knows? Through e-mail marketing, your business could just get that big break it’s been looking for.

    Design in less time!

    Get access to Sandwich’s Pre-Designed Sections, Templates, and a whole lot more.

    Try Live Preview
  • How To Customize Page Builder Sandwich’s Pre-Designed Sections On Your Own

    We’ve been getting quite a few inquiries the past week about Pre-Design Sections (and by extension, the PBS Templates), what they are, and how they can be accessed.

    So in this article, we’ll be teaching you how to not only access them, but also how to maximize these features of Page Builder Sandwich: By customizing them and making them your own.

    Accessing the Pre-Designed Sections

    If you aren’t familiar yet, all you have to do to access the Pre-Designed sections is to hover your mouse onto the left side of your screen, and access the Elements Inspector. This is the sidebar that lets you drag and drop elements directly onto your content area.

    Say hello to the Elements Inspector!

    Once it’s accessed, simply scroll down to the bottom and select Pre-Designed Sections. A library of the sections will pop up. Select one from the collection, drag and drop, and it’ll show up on your content area, like so:

    From here, you can move the elements within the section around, or move the entire thing and adjust its position. And there you have it! You’ve selected a Pre-Designed Section from Page Builder Sandwich.

    Now it’s time to add in your own twist: By customizing and tweaking with the elements’ settings within the selected section.

    Customizing the Pre-Designed Sections

    Each element’s setting within any one Pre-Designed section can be edited and customized according to your website’s needs and your personal taste.

    This means everything included in your selected Pre-Designed section – like text, colors, images, buttons, everything – can be edited and tinkered with by you.

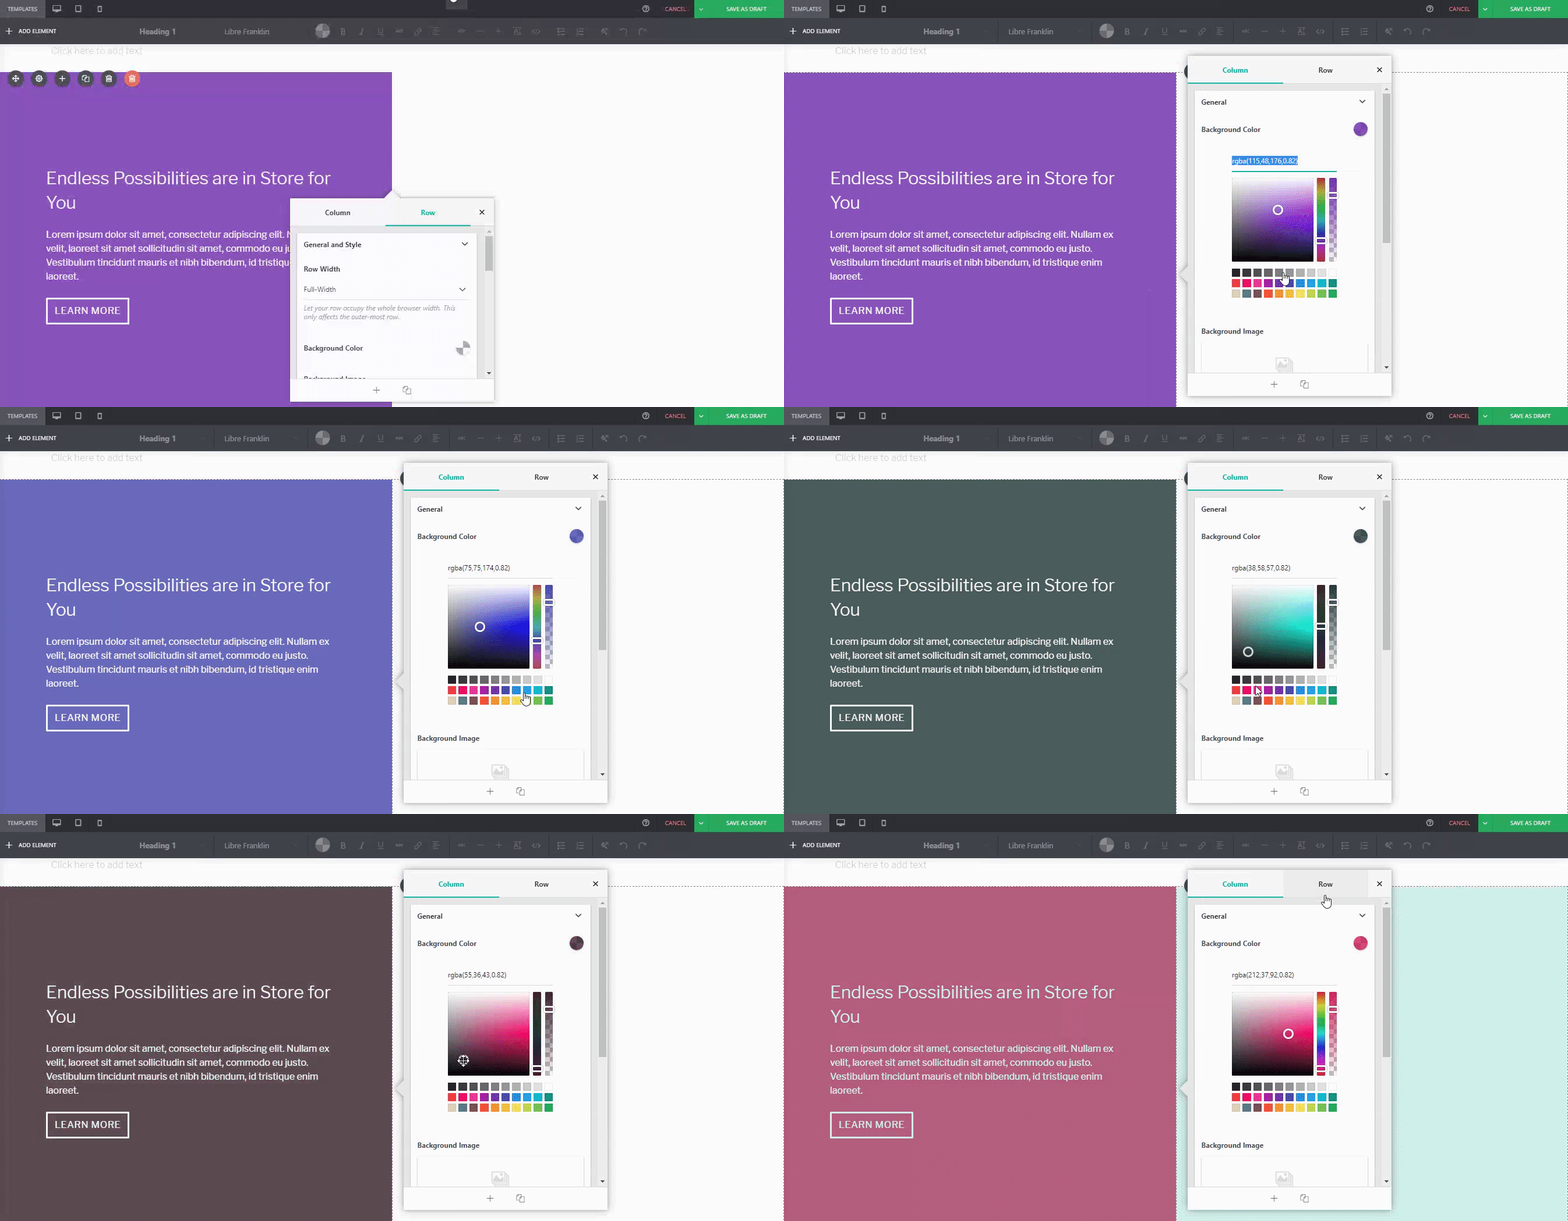
    So for instance, if you’re not happy with the default blue-green tint and the wheat field image in the default Pre-Designed section below…

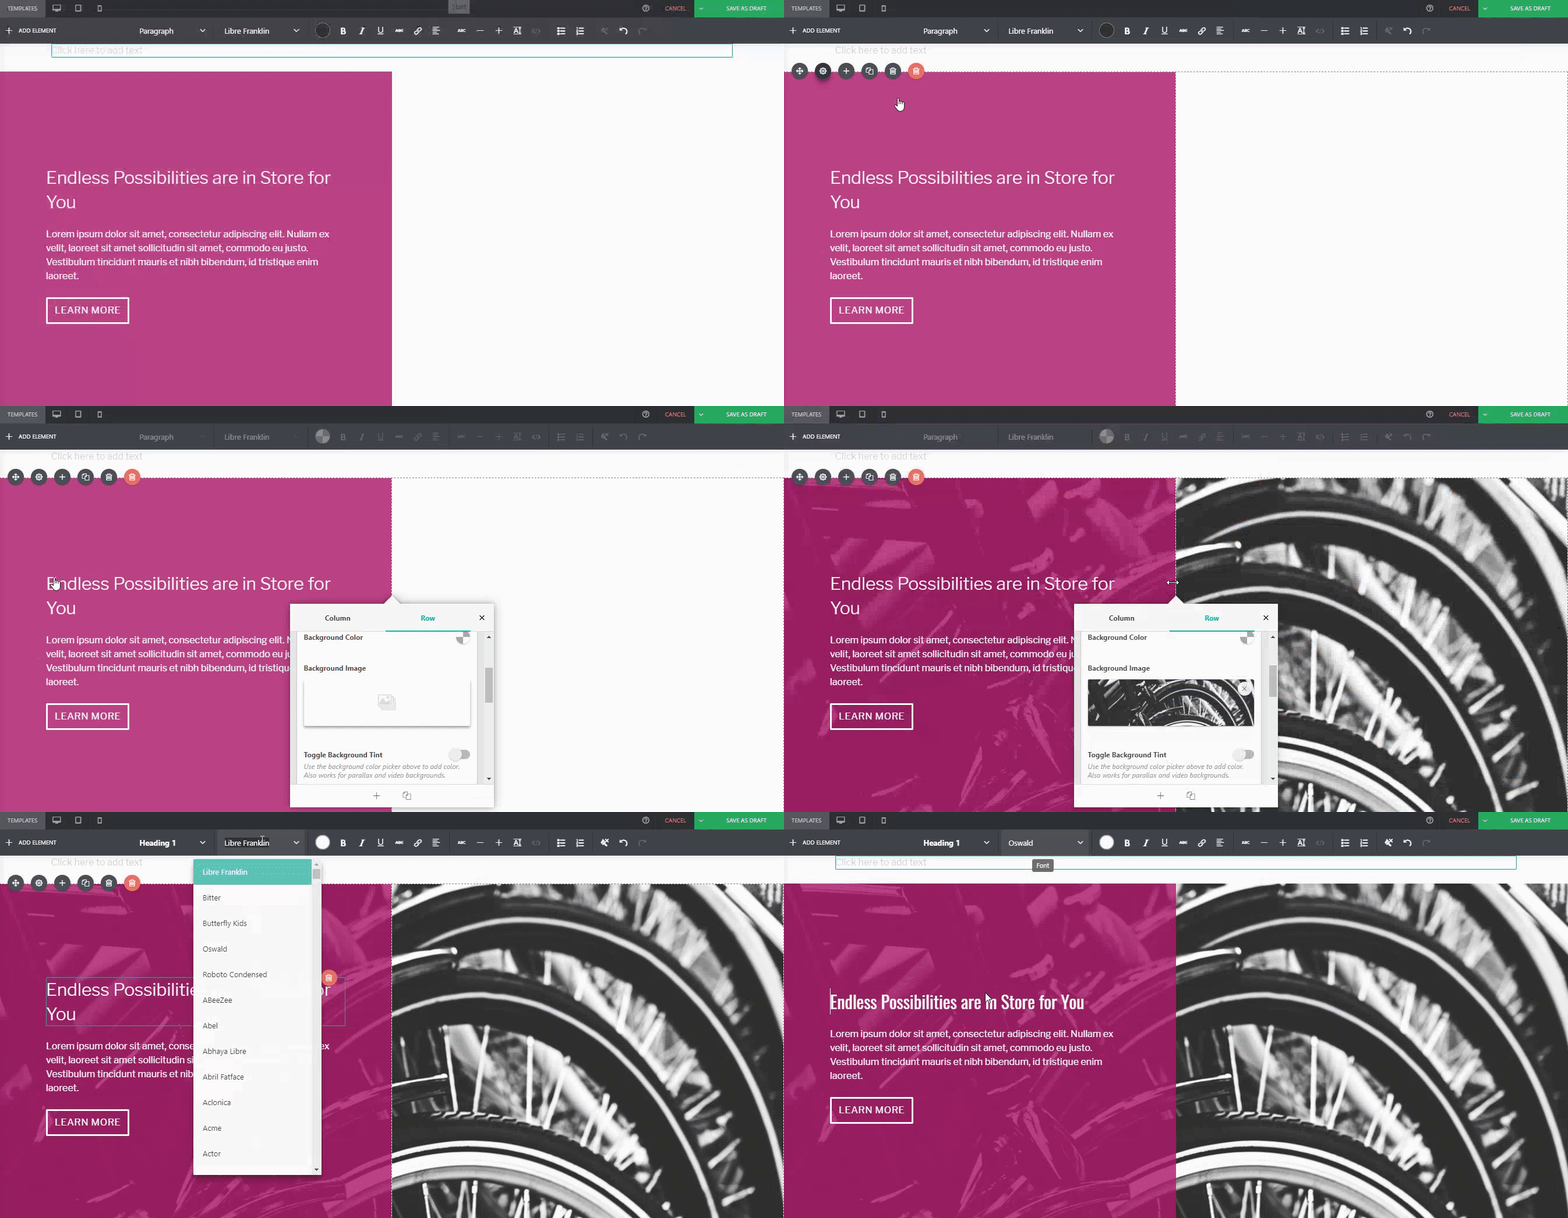
    You can adjust it. For instance, if I wanted a different background tint on the left:

    Or if you wanted to replace the image of the wheat field on the right:

    Or even change the button style, margin, padding, and font:

    …You can.

    For comparison:

    Default PBS Pre-Designed Section

    The same Pre-Designed Section, completely tweaked and customized. Notice the different font, color scheme, button style, photo, and margin width. You can actually take this further, and let your imagination run wild.

    Here are a few more examples on how you can spice up our Pre-Designed Sections

    Default Pre-Designed Section from Sandwich

    The same Pre-Designed Section, customized

    You can do it with our Full-Page Templates, too:

    Default Template from Sandwich

    The same Template, customized

    Conclusion

    There’s more to Page Builder Sandwich’s Pre-Designed Sections than you think.

    Tweak and customize them to make them completely your own, or even use them as a starting point for when you don’t want to design your page from the ground up.

    Remember, Page Builder Sandwich is here to help you design in less time. Making full use of our Pre-Designed Sections and Full Page Templates will help you do just that.

    Design in less time!

    Get access to Sandwich’s Pre-Designed Sections, Templates, and a whole lot more.

    Try Live Preview
  • 4 Website Design Mistakes You Need to Avoid in 2018

    If there’s one thing you need to remember when building a website, it’s to never take good design for granted.

    As we’ve mentioned in a previous article, a site visitor’s first impression on your website can make or break you in just a matter of seconds.

    In other words, if they don’t like what they see within that timeframe, chances are they’re going to close their browser windows and direct their attention elsewhere.

    Fortunately, there are a lot of ways to prevent this from happening; one of them is to familiarize yourself with good web design practices. And the good news is you don’t need to be a professional web designer in order to do so.

    Because while it’s true that not everyone has a good eye for design, preventing bad design becomes easier once you know what to avoid.

    That said, make sure you keep these 4 common web design mistakes in mind. This way, you’ll have one less thing to worry about when you finally start building your website.

    Mistake #1: Using More Than 3 Fonts

    A rule of thumb when designing websites? Try not to have too much visual elements going on within your space. Having more than 3 fonts on your site design is a surefire way to break this one rule. It’ll also overwhelm your site visitors.

    Keeping your website fonts to a minimum of 3 is a general design practice observed by professionals. Plus, it increases your site’s level of readability and consistency, which are key to your site traffic’s success.

    DON’T DO THIS:

    Don’t use more than 3 fonts and try to avoid “fancy fonts” as much as possible. These tend to make your site look unprofessional and outdated.

    DO THIS:

    Use only 2 fonts, or a maximum of 3 if you have to. Notice how the page below looks clean and sleek, all while keeping readability and consistency all throughout the design.

    Try comparing the differences between this example and the previous one. The example below with only two fonts is a website that your visitors will likely take seriously.  This previous one above with the overwhelming amount of fonts isn’t.

    Mistake #2: Failing to Use White Space

    White space is one of the most important aspects of web design. But what is it?

    Put simply, white space is literally the empty space between elements in a composition.

    In other words, it’s negative space. This pertains to anything on your website that isn’t filled with text, photos, or other design elements.

    Now, the problem arises when website owners want to fill all of the white space in, which is an absolute no-no.

    White space matters because it gives your site visitors and readers some breathing space when going through your site. Just how it was mentioned in the first design mistake to avoid, overwhelming your website with too much design elements is more than enough reason for your site visitors to leave and for your traffic to decrease significantly. It also makes for poorly executed design.

    DON’T DO THIS:

    In the example below, take a look at how the text is nearing the edges of the purple section’s margin. Notice as well how all elements leave almost zero room for white space.

    DO THIS INSTEAD:

    Give your site readers some room to breathe. If adding in long paragraphs is unavoidable, just remember to always take the rules of spacing into account—they’re pretty easy to remember anyway ?.  It will leave your page looking cool, crisp, and professional.

    Mistake #3: Designing Websites With Zero Flow in Your Site’s Content

    It’s important to pay attention as to how  information on your website is presented. Moreover, site content should generally follow a logical flow, taking the site viewer’s intuition into consideration.

    Check out the two examples below to see what we mean.

    DON’T DO THIS:

    Unless you’re a graphic designer by profession, it’s probably not a good idea to experiment with the standard flow of your website’s sections.

    Below, you can see that the site’s design lacks both visual and logical flow; everything is all over the place. You don’t want your audience having a hard time navigating through your site, either. This is another surefire way to do it.

    DO THIS INSTEAD:

    Notice how the sections of the website flow depending on what actions the visitor is most likely to take.

    The design is intuitive and has a logical flow: First, the organization introduces itself and fills the audience in on the basics; like what it’s about and what it does. Second, it adds in reliable figures to establish credibility. Lastly, the website gives the audience its contact numbers and a list of events, prompting them to take action.

    Mistake #4: Trying to Fit in Every Bit of Information Onto Your Website

    Adding in walls of uncessary text where white space should can drive your audience away. Remember to only keep important details.

    Studies find that readers only visit 20% of your webpage; everyone else outside that percentage will probably just scroll through your site.

    DON’T DO THIS.

    Don’t overwhelm your visitors with inconsistent, giant walls of text, especially if it means having to sacrifice your website design’s cohesiveness and structure.

    DO THIS INSTEAD:

    Keep your copy short and concise, and take out chunks of unecessary text if you can help it. Only keep vital information that your site visitors absolutely need to know.

    Conclusion

    Website design is important, and can be a huge deciding factor in whether or not you gain site traffic.

    Remember not take it for granted. Always alot time to research, and look up design articles to guide you along the way. Before you know it, you’ll be seeing your site traffic moving upwards. ? Good luck!

    Design in less time!

    Check out how much faster Page Builder Sandwich let you design your web pages.

    Try Live Preview

    This week’s useful resource:

    CANVA has hundreds of resources that you can access on their website. Apart from useful and easy-to-follow design tips, they also have photo editing tools, graphs, and a wide range of useful resources you can use for your creative projects.

    Check out this cool Color Guide from Canva for your next design venture.

    Canva Design Wiki

    Unleash your creativity.

    Check Out the Canva Color Guide

  • Frontly Rebrand Update #1: Copy-Pasting Paragraphs

    Over our past blog posts, we mentioned that PBS will be rebranding as Frontly, and that we’ll be changing and improving a lot of aspects for the better. One of these aspects is being able to use Frontly to experience a smoother, more intuitive page building experience that’s even better than PBS.

    So while we’re still making Frontly perfect for you guys, we’ve decided to release a series of posts to let you know exactly what it is you’re getting once Frontly hits the market.

    Copy-paste blocks of text on Frontly

    We designed PBS in a way that your every paragraph is a separate element. Copy-pasting long texts divides the selection into separate textblocks.

    What do we mean by this? Here’s an example to illustrate.

    On PBS’ current version (the one you’re using now), copy-pasting multiple lines gets broken into multiple text elements, making it harder to move sections of text around. This makes it hard to edit text.

    So if I wanted to move the text I just copy-pasted to another column, it’d be harder because I have to drag the lines one by one.

    This is something we’re definitely addressing with Frontly.

    This is a small test page Benjamin made for Frontly. Here, you’ll see that we copy-pasted the same paragraph we tried to copy-paste on PBS. Only this time, everything is retained in a single area that you can drag around and place wherever you want to.

    This means you get to add and edit text more smoothly, giving you a hassle-free typing (and page building) experience.

    Retain full text formatting with Frontly

    Another thing we’re excited to have you guys try out in Frontly is how all formatting remains the same – all headings are kept, including bullets, and even emojis.

    Copy-pasting with PBS vs copy-pasting with Frontly

    On Frontly (right), you’ll see that all text formatting was retained from the original source. Everything bolded, italicized, underlined, or edited as a different heading size all remain intact when pasted onto the Frontly area (compared to PBS, where the only thing retained were the emojis).

    What else do we have in store for you?

    As we’ve mentioned, this is only the first in a series of posts about how Frontly is going to be lightyears ahead of PBS. We can’t wait to show you all of the other stuff, so stay tuned for our next blog post!

    Suggestions or comments? Hit us up and leave a reply below!

  • Frontly API: Making Frontly Builder More Developer-Friendly

    Great news for developers: in Frontly’s upcoming release, we’ll finally be launching the Frontly API.

    It’s currently still in development, but you’ll finally be able to create addons and extensions for Frontly. Of course, we’ll also be launching an API documentation to go along with it for a smoother, more functional experience.

    We can’t wait to see all the great stuff you guys are gonna come up with.

    Here’s a short list of some of the APIs we have so far:

    1. Text Formatting Bar API

    With the Text Formatting Bar API, developers can extend the functionality of Frontly’s text formatting bar. With this, you can add new buttons/options on the text formatting bar.

    2. Add Element API

    This API will let you create new elements, adding them to the list of already-existing ones in the Elements section on the left side of the content editor.

    3. Inspector API

    The Inspector API will let you create, add, or remove settings on each element’s Properties Inspector.

    4. Text API

    The Text API will allow you to make modifications to text styles, specifically, the ability to modify text formats, change text background colors, and more.

    Developers! It’d be great if you could send over some suggestions

    These are just some of the basic APIs we have in store for you. We’re in the middle of creating more, but if you have any other ideas of APIs we can add to our console, just leave a comment below, or hit us up at [email protected]. We might just feature your suggestions in the upcoming Frontly release ?

  • Frontly Builder: Frequently Asked Questions

    A few months ago, we announced the launch Frontly Builder, a bigger, better front-end page builder with increased performance and awesome new stuff. Think of it as a new and improved version of Page Builder Sandwich.

    It’s still in the works, but it’s coming real soon. In the meantime, we’re sure you guys have some questions about Frontly. So here’s a short FAQ for everyone!

    What will happen to my PBS-run site?/Will I lose everything I’ve built using PBS?/Will the Frontly update destroy my website?

    • No, definitely not! Everything you’ve made using Page Builder Sandwich will remain intact, and nothing will change.

    I purchased Page Builder Sandwich before the Frontly release. What do I do?

    • The only thing you have to do is… nothing. For current PBS users, Frontly will be released as an “update”. You’ll just be upgraded to a “better” version of PBS- Frontly.

    Will I have to repurchase Frontly?

    • No. If you’ve purchased PBS before the Frontly release, you don’t need to purchase anything. As mentioned, everything will be released as an “update” for old users, so you won’t have to lift a finger or shell anything out- we’ve sorted everything out for you guys. ?

    That’s it for now! If you guys have more questions, leave us a comment below so we can add to this list of FAQ’s.

    We hope you’re excited about Frontly as we are! See you there. ?

    Leave us your email to get first dibs on updates!

  • How to Add the Parallax Effect, Video Background, and Ken Burns Effect

    Page Builder Sandwich has a feature that we collectively like to call Fancy Background Effects. There are three of them: the Parallax Effect, Video Backgrounds, and the Ken Burns Effect.

    What are the different Fancy Background Effects?

    PBS’ Fancy Background Effects give your website the boost that it needs to attract site viewers. They’re a surefire way to grab attention, and when executed correctly, can yield eye-catching results in website traffic.

    The Parallax Effect

    Implementing the Parallax Effect onto your page gives your background a sense of depth, letting certain elements of your site “pop out” while scrolling. Here’s an example of a page with a parallax background implemented, and one without.

    With Parallax Scrolling

    The background image scrolls at a different rate as the rest of the elements in the page.

    Without Parallax Scrolling

    The elements of the web page – the text, images, buttons, etc – all scroll at the same rate as the background.

    Video Backgrounds

    Video Backgrounds allow you to place looping videos on backgrounds instead of still images. The great thing about PBS’ video backgrounds is that you can simply paste your desired YouTube or Vimeo link when prompted, and we’ll turn it into a video background for you. You can also upload your own videos for this, too.

    Some samples of video backgrounds you can check out:

    The Ken Burns Effect

    Ken Burns, who popularized the Ken Burns effect in film.

    In documentaries, do you ever notice when they show photos that slowly zoom into detail? That’s called the Ken Burns Effect. You can access these effects on Page Builder Sandwich, too.

    How do I add the Fancy Background Effects?

    You can find all the Fancy Background Effects through the following steps:

    Step 1: Choose a row you’d like to add an effect on. Click on this row’s settings button (the gear icon on the left). This will open the Properties Inspector.

    Step 2: Once the Properties Inspector pops up, scroll down a bit until you find the option called “Fancy Background Effects”.

    Step 3: Once you’ve found it, you’ll see that you can click a dropdown button and select which background effect you’d like on your row.

    Step 4: Depending on which Fancy Background Effect you choose, you can adjust each effect’s settings. For example, for the Parallax effect, you can adjust its height and position.

    And you’re done! After this, you should see your Fancy Background Effects appear on your site in full swing.

    Have you used PBS’ Fancy Backgrounds yet?

    Are there any other background effects you’d like to suggest we add to our features? Or show us your PBS-made site with one of the effects? Let us know in the comments section below!

  • Page Builder Sandwich 2017: A Year in Review

    In 2017, we began expanding Page Builder Sandwich’s features. This year was a huge leap for us, and we couldn’t be happier.

    We’ve gotten tons of feedback and support from our users, as well as our friends from WordPress. And because of this, we were able to create something big, something that let you create wonderful things with us.

    So without further ado, let’s look back at Page Builder Sandwich’s 2017. Here are our favorite updates and releases from this year.

    Parallax Scrolling

    Parallax Scrolling is a background effect that gives your page a a 3D layered look while you scroll.  We made adding this effect easy for our users- simply select the Parallax Scrolling option in your row’s background to add the parallax effect.

    Video Backgrounds

    Just like with Parallax Scrolling, Page Builder Sandwich lets you add fancy Video Backgrounds by simply copy-pasting Vimeo or YouTube links, or manually uploading videos.

    Ken Burns Backgrounds

    You notice the way that archival footage is shown in most documentaries? How they show an image on the screen, slowly zooming in? That’s called the Ken Burns effect. And yes, Page Builder Sandwich released that in 2017, too.

    Blank Page Template

    Want to start with a blank slate? Page Builder Sandwich’s got you covered. We also released the Blank Page Template in 2017, which lets you design your website on a completely blank canvas.

    Full Page Templates

    Page Builder Sandwich released its very first set of Page Templates in January 2017. Niche-based and professionally designed, these templates also allow for manual editing so you can customize them the way you’d like.

    Mobile Responsiveness

    2017 was the year we introduced Mobile Responsiveness to our roster of features. Now you can view your website through mobile, seamlessly.

    All 800+ Google Fonts

    We gave you the ability to add spice and flexibility to your website with all 800+ Google Fonts.

    200% Performance Increase

    Bigger, better, faster. Page Builder Sandwich increased its performance by 200% in 2017.

    What’s in Store for 2018?

    Page Builder Sandwich has been the truly user-friendly, truly intuitive, and truly front-end page builder. Our vision to give you the best webpage-making experience grows as you guys share your needs.

    From your ideas we built something better for 2018!

    Frontly Builder is the next step in our evolution and we’re at the final stages of development!

    Leave us your email to get first dibs on updates!

    ’til relaunch

    We wouldn’t have gotten this far without you guys’ support, so a huge, huge thanks to everyone by our side this 2017! Here’s to creating even more amazing things in 2018. We’ll see you there!

    Cheers,
    The Page Builder Sandwich Team