投稿者: Neil Lock

  • トップページの上部に配置すべきもの – 「ファーストビュー」コンテンツのヒント

    Tips-For-“Above-the-Fold”-ContentWhat you put in the top of your front page has a huge impact on the success or failure of your website. Put the wrong thing in, and you’ll probably see your visitors quickly navigating away from your site. Put the right content there and you may see your sales go up.

    This article isn’t an all-in-one guide for creating above the fold content, nor is about an all-encompassing rule on what you should put in. Rather, I will give you a few tips, recommendations and a little bit of helpful research about this topic.

    本題に入る前に、まずはトップページの一番上の部分が何と呼ばれているかを知っておくと良いでしょう。「サイトの一番上の部分」よりももっと良い呼び名があります。

    file000153814713_

    「アバブ・ザ・フォールド(Above the Fold)」

    それは「アバブ・ザ・フォールド」と呼ばれています。なぜでしょうか?昔、新聞というものがあった時代、新聞は通常半分に折られていたため、すぐに目に入るのは上半分だけでした。その一番上の部分、つまり「アバブ・ザ・フォールド(折り目の上)」の部分にはその日の最も重要な見出しが掲載され、広げるとあまり重要ではない残りの見出しが見えるようになっていました。Webサイトでも同様に、サイトの一番上の部分はユーザーが最初に目にする場所であり、下にスクロールすると新聞を広げるようにサイトの残りの部分が表示されます。

    新聞の例で言えば、通りを歩いていて新聞スタンドを見かけたとします。新聞が目に入り、もしその見出しが面白そうなら、続きを読むために新聞を買うかもしれません。これは基本的にWebサイトでも同じで、訪問者があなたのサイトを訪れ、ファーストビュー(アバブ・ザ・フォールド)のコンテンツに興味を持てば、納得してスクロールしたり、サイトの続きを読むためにさらに閲覧したりする可能性があるのです。

    ニールセンのリサーチ

    Earlier I said that your above the fold content may make or break your site. Nielsen Normal Group has written a few research articles about this across the years. I’ll quote the summary of their article The Fold Manifesto: Why the Page Fold Still Matters

    The average difference in how users treat info above vs. below the fold is 84%.

    If you just got confused about the wording of the quote, I did too at the start. Let me clarify: That study doesn’t mean that 84% of people do not scroll down, on the other hand I’ve seen other research say that most people do scroll down to the bottom of the page. It also doesn’t mean that the lower part isn’t important. Instead it means that the behavior of your visitors in your site is largely impacted by your content above the fold.

    Webサイトの一番上の領域が最初に目に入る場所であることを考えると、これは理にかなっています。

    では、トップページのファーストビューがどれほど重要か分かったところで、サイトの最上部には何を配置すべきでしょうか?

    要点を端的に伝える

    あなたのサイトが何についてのサイトなのかをすぐに伝えましょう。トップページとファーストビューエリアは、サイト全体の生命線です。訪問者が迷ってしまうと、すぐに立ち去り、タブを閉じてしまいます。あなたが新刊の著者なら、そう明記して最新の著書を紹介しましょう。ウェディングプランナーなら、最も思い出に残る結婚式を提供するプランナーであることを明記してください。あるいは小さなホテルのサイトを作るなら、街で最高のベッド&ブレックファストであると書きましょう。(これらの例は後でも詳しく取り上げます。)

    訪問者に「このサイトは何のサイトだろう」と推測させてはいけません。すぐに理解してもらえて初めて、さらに詳細を見るために下へとスクロールしてくれるのです。

    目的を持って訪問者を引き込む

    次に、Webサイトの本来の目的について考える必要があります。そもそもなぜWebサイトを立ち上げるのでしょうか?その理由が何であれ、それもファーストビューに配置する必要があります。

    先ほど挙げたいくつかの例で考えてみましょう。新刊著者の場合、おそらくもっと認知度を上げたいはずです。無料の電子書籍があるなら、訪問者がダウンロードできるボタンを配置できます。ウェディングプランナーなら、サービスについての問い合わせが欲しいでしょうから、電話番号やお問合せフォームを設置します。小さなホテルの場合は、電話番号と一緒に予約フォームを配置しましょう。

    Page Builder Sandwichの場合、プラグインをもっと知ってもらい、最終的に顧客になってもらいたいと考えています。そのため、訪問者がすぐにデモを試せるボタンと、プラグインを購入するための別のボタンを配置しています。

    ファーストビューのデザイン

    何を配置するかが分かったところで、次はデザインを決める番です。個人的には、すっきりとしたセクション分けされたコンテンツが好みなので、当サイトのトップページには無地の背景を採用しています。しかし、ファーストビューのコンテンツをより生き生きと見せるために、画像や動画を添えるのも良い方法です。
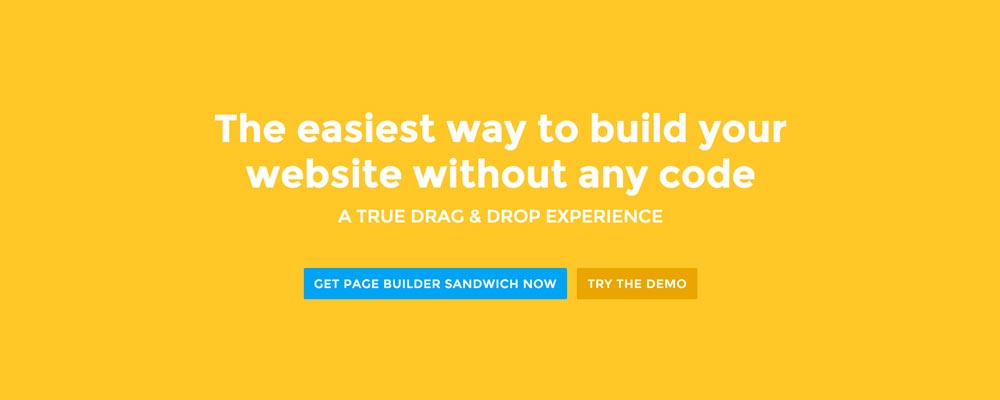
    Screen-Shot-2016-01-29-at-12.11.19-AM_Here’re a few examples of what you can do about your front page.

    Add a background image. A large background image behind your large statement is a great eye-catcher and can further encourage visitor engagement. For new book author, maybe adding a background image illustrating the setting of his free ebook would entice people more.

    Add an introduction video. Admit it, people can be lazy, especially when it comes to reading. So if your site is a bit complicated, it might be a good idea to add a short video that introduces your site/product quickly. For the wedding organizer, then this can be a video of their latest wedding. Or for our site for example, we can add in a quick intro about the features of our plugin.

    Add a video background. This is a bit of a trend nowadays, but I find it appealing at times. If this suits your taste, then this might be a good idea.. I know PayPal had a video background before in their site. For the small hotel, you can put in a stationary video of a scenic area of your hotel as the backdrop.

    結論

    トップページのファーストビュー(アバブ・ザ・フォールド)のコンテンツを作ることは難しくありませんが、適切に行うにはある程度の熟考とテストが必要です。すでにサイトがあり、形はできているものの、Googleアナリティクスで直帰率が高い場合は、上記のヒントを参考にファーストビューのコンテンツを見直してみることをおすすめします。

    If you have tips on creating above the fold content, kindly share them in the comments!


    Page Builder Sandwich can Help You Design Your Front Page & Above The Fold Content

    Page Builder Sandwich is a WordPress plugin that allows you to create any design you want without writing any piece of code.

    Page Builder Sandwichの詳細を見る

  • 100ドル未満でゼロからウェブサイトを作成する方法

    How-to-Create-a-Website-from-Scratch-for-Under-$100

    ゼロからウェブサイトを作りたいけれど、予算が少なく、技術的な知識もまったくゼロという方のために、この短いガイドを用意しました。

    この記事は、技術的なことや複雑なことは抜きにして、とにかくウェブサイトを作りたい完全な初心者を対象としています。クライアントに見せるためのオフィスのウェブサイトが欲しいスタートアップのオーナーの方、オンラインでレストランのレビューを書きたいグルメな方、あるいは単にサイトが必要なDIY派の方など、ぜひ読み進めてみてください!できる限り専門用語を使わず、可能な限りシンプルに解説していきます。

    作業が完了したときに手に入るものを確認しておきましょう。この記事を読み終える頃には、以下のものが揃っています:

    1. Your own website that people can visit at http://supermegaawesomewebsite.com,
    2. Optionally have your own email address at [email protected],
    3. A certain zen-like state of mind.

    必要なもの

    では、実際の手順に入る前に、以下のものを用意してください:

    1. どのようなウェブサイトにするかのアイデア
    2. クレジットカード、または100ドルの残高があるPayPalアカウント
    3. のどが渇いたときのための炭酸飲料または水1杯(水分補給は常に大切です)

    ウェブサイトとは?

    何かを始める前に、私たちが実際に何を作ろうとしているのかをまず知っておくことが重要です。確かに自分のウェブサイトを作るわけですが、それは一体どのようなものなのでしょうか?

    In a nutshell, a website is a bunch of files in a special computer, and this special computer can be accessed by using a special web address on your web browser. After accessing the web server, it’s going to crunch those files together and in the end we would be able to see a pretty looking web page.

    Sorta techy terms:

    • bunch of files = web pages
    • special computer = web server
    • special web address = domain name or URL

    前の段落にある太字の単語が、私たちが手に入れる必要のあるものです。幸いなことに、これらをすべて一度に手に入れられる場所があります。

    ウェブ上のスペースを確保する

    私のおすすめは、GoDaddyのManaged WordPress Hosting – Basicプランを取得することです。このプランなら、最小限の手間で今すぐサイトを作成するために必要なものがすべて揃います。一番のメリットは、すべての設定における技術的な詳細を気にする必要がないことです。

    「Managed WordPress Hosting(マネージドWordPressホスティング)」プランとは何だろうと思っている方のために、詳しく解説します:

    • Managed – GoDaddy will be the ones who’ll make sure that everything runs smoothly, updated, fast and without any problems. And if you need any help, you can ask their customer support.
    • WordPress – This the content management platform that will be used. It’s what you’ll use to publish your content online. It’s awesome. If you want to know more about WordPress, WP101 has a great intro video on What WordPress Is
    • Hosting – Everything will be placed in GoDaddy’s servers, so everything can be accessed quickly and with almost no down time.

    When getting the plan from GoDaddy, they also provide you with a domain name for free. This is awesome since now we don’t have to do anything aside from signing up in order to get the full package!

    さらに嬉しい特典として、Basicプランを利用するとメールアドレスも取得できます。初年度は無料なので、顧客などとの連絡にメールを使用する場合は迷わず選ぶべきです。

    プランの詳細については、以下のリンクをご確認ください(なお、おすすめしているからといって彼らから報酬をもらっているわけではありません):

    GoDaddyのマネージドWordPressホスティングプランをチェック

    すべての詳細情報を入力し、希望するドメイン名を見つけたら(supermegaawesomewebsite.comにする必要はありません)、購入手続きに進んで支払いを済ませます。

    I recommend that you sign up for at least one year so that you can avail of their discounts. You can also scour the web to check if there are any promos available.

    Web Server Cost: $12.18 – $59.88 for 1 year (the key here is to find a promo) Email Cost: $0 for 1 year Domain Name Cost: $0 for 1 year

    Total Cost so far: $12.18 – $59.88

    おめでとうございます、WordPressウェブサイトが完成しました!

    GoDaddyのホスティングを取得した後は、サイトがすでに完全に機能しているはずです。ご自身のドメイン http://supermegaawesomewebsite.com にアクセスして、サイトを確認してみましょう。

    サイトの最初の印象は…何もない…ように見えて、普通に見えるかもしれません。心配いりません、これから整えていきましょう!

    ウェブサイトにアクセスする

    Since you’ve signed up with GoDaddy, they’ll give you a URL where you can access the administration side of your website. If you can’t find it, you can add a /wp-admin at the end of your URL. e.g. http://supermegaawesomewebsite.com/wp-admin and log in from there. Once logged in, you’ll end up in your WordPress Dashboard.

    GoDaddyには、初心者がサイトをカスタマイズするのを支援する独自の「クイックセットアップ」システムがあります。WordPressの仕組みに慣れていない場合は、このセットアッププロセスを実行することをお勧めします。

    WordPressの使い方を学ぶ

    それでは、WordPressに慣れていきましょう。先ほど述べたように、WordPressはコンテンツを公開するために現在使用しているプラットフォームです。言い換えると、サイトにログインして、固定ページやブログ記事を作成し、文字通り公開ボタンを押すだけです。

    次のステップは、WordPressの使い方を学ぶことです。これまでにWordPressを使ったことがない場合、初めて見るダッシュボードは情報量が多すぎて圧倒されるかもしれません。ご自身のペースでさまざまなエリアを探索してみることをお勧めします。

    If you need guidance, there are a lot of tutorials on how to use WordPress online too. One of them is WP101. WP101 makes things super easy by providing lots of tutorials in video format, and they have a huge library of videos that will teach you all the ins and outs of WordPress.

    They have a few free videos in their site. For example, you can watch WP101’s video tutorial about the WordPress Dashboard.

    WP101の動画チュートリアルをチェック

    Video Tutorials Cost: $15 per month (if you can obsess over all their videos within the first month, then you’re golden)

    Total Cost so far: $27.18 – $74.88

    サイトの見た目を美しくする

    The next step is to change the design of your site to make it match your personality and/or needs. You’ll need themes for that. In short, themes are like “skins” for your WordPress site.

    There are a ton of free and paid themes out there. If you want free themes, then there’s no doubt that the WordPress.org theme directory is your number one option.

    Since there are a lot out there though, it’s sometimes hard to find the perfect one for you. Theme Friendly’s Find Themes helps by providing reviews for themes and gives them a score based on their review. They have a number of themes in their site, and probably the best thing there is that you can click on filters while browsing themes, so you can view only themes fit for portfolios, businesses or blogs, and many more.

    There are also paid themes, but for starters I would recommend the free ones first. If you decide to take the premium route check out Premium WordPress’ list of theme shops.

    If you’re wondering why I didn’t mention ThemeForest, it’s because there are a lot of themes there that add a lot of bloat (unnecessary features) to your site. So if you really want to find a theme from there, tread carefully.

    Theme Cost: $0 – $70 one time (I’d recommend looking for promos in theme shops too)

    Total Cost so far: $27.18 – $144.88

    サイトに機能を追加する

    As you create your site and continue to add content to it, you might find yourself wanting to add more stuff like contact forms, maybe some icons, or a Google Map, or something else. For these kinds of stuff, you’ll need plugins.

    As with themes, there are also a ton of free and paid options. And like themes, the number one choice for free plugins is the WordPress.org plugin directory. It’s a common saying within the WordPress community that if you need something in your site, “there’s a plugin for that.”

    For premium plugins, you can also find premium ones in CodeCanyon.net. But I would recommend going through the thousands of free ones in the WordPress.org plugin directory first.

    Plugin Cost: $0

    Total Cost so far: $27.18 – $144.88

    Conclusion

    You might have noticed that the total cost indicator is a range instead of a solid number. It’s because there are various ways to push the cost down like watching out for promotions, and opting for free themes & plugins.

    So if you play your cards right, you can actually have your own site from scratch (powered on for a full year), for only $27.18

    Most likely the succeeding years won’t be as cheap as the first year, but if you have your site up and running for at least a year already, then I would like to think that it’s a success and the other future costs aren’t a problem anymore.

    Hopefully you’ve learned a bunch from this article. And if you didn’t know about WordPress before and you’re now a proud WordPress user, consider joining the numerous WordPress communities online. Just search for a WordPress group in Facebook :)

    待ってください!まだタブを閉じないでください!

    ちょっと待ってください!このタブを閉じる前に、Page Builder Sandwichについて触れておきたいと思います。ここまでたくさんの素晴らしいものを紹介してきましたが、Page Builder Sandwichのことはまだご存知ないはずです。

    Page Builder Sandwichを使えば、コードの知識がまったくなくても、新しいサイトのページを簡単にデザインできます。見た目や操作感はワープロ文書を編集するような感覚ですが、ウェブサイト用です。これを使えば、カルーセル、アイコン、ボタン、画像の背景などを簡単に追加して、サイトをさらに素晴らしいものに仕上げることができます。

    You can try out the demo, or watch the video below. What’s cool is that we’re still below the $100 limit :)

    Page Builder Sandwichのデモを試す

    Page Builder Sandwich Cost: $39 for 1 site

    Total Cost so far: $86.18 – $203.88

  • Page Builder Sandwich Lite が WordPress プラグインリポジトリで利用可能になりました

    PBS-Lite-Is-Now-Available-In-The-WP-Plugin-RepoNow you can download the Lite version of Page Builder Sandwich from the WordPress.org plugin repository!

    Lite 版はプレミアムプラグインの機能を絞り込んだバージョンですが、十分に実用的です。Lite 版で利用できる機能とツールのリストは以下の通りです:

    • ライブフロントエンド編集
    • ポップアップの煩わしさがない、直接クリックして入力できる編集
    • テキスト書式設定ツール: 色、太字、斜体、下線、水平線、配置など、基本的に管理画面の TinyMCE エディターでできることはすべて網羅。
    • WordPress メディアマネージャーを使用した画像と画像操作
    • WordPress のリンク作成ダイアログを使用したリンク作成
    • ブロック要素: 見出し、引用、箇条書き、番号付きリスト
    • 利用可能なすべてのショートコードの完全なリストとともに、ライブショートコードのレンダリングと編集が可能
    • ネスト可能な行と列によるレイアウト
    • 行と列のプロパティ: 背景色、マージン、パディング、境界線
    • 機能する元に戻す/やり直し
    • その他にも多数 !

    今すぐ Lite 版をダウンロード

    プラグインのページを見て、なぜこのプラグインが完全な最新作ではないのか疑問に思われたなら、それはこれがプラグインの最初のバージョンではないからです。1年前はバックエンド のページビルダーでしたが、納得がいかず、数か月にわたる検討とブレインストーミングの末、完全に異なる方向へと舵を切りました。そして今では、私自身も使うのが楽しい素晴らしいフロントエンドページビルダーになりました。

    お使いのテーマで動作しますか ?

    技術的には、あらゆるすべてのテーマで動作するはずです。ユーザーやお客様とともに、WordPress.org テーマリポジトリのテーマ、Genesis Themes、StudioPress Themes、Elegant Themes、ThemeForest のテーマなど、多くのテーマで Page Builder Sandwich が問題なく動作することを確認しています。もしお使いのテーマで動作しない場合は、お知らせいただければ修正いたします。

    現在のコンテンツで動作しますか ?

    Page Builder Sandwich は既存のコンテンツでも問題なく動作するはずです。フロントエンドでコンテンツをすぐに編集できます !

    コンテンツ内にショートコードが幾重にもネストされている場合 (例えばカラムショートコードを使用している場合など)、まずはそれらのカラムショートコードを整理して削除することをお勧めします。Page Builder Sandwich には、CSS のみで構成された、ショートコード不要のレスポンシブなカラムが付属しています。より高速で堅牢なため、こちらを使用することをお勧めします。

    特別初回割引

    全幅の行、高度なテキスト・画像・行・列の書式設定など、より多くの機能が必要な場合は、プレミアムバージョンが最適です。プラグインのアップデートとカスタマーサポートもご利用いただけます。

    For the next few days, we’re offering you a 50% introductory discount. Take advantage of this now!

    If you’re unsure, give the lite version a spin on your own setup first, or check out the live demo from the top menu ?

  • Markdownに対応、さらに便利な書式設定ツールも追加

    Markdown-Now-Supported,-Plus-A-Few-Cool-Formatting-Toolsバージョン2.4より、フロントエンド内でMarkdownを使ってコンテンツを編集できるようになりましたことを喜んでお知らせいたします!

    Markdown構文のサポート

    Markdownとは何でしょうか?基本的にはショートカットキーのようなものですが、キーの組み合わせを押す代わりに文字を入力することで、書式設定がすぐに適用されます。WordPressでも最近Markdownのサポートが追加されましたが、Page Builder Sandwich内でもそれらを利用できるようになりました。Markdownを使って、さまざまな見出し、引用文、整形済みテキストやコード、水平線、箇条書きや番号付きリスト、リンクを追加できます。

    マウスを使って書式設定ボタンをクリックする代わりの方法と考えてみてください。例えば、ブログ記事の執筆中に別の見出しを追加したくなった場合、シャープ記号を2つ(##)入力してから見出しテキストを入力するだけです。Enterキーを押すと、その行全体が<h2> タグに変換されます。とても便利だと思いませんか?

    サポートされているすべてのMarkdown構文のリストは、こちらのドキュメントページでご覧いただけます:http://pagebuildersandwich.helpscoutdocs.com/article/4-how-to-use-markdown

    ライブデモ

    便利なフォーマットツールと新機能

    また、新しくいくつかのツールが利用可能になったこともご紹介します:

    • ボタンツール – ショートコード不要のボタンを作成できるようになりました!これまではアンカーリンクの作成に制限されていましたが、もうそんなことはありません!このツールの素晴らしい点は、面倒なポップアップを開くことなく、ボタンのラベルや色を直接編集できることです。
    • コードツール – 開発者の方に朗報です。インラインテキストをcode.
    • 水平線ツール – コンテンツを区切るのに最適です。これにもMarkdown構文があり、行に1つ以上のダッシュを入力するだけで水平線に変換されます。

    これらに加えて、便利な新機能も追加されました:

    • リンクを貼り付けると、自動的にアンカータグに変換されます(YouTube動画などの埋め込み可能なURLの場合は、コンテンツが埋め込まれます)。
    • Finderやエクスプローラーから画像をウィンドウに直接ドラッグすると、メディアマネージャーに画像がアップロードされます。これで大幅な時間の節約になります。
  • バージョン2.2の進捗状況

    Version-2-2-Progress-Update先週、多くのバグを修正し、Page Builder SandwichにWordPressのリンク編集ダイアログを追加したバージョン2.1をリリースしました。

    今回、Page Builder Sandwichで特に要望の多かった2つの主要機能に対応しました:

    1. より合理的で、すっきりとシンプルに再設計されたユーザーインターフェース。
    2. 要素、行、列にカスタムCSSクラスとIDを追加/編集できる機能。

    以前のインターフェースは、複数のボタンがごちゃ混ぜになっているように見えました。技術的には、ボタンがあってそれをクリックするだけなのでシンプルです。しかし実際には、見た目も操作感もシンプルとは言えず、新しいユーザーにとっては少しハードルが高く感じられました(これをご指摘いただいたサポーターの皆様に感謝いたします)。そこで、テキストの書式設定、行と列など、類似したツールごとにすべてグループ化しました。また、圧倒されるような印象を与えないよう、最初は最も基本的なボタンのみが表示されるようになっています。より「高度な」ツールは、表示を切り替えることができます。これにより、新しいユーザーはまずコアとなるレイアウトに触れるだけで全体の仕組みを素早く把握でき、慣れてきたら残りのツールも表示できるようになります。

    要素ごとにカスタムクラスやIDの編集を可能にしてほしいという要望がこれほど多く寄せられたことには驚きました。個人的には、ページビルダーを使う際にそれらのツールを使うことは滅多にありませんが、それは私個人の話です。カスタムクラスやIDの追加における課題は、常に可能な限りシンプルかつ直感的であるべきだというPage Builder Sandwichの理念を維持することでした。そのためバージョン2.2では、ページ内の任意の要素を選択すると、インスペクターにプロパティ領域が表示され、そこでカスタムCSSクラスやIDを追加または変更できるようになっています。これは行や列でも機能するため、必要に応じて自由に調整することができます。

    Page Builder Sandwichの開発をサポートしてくださる皆様に感謝いたします!今後のアップデートもどうぞお楽しみに ?

  • 動画、画像、ツイート、その他のコンテンツをサイトに追加・埋め込む方法

    How-to-Add-and-Embed-Videos-Images-Tweets-and-Other-Content-in-Your-SiteThere may be times where you want to add supporting videos from YouTube or Vimeo into your site. Or maybe you want to add Tweets from Twitter, or content from other websites like Flickr and Instagram. You can embed these content easily in your WordPress site.

    To do this, all you need to do is find the permalink for the content. In some sites like YouTube, the permalink is simply the current URL. For other sites like Reddit or Vimeo, you’ll have to find the “permalink”, “share” or “embed” button to get the URL. In some sites like Facebook, you’ll have to click the date of the status or post in order to get the permalink.

    パーマリンクにはさまざまな形がありますが、通常は以下のような外観をしています。これはYouTubeのものです。

    https://www.youtube.com/watch?v=dQw4w9WgXcQ​

    これらのURLをコンテンツエディターに貼り付けることで、コンテンツを埋め込むことができます。埋め込み可能な場合、URLが実際の動画やコンテンツに変換されます。変換されない場合は、そのサイトからのコンテンツを挿入できないことを意味します。

    自分のサイトに埋め込み可能なサイトは?

    Not all sites can be embedded into your WordPress site. The WordPress Codex has a list of sites which you can embed: https://codex.wordpress.org/Embeds

    プラグインをインストールして埋め込み可能なサイトを追加する

    If the content you want to embed isn’t in the list in the WordPress Codex, there is another way. Installing plugins can add more embeddable sites. For example, installing Jetpack allows you to embed wall posts from Facebook.

    There are plenty more out there that add more sites, do a search for “oEmbed provider” in the WordPress.org plugin repository to find more. Here’s a link to the plugin repo for your convenience: https://wordpress.org/plugins/search.php?type=term&q=oembed+provider

    コンテンツを追加するもう一つの方法 – iframe埋め込みコード

    URLを貼り付けるだけではうまくいかない場合でも、コンテンツを埋め込む別の方法があります。追加したいサイトの共有オプションを確認してみてください。パーマリンク以外に、短い「埋め込みコード」が提供されている場合があります。埋め込みコードは次のようになります。

    <iframe width="420" height="315" src="https://www.youtube.com/embed/dQw4w9WgXcQ" frameborder="0" allowfullscreen></iframe>​

    Copy that then in your WordPress content editor, click on the text tab on the top of the editor and paste that in. After you’ve pasted that in, head back to the visual tab, you’ll see if it works when the embed code now looks like the actual content that will get embedded. You can’t do this in the visual tab, pasting it from there would just show the pasted code in your site, it won’t get converted into the content.

    Page Builder Sandwichを使用してフロントエンドから他のサイトのコンテンツを追加する

    While adding content from other sites seem easy, doing things in the administration side of WordPress is a bit of a hassle. You have to know whether to add it in the visual tab or text tab, and you’ll have to preview your page or post in order to see how it would look like when viewed by your site’s visitors.

    Page Builder Sandwichを使用すると、すべてフロントエンドから実際のサイトを編集できるため、作業が簡単になります。Page Builder Sandwichを使用すれば、サイトのコンテンツを簡単に作成・編集できます。他のサイトからのコンテンツの埋め込みもはるかに容易になります。

    Page Builder Sandwichなら、パーマリンクまたはiframe埋め込みコードをサイトのフロントエンドの任意の場所に貼り付けるだけで、すぐに埋め込みコンテンツへと変換されます。どのタブに貼り付ければよいかを把握する必要はもうありません。

    今すぐPage Builder Sandwichを入手しましょう。

  • 動画、音声、その他のコンテンツの埋め込みに対応しました

    Embedding-Video-Audio-and-Other-Content-Now-Supported明けましておめでとうございます!

    バージョン2.3より、Page Builder SandwichでoEmbedが利用可能になったことをお知らせできることを嬉しく思います!YouTube、Vimeo、Twitter、Flickr、Instagramなどから、動画、画像、スレッド、その他多くのコンテンツを埋め込むことができるようになりました。

    oEmbed

    これまでは、フロントエンドで動画やその他の埋め込み可能なコンテンツを追加する方法が(ショートコードを除いて)ありませんでした。oEmbedが完全にサポートされたことを喜んでご報告します。任意の場所にoEmbedのURLを貼り付けてEnterキーを押すだけで、埋め込みが行われます。

    oembed_cast
    1行にURLを貼り付けると、埋め込みコンテンツに変換されます。

    どのURLがサポートされているでしょうか?基本的には、WordPressでサポートされている埋め込みURLのすべてです!さらに、oEmbedプロバイダーを追加するプラグイン(例: Jetpack by WordPress.com)をお持ちの場合は、それらも同様にサポートされます。

    この新機能の最も優れた点は、埋め込みによってコンテンツが乱雑にならないことでしょう。バックエンドエディターでの埋め込みURLは、1行のURL文字列として表示されます。

    試してみたい場合は、上のライブデモリンクをクリックして、そこにURLをいくつか貼り付けてみてください!

    その他の改善点とバグ修正

    • コンテンツタイプツールボタン(p、h2、h3など)が、選択されている内容に応じてハイライト表示されるようになりました。
    • 行の高さ(line-height)が、小さなspan要素ではなく、要素全体に適用されるようになりました。
    • 修正: 要素に不要なインラインスタイルが適用されることがある問題を修正
    • 修正: インスペクターが管理バーの背面に回り込み、ドラッグできなくなる問題を修正
    • 修正: ボタン状態の処理を改善
    • 修正: フォーマットの適用/解除によってリンクされたテキストが削除される問題を修正
    • 修正: strong、em、i、bタグを含むコンテンツをフォーマットできない問題を修正
    • 修正: 一部のフォーマットツールがカラムやテーブル内で使用できない問題を修正