[작성자:] Neil Lock

  • 메인 페이지 상단에 무엇을 배치해야 할까 – “스크롤 없이 볼 수 있는 영역(Above the Fold)” 콘텐츠를 위한 팁

    Tips-For-“Above-the-Fold”-ContentWhat you put in the top of your front page has a huge impact on the success or failure of your website. Put the wrong thing in, and you’ll probably see your visitors quickly navigating away from your site. Put the right content there and you may see your sales go up.

    This article isn’t an all-in-one guide for creating above the fold content, nor is about an all-encompassing rule on what you should put in. Rather, I will give you a few tips, recommendations and a little bit of helpful research about this topic.

    본론으로 바로 들어가기 전에, 먼저 첫 페이지의 맨 윗부분을 무엇이라 부르는지 알아두는 것이 좋습니다. 사이트의 ‘맨 윗부분’이라는 표현보다 더 나은 명칭이 있습니다.

    file000153814713_

    “스크롤 없이 볼 수 있는 영역(Above the Fold)”

    이를 ‘Above the Fold’라고 부릅니다. 왜일까요? 초기 시절 인류에게 신문이라는 것이 있었을 때, 신문은 보통 반으로 접혀 있어 상단 부분만 즉시 보였기 때문입니다. 이 상단 부분, 즉 접힌 윗부분(above the fold)에는 그날의 가장 중요한 헤드라인들이 실렸고, 신문을 펼쳤을 때 나머지 덜 중요한 헤드라인들을 볼 수 있었습니다. 마찬가지로 웹사이트에서도 사이트 상단은 사람들이 가장 먼저 보는 영역이며, 신문을 펼치듯 스크롤을 내리면서 사이트의 나머지 부분을 보게 됩니다.

    신문 예시를 계속 들어보자면, 길을 걷다가 신문 가판대를 보았다고 가정해 봅시다. 신문을 보고 헤드라인이 흥미롭다면 나머지 내용을 보기 위해 신문을 살 수도 있을 것입니다. 이는 기본적으로 웹사이트에서도 동일합니다. 방문자가 여러분의 사이트를 둘러보다가 스크롤 없이 볼 수 있는 영역의 콘텐츠가 흥미롭다고 느끼면, 매력을 느껴 아래로 스크롤하거나 사이트의 나머지 부분을 더 둘러볼 것입니다.

    닐슨의 연구

    Earlier I said that your above the fold content may make or break your site. Nielsen Normal Group has written a few research articles about this across the years. I’ll quote the summary of their article The Fold Manifesto: Why the Page Fold Still Matters

    The average difference in how users treat info above vs. below the fold is 84%.

    If you just got confused about the wording of the quote, I did too at the start. Let me clarify: That study doesn’t mean that 84% of people do not scroll down, on the other hand I’ve seen other research say that most people do scroll down to the bottom of the page. It also doesn’t mean that the lower part isn’t important. Instead it means that the behavior of your visitors in your site is largely impacted by your content above the fold.

    웹사이트의 상단 영역이 가장 먼저 눈에 들어오는 곳이기 때문에 이는 자연스러운 현상입니다.

    그렇다면 첫 페이지의 상단 첫 화면 콘텐츠가 얼마나 중요한지 알았으니, 사이트 상단에는 무엇을 넣어야 할까요?

    본론으로 곧장 들어가기

    여러분의 사이트가 어떤 곳인지 즉시 보여주세요. 첫 페이지와 스크롤 전 영역은 사이트 전체의 생명줄입니다. 방문자가 길을 잃은 듯한 느낌을 받는다면 빠르게 돌아서서 탭을 닫아버릴 것입니다. 신인 작가라면 본인이 작가임을 알리고 최신 저서를 소개하세요. 웨딩 플래너라면 방문자에게 생애 가장 기억에 남을 결혼식을 선사하겠다고 적으세요. 또는 작은 호텔을 위한 사이트를 제작 중이라면 마을 최고의 B&B(숙박 겸 조식 제공 숙소)라고 적으세요. (아래에서 이 예시들을 더 활용하겠습니다.)

    방문자가 이 사이트가 무슨 사이트인지 추측하게 해서는 안 됩니다. 즉시 이해할 수 있어야만, 아래로 스크롤하여 더 자세한 내용을 확인할 것입니다.

    의도적으로 방문자의 참여 유도하기

    다음으로 웹사이트의 실제 목적에 대해 생각해 보아야 합니다. 애초에 웹사이트를 개설한 이유가 무엇인가요? 그 이유가 무엇이든, 해당 내용 또한 스크롤 없이 볼 수 있는 상단 영역에 배치해야 합니다.

    앞서 언급한 몇 가지 예시를 들어보겠습니다. 신인 작가라면 더 많은 노출을 원할 것입니다. 무료 전자책이 있다면 방문자가 다운로드할 수 있는 버튼을 배치할 수 있습니다. 웨딩 플래너라면 사람들이 서비스에 대해 문의하기를 바랄 테니, 전화번호나 문의 양식을 넣으세요. 또는 작은 호텔이라면 전화번호와 함께 예약 양식을 넣으세요.

    Page Builder Sandwich의 경우, 저는 사람들이 이 플러그인을 더 잘 알게 되고 궁극적으로 고객이 되기를 바랍니다. 그래서 방문자가 데모를 바로 체험해 볼 수 있는 버튼과 플러그인을 구매할 수 있는 또 다른 버튼을 배치했습니다.

    상단 첫 화면(Above the Fold) 디자인하기

    이제 무엇을 넣어야 할지 알았으니 디자인을 결정할 차례입니다. 개인적으로는 깔끔하게 구획된 콘텐츠를 선호하기 때문에 첫 페이지에 단색 배경을 사용했습니다. 하지만 상단 첫 화면 콘텐츠에 이미지나 비디오를 곁들여 더욱 생동감 있게 만드는 것도 좋은 방법입니다.
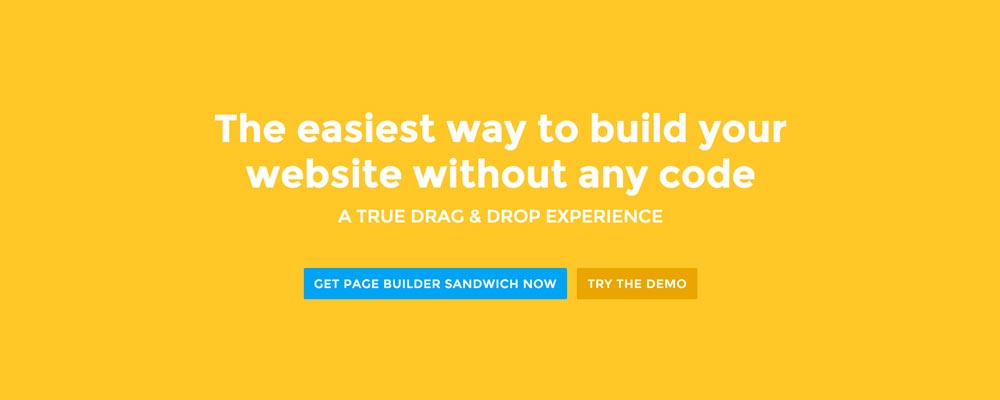
    Screen-Shot-2016-01-29-at-12.11.19-AM_Here’re a few examples of what you can do about your front page.

    Add a background image. A large background image behind your large statement is a great eye-catcher and can further encourage visitor engagement. For new book author, maybe adding a background image illustrating the setting of his free ebook would entice people more.

    Add an introduction video. Admit it, people can be lazy, especially when it comes to reading. So if your site is a bit complicated, it might be a good idea to add a short video that introduces your site/product quickly. For the wedding organizer, then this can be a video of their latest wedding. Or for our site for example, we can add in a quick intro about the features of our plugin.

    Add a video background. This is a bit of a trend nowadays, but I find it appealing at times. If this suits your taste, then this might be a good idea.. I know PayPal had a video background before in their site. For the small hotel, you can put in a stationary video of a scenic area of your hotel as the backdrop.

    결론

    첫 페이지의 상단 첫 화면 콘텐츠를 만드는 것은 어렵지 않지만, 제대로 하려면 약간의 고민과 테스트가 필요합니다. 이미 사이트를 구축해 두었지만 Google 애널리틱스에서 이탈률이 높게 나타난다면, 위의 팁들을 활용해 상단 첫 화면 콘텐츠를 다시 고민해 보시길 권장합니다.

    If you have tips on creating above the fold content, kindly share them in the comments!


    Page Builder Sandwich can Help You Design Your Front Page & Above The Fold Content

    Page Builder Sandwich is a WordPress plugin that allows you to create any design you want without writing any piece of code.

    Page Builder Sandwich에 대해 자세히 알아보기

  • 100달러 미만으로 처음부터 웹사이트를 만드는 방법

    How-to-Create-a-Website-from-Scratch-for-Under-$100

    웹사이트를 처음부터 직접 만들고 싶지만 예산이 부족하고 기술적인 지식이 전혀 없다면, 이 간단한 가이드가 여러분을 위한 것입니다.

    이 글은 복잡하고 어려운 기술적인 내용 없이 정말로 웹사이트를 만들고 싶어 하는 완전 초보자를 위한 글입니다. 고객에게 보여줄 회사 웹사이트가 필요한 스타트업 대표님이든, 온라인에 맛집 리뷰를 작성하고 싶은 미식가이든, 나만의 사이트가 필요한 DIY 애호가이든 상관없이 계속 읽어보세요! 최대한 이해하기 쉽도록 전문 기술 용어는 피하겠습니다.

    모든 과정을 마쳤을 때 얻게 될 결과물을 정리해 보겠습니다. 이 글을 다 읽을 때쯤 여러분은 다음을 갖추게 됩니다:

    1. Your own website that people can visit at http://supermegaawesomewebsite.com,
    2. Optionally have your own email address at [email protected],
    3. A certain zen-like state of mind.

    준비물

    자, 본격적인 단계를 시작하기 전에 다음과 같은 준비물이 필요합니다:

    1. 웹사이트를 어떤 것으로 만들지에 대한 아이디어,
    2. 100달러 잔액이 있는 신용카드 또는 페이팔(Paypal) 계정, 그리고
    3. 목이 마를 때를 대비한 탄산음료나 물 한 잔 (수분 보충은 언제나 좋습니다).

    웹사이트란 무엇일까요?

    무언가를 시작하기 전에, 우리가 실제로 무엇을 만들고 있는지 먼저 아는 것이 중요합니다. 네, 우리는 여러분만의 웹사이트를 만들고 있지만, 그것이 정확히 무엇일까요?

    In a nutshell, a website is a bunch of files in a special computer, and this special computer can be accessed by using a special web address on your web browser. After accessing the web server, it’s going to crunch those files together and in the end we would be able to see a pretty looking web page.

    Sorta techy terms:

    • bunch of files = web pages
    • special computer = web server
    • special web address = domain name or URL

    이전 문단에서 굵은 글씨로 표시된 단어들이 바로 우리가 구해야 할 것들입니다. 다행히도, 이 모든 것을 한 번에 구할 수 있는 곳이 있습니다.

    웹에서 내 공간 마련하기

    저는 GoDaddy의 매니지드 워드프레스 호스팅 – 베이직 플랜을 추천합니다. 이 플랜은 최소한의 번거로움으로 사이트를 즉시 만드는 데 필요한 모든 것을 제공합니다. 가장 좋은 점은 모든 것을 설정하는 기술적인 세부 사항에 대해 전혀 걱정할 필요가 없다는 것입니다.

    “매니지드 워드프레스 호스팅” 플랜이 무엇인지 궁금하시다면, 간단히 설명해 드리겠습니다:

    • Managed – GoDaddy will be the ones who’ll make sure that everything runs smoothly, updated, fast and without any problems. And if you need any help, you can ask their customer support.
    • WordPress – This the content management platform that will be used. It’s what you’ll use to publish your content online. It’s awesome. If you want to know more about WordPress, WP101 has a great intro video on What WordPress Is
    • Hosting – Everything will be placed in GoDaddy’s servers, so everything can be accessed quickly and with almost no down time.

    When getting the plan from GoDaddy, they also provide you with a domain name for free. This is awesome since now we don’t have to do anything aside from signing up in order to get the full package!

    추가 혜택으로, 베이직 플랜을 이용하면 이메일 주소도 얻을 수 있습니다. 첫해는 무료이므로 고객 및 다른 사람들과 이메일로 소통할 계획이라면 고민할 필요가 없는 선택입니다.

    해당 요금제에 대한 자세한 내용은 아래 링크를 확인해 보세요 (추천 대가를 전혀 받지 않았습니다):

    GoDaddy의 매니지드 워드프레스 호스팅 요금제를 확인해 보세요

    모든 세부 정보를 입력하고, 원하는 도메인 이름을 찾은 다음(supermegaawesomewebsite.com을 사용할 필요는 없습니다), 결제를 진행하고 완료하세요.

    I recommend that you sign up for at least one year so that you can avail of their discounts. You can also scour the web to check if there are any promos available.

    Web Server Cost: $12.18 – $59.88 for 1 year (the key here is to find a promo) Email Cost: $0 for 1 year Domain Name Cost: $0 for 1 year

    Total Cost so far: $12.18 – $59.88

    축하합니다, 이제 여러분만의 워드프레스 웹사이트가 생겼습니다!

    GoDaddy 호스팅을 구매하셨다면 이제 사이트가 완전히 작동할 것입니다. 도메인 주소인 http://supermegaawesomewebsite.com 에 접속하여 사이트를 확인해 볼 수 있습니다.

    사이트의 첫인상은 다소.. 비어 보일 수 있으며.. 이는 지극히 정상입니다. 걱정하지 마세요, 이제 멋지게 꾸며봅시다!

    웹사이트 접속하기

    Since you’ve signed up with GoDaddy, they’ll give you a URL where you can access the administration side of your website. If you can’t find it, you can add a /wp-admin at the end of your URL. e.g. http://supermegaawesomewebsite.com/wp-admin and log in from there. Once logged in, you’ll end up in your WordPress Dashboard.

    GoDaddy에는 초보자가 사이트를 쉽게 맞춤 설정할 수 있도록 돕는 자체 “빠른 설정(Quick Setup)” 시스템이 있습니다. 워드프레스 작동 방식이 익숙하지 않다면 이 설정 과정을 진행해보는 것을 추천합니다.

    워드프레스 배우기

    이제 워드프레스와 친숙해질 시간입니다. 앞서 언급했듯이, 워드프레스는 콘텐츠를 발행하기 위해 현재 사용하고 있는 플랫폼입니다. 즉, 사이트에 로그인하여 페이지와 블로그 글을 작성하고 말 그대로 발행 버튼을 누르면 됩니다.

    이제 다음 단계는 워드프레스 사용법을 배우는 것입니다. 워드프레스를 사용해 본 적이 없다면 대시보드를 처음 보았을 때 너무 많은 정보 때문에 당황스러울 수 있습니다. 각자 편안한 속도로 다양한 영역을 둘러보는 것을 권장합니다.

    If you need guidance, there are a lot of tutorials on how to use WordPress online too. One of them is WP101. WP101 makes things super easy by providing lots of tutorials in video format, and they have a huge library of videos that will teach you all the ins and outs of WordPress.

    They have a few free videos in their site. For example, you can watch WP101’s video tutorial about the WordPress Dashboard.

    WP101의 동영상 튜토리얼을 확인해 보세요

    Video Tutorials Cost: $15 per month (if you can obsess over all their videos within the first month, then you’re golden)

    Total Cost so far: $27.18 – $74.88

    사이트를 예쁘게 꾸미기

    The next step is to change the design of your site to make it match your personality and/or needs. You’ll need themes for that. In short, themes are like “skins” for your WordPress site.

    There are a ton of free and paid themes out there. If you want free themes, then there’s no doubt that the WordPress.org theme directory is your number one option.

    Since there are a lot out there though, it’s sometimes hard to find the perfect one for you. Theme Friendly’s Find Themes helps by providing reviews for themes and gives them a score based on their review. They have a number of themes in their site, and probably the best thing there is that you can click on filters while browsing themes, so you can view only themes fit for portfolios, businesses or blogs, and many more.

    There are also paid themes, but for starters I would recommend the free ones first. If you decide to take the premium route check out Premium WordPress’ list of theme shops.

    If you’re wondering why I didn’t mention ThemeForest, it’s because there are a lot of themes there that add a lot of bloat (unnecessary features) to your site. So if you really want to find a theme from there, tread carefully.

    Theme Cost: $0 – $70 one time (I’d recommend looking for promos in theme shops too)

    Total Cost so far: $27.18 – $144.88

    사이트에 더 많은 기능 추가하기

    As you create your site and continue to add content to it, you might find yourself wanting to add more stuff like contact forms, maybe some icons, or a Google Map, or something else. For these kinds of stuff, you’ll need plugins.

    As with themes, there are also a ton of free and paid options. And like themes, the number one choice for free plugins is the WordPress.org plugin directory. It’s a common saying within the WordPress community that if you need something in your site, “there’s a plugin for that.”

    For premium plugins, you can also find premium ones in CodeCanyon.net. But I would recommend going through the thousands of free ones in the WordPress.org plugin directory first.

    Plugin Cost: $0

    Total Cost so far: $27.18 – $144.88

    Conclusion

    You might have noticed that the total cost indicator is a range instead of a solid number. It’s because there are various ways to push the cost down like watching out for promotions, and opting for free themes & plugins.

    So if you play your cards right, you can actually have your own site from scratch (powered on for a full year), for only $27.18

    Most likely the succeeding years won’t be as cheap as the first year, but if you have your site up and running for at least a year already, then I would like to think that it’s a success and the other future costs aren’t a problem anymore.

    Hopefully you’ve learned a bunch from this article. And if you didn’t know about WordPress before and you’re now a proud WordPress user, consider joining the numerous WordPress communities online. Just search for a WordPress group in Facebook :)

    잠깐만요! 아직 탭을 닫지 마세요!

    잠깐만요! 이 탭을 닫기 전에 Page Builder Sandwich에 대해 말씀드리고 싶습니다. 위에서 멋진 내용들을 많이 소개했지만, 아직 Page Builder Sandwich는 보지 못하셨으니까요.

    Page Builder Sandwich를 사용하면 코드를 전혀 몰라도 새로운 사이트의 페이지를 손쉽게 디자인할 수 있습니다. 워드프로세서 문서를 편집하는 것과 비슷하게 보이고 작동하지만, 웹사이트용 도구입니다. 이를 통해 캐러셀(슬라이드), 아이콘, 버튼, 이미지 배경 등을 쉽게 추가하여 사이트를 더욱 멋지게 만들 수 있습니다.

    You can try out the demo, or watch the video below. What’s cool is that we’re still below the $100 limit :)

    Page Builder Sandwich 데모를 체험해 보세요

    Page Builder Sandwich Cost: $39 for 1 site

    Total Cost so far: $86.18 – $203.88

  • Page Builder Sandwich Lite를 이제 워드프레스 플러그인 저장소에서 이용할 수 있습니다

    PBS-Lite-Is-Now-Available-In-The-WP-Plugin-RepoNow you can download the Lite version of Page Builder Sandwich from the WordPress.org plugin repository!

    라이트 버전은 프리미엄 플러그인의 일부 기능을 축소한 버전이지만 여전히 완전히 사용 가능합니다. 라이트 버전에서 제공되는 기능 및 도구 목록은 다음과 같습니다:

    • 실시간 프런트엔드 편집
    • 팝업의 번거로움 없이 직접 클릭하고 입력하는 편집
    • 텍스트 서식 도구: 색상, 굵게, 기울임꼴, 밑줄, 가로선, 정렬 등 기본적으로 백엔드 TinyMCE 에디터에서 할 수 있는 모든 작업 가능.
    • 워드프레스 미디어 관리자를 사용한 이미지 및 이미지 조작
    • 워드프레스 링크 생성 대화 상자를 사용한 링크 생성
    • 블록 요소: 제목, 인용구, 글머리 기호 및 번호 매기기 목록
    • 사용 가능한 모든 숏코드의 전체 목록과 함께 실시간 숏코드 렌더링 및 편집
    • 중첩 가능한 행 & 열을 사용한 레이아웃 구성
    • 행 & 열 속성: 배경색, 여백(margin/padding) 및 테두리
    • 실행 취소/다시 실행 작동
    • 그리고 훨씬 더 많은 기능!

    지금 라이트 버전 다운로드

    플러그인 페이지를 보고 왜 완전히 새로운 플러그인이 아닌지 궁금하시다면, 이번이 이 플러그인의 첫 번째 버전이 아니기 때문입니다. 1년 전에는 백엔드 페이지 빌더였지만 마음에 들지 않았고, 몇 달 동안 고민하고 아이디어를 모은 끝에 완전히 다른 방향을 택하여 지금은 개인적으로도 즐겨 사용하는 멋진 프런트엔드 페이지 빌더가 되었습니다.

    내 테마와 호환되나요?

    기술적으로 이는 모든 테마에서 작동해야 합니다. 당사의 사용자와 고객과 함께 WordPress.org 테마 저장소의 테마, Genesis 테마, StudioPress 테마, Elegant Themes 및 ThemeForest의 테마를 포함한 수많은 테마에서 Page Builder Sandwich를 성공적으로 사용해 왔습니다. 귀하의 테마에서 작동하지 않는 경우 저희에게 알려주시면 해결해 드리겠습니다.

    현재 콘텐츠와도 호환되나요?

    Page Builder Sandwich는 기존 콘텐츠와 잘 연동됩니다. 프런트엔드에서 콘텐츠를 바로 편집할 수 있습니다!

    콘텐츠가 숏코드 안에 중첩된 숏코드로 가득 차 있다면(예: 열 숏코드를 사용하는 경우), 먼저 해당 열 숏코드를 정리하고 제거하는 것이 좋습니다. Page Builder Sandwich는 순수 CSS 기반의 숏코드가 없는 반응형 열을 제공합니다. 더 빠르고 안정적이므로 대신 이를 사용하는 것이 좋습니다.

    특별 출시 할인

    전체 너비 행, 고급 텍스트, 이미지, 행 및 열 서식과 같은 더 많은 기능을 원하신다면 프리미엄 버전이 마음에 드실 것입니다. 또한 플러그인 업데이트와 고객 지원도 받으실 수 있습니다.

    For the next few days, we’re offering you a 50% introductory discount. Take advantage of this now!

    If you’re unsure, give the lite version a spin on your own setup first, or check out the live demo from the top menu ?

  • 이제 마크다운이 지원되며, 몇 가지 멋진 서식 도구도 추가되었습니다

    Markdown-Now-Supported,-Plus-A-Few-Cool-Formatting-Tools버전 2.4부터 프런트엔드 내에서 마크다운을 사용하여 콘텐츠를 편집할 수 있게 되었음을 기쁜 마음으로 알려드립니다!

    마크다운 구문 지원

    마크다운이란 무엇일까요? 기본적으로 단축키와 비슷하지만, 버튼 조합을 누르는 대신 텍스트로 입력하면 서식이 바로 적용됩니다. 워드프레스도 최근 마크다운 지원을 추가했으며, 이제 Page Builder Sandwich 내에서도 동일하게 사용할 수 있습니다. 마크다운을 사용하여 다양한 제목, 인용구, 서식 있는 텍스트나 코드, 구분선, 글머리 기호 또는 번호 매기기 목록, 링크를 추가할 수 있습니다.

    마우스로 서식 버튼을 클릭하는 것의 대안이라고 생각하시면 됩니다. 예를 들어, 블로그 글을 작성하다가 다른 제목을 넣고 싶을 때 두 개의 우물 정자 기호(##)를 입력한 다음 제목 텍스트를 입력하기만 하면 됩니다. Enter 키를 누르면 전체 라인이 <h2> 태그로 변환됩니다. 정말 멋지지 않나요?

    지원되는 모든 마크다운 구문 목록은 문서 페이지에서 확인할 수 있습니다: http://pagebuildersandwich.helpscoutdocs.com/article/4-how-to-use-markdown

    또한 라이브 데모

    몇 가지 멋진 서식 도구 및 기능

    이제 다음과 같은 몇 가지 새로운 도구를 자유롭게 활용할 수 있다는 점도 주목할 만합니다:

    • 버튼 도구 – 이제 숏코드 없이도 버튼을 만들 수 있습니다! 이전에는 앵커 링크 생성에만 국한되었지만, 이제는 다릅니다! 가장 좋은 점은 번거로운 팝업 창을 거치지 않고 버튼 라벨과 색상을 직접 편집할 수 있다는 것입니다.
    • 코드 도구 – 개발자분들에게 희소식입니다. 이제 인라인 텍스트를 code.
    • 구분선(수평선) 도구 – 콘텐츠를 구분하기에 좋습니다. 이 기능에도 마크다운 구문이 적용되어, 한 줄에 하나 이상의 대시(-)를 입력하기만 하면 구분선으로 변환됩니다.

    이 외에도 새로운 편의 기능들이 추가되었습니다:

    • 링크를 붙여넣을 때마다 자동으로 앵커 태그로 변환됩니다(YouTube 동영상과 같이 임베드 가능한 URL인 경우 해당 콘텐츠가 임베드됩니다).
    • 파인더(Finder)나 탐색기(Explorer)에서 창으로 이미지를 직접 드래그하면 미디어 관리자에 이미지가 업로드됩니다. 시간을 크게 절약할 수 있습니다.
  • 버전 2.2 진행 상황 업데이트

    Version-2-2-Progress-Update지난주 저희는 여러 버그를 수정하고 WordPress 링크 편집기 대화상자를 Page Builder Sandwich에 추가한 버전 2.1을 출시했습니다.

    이제 저희는 Page Builder Sandwich에서 가장 많이 요청된 두 가지 주요 기능을 반영했습니다:

    1. 더 효율적이고 깔끔하며 단순하게 재설계된 사용자 인터페이스.
    2. 요소, 행 및 열에 대한 사용자 지정 CSS 클래스 및 ID를 추가/편집할 수 있는 기능.

    이전 인터페이스는 여러 버튼이 뒤섞여 있는 것처럼 보였습니다. 기술적으로는 버튼이 있고 클릭하기만 하면 되므로 단순합니다. 하지만 실제로는 단순해 보이지도 느껴지지도 않았고, 신규 사용자들에게는 다소 위압적이었습니다(이를 지적해 주신 후원자 여러분께 감사드립니다). 그래서 이제 서로 다른 모든 도구가 텍스트 서식, 행 및 열 등 유사한 도구별로 함께 그룹화되었습니다. 또한 위압감을 줄이기 위해 처음에는 가장 기본적인 버튼만 표시됩니다. 더 “고급” 도구는 보기로 전환하여 표시할 수 있습니다. 이는 신규 사용자가 핵심 레이아웃만 먼저 접함으로써 모든 것이 어떻게 작동하는지 빠르게 파악할 수 있도록 돕고, 익숙해지면 나머지 도구도 볼 수 있도록 하기 위함입니다.

    요소별로 사용자 지정 클래스와 ID를 편집할 수 있게 해달라는 요청이 얼마나 많았는지 보고 놀랐습니다. 개인적으로 페이지 빌더를 사용할 때 이러한 도구를 거의 사용하지 않지만, 그것은 저만의 이야기일 뿐입니다. 사용자 지정 클래스와 ID를 추가할 때의 과제는 모든 것이 항상 가능한 한 단순하고 직관적이어야 한다는 Page Builder Sandwich의 철학을 유지해야 한다는 점이었습니다. 따라서 버전 2.2에서는 페이지의 요소를 선택하면 검사기(인스펙터)에 사용자 지정 CSS 클래스 및 ID를 추가하거나 수정할 수 있는 속성 영역이 표시됩니다. 이는 행과 열에서도 작동하므로 필요한 대로 완벽하게 변경하고 조정할 수 있습니다.

    Page Builder Sandwich의 개발을 지원해 주신 모든 분께 감사드립니다! 앞으로의 업데이트도 계속 지켜봐 주세요 ?

  • 사이트에 동영상, 이미지, 트윗 및 기타 콘텐츠를 추가 및 임베드하는 방법

    How-to-Add-and-Embed-Videos-Images-Tweets-and-Other-Content-in-Your-SiteThere may be times where you want to add supporting videos from YouTube or Vimeo into your site. Or maybe you want to add Tweets from Twitter, or content from other websites like Flickr and Instagram. You can embed these content easily in your WordPress site.

    To do this, all you need to do is find the permalink for the content. In some sites like YouTube, the permalink is simply the current URL. For other sites like Reddit or Vimeo, you’ll have to find the “permalink”, “share” or “embed” button to get the URL. In some sites like Facebook, you’ll have to click the date of the status or post in order to get the permalink.

    고유주소(퍼머링크)는 다양한 모양과 형식을 띠지만, 일반적으로 아래와 같은 모습을 보입니다. 이것은 YouTube에서 가져온 것입니다:

    https://www.youtube.com/watch?v=dQw4w9WgXcQ​

    콘텐츠 에디터에 이러한 URL을 붙여넣어 콘텐츠를 임베드할 수 있습니다. 임베드가 가능한 경우, URL이 실제 비디오나 콘텐츠로 변환되는 것을 볼 수 있습니다. 변환되지 않는다면 해당 사이트의 콘텐츠를 삽입할 수 없음을 의미합니다.

    내 사이트에 임베드할 수 있는 사이트는 무엇인가요?

    Not all sites can be embedded into your WordPress site. The WordPress Codex has a list of sites which you can embed: https://codex.wordpress.org/Embeds

    플러그인을 설치하여 더 많은 임베드 지원 사이트 추가하기

    If the content you want to embed isn’t in the list in the WordPress Codex, there is another way. Installing plugins can add more embeddable sites. For example, installing Jetpack allows you to embed wall posts from Facebook.

    There are plenty more out there that add more sites, do a search for “oEmbed provider” in the WordPress.org plugin repository to find more. Here’s a link to the plugin repo for your convenience: https://wordpress.org/plugins/search.php?type=term&q=oembed+provider

    콘텐츠를 추가하는 또 다른 방법 – Iframe 임베드 코드

    URL만 붙여넣는 것으로 작동하지 않는다면 콘텐츠를 임베드하는 또 다른 방법이 있습니다. 포함하려는 사이트의 공유 옵션을 확인해 보세요. 고유주소 외에도 짧은 “임베드 코드”가 제공될 수 있습니다. 임베드 코드는 다음과 같이 생겼습니다:

    <iframe width="420" height="315" src="https://www.youtube.com/embed/dQw4w9WgXcQ" frameborder="0" allowfullscreen></iframe>​

    Copy that then in your WordPress content editor, click on the text tab on the top of the editor and paste that in. After you’ve pasted that in, head back to the visual tab, you’ll see if it works when the embed code now looks like the actual content that will get embedded. You can’t do this in the visual tab, pasting it from there would just show the pasted code in your site, it won’t get converted into the content.

    Page Builder Sandwich를 사용하여 프론트엔드에서 다른 사이트의 콘텐츠 추가하기

    While adding content from other sites seem easy, doing things in the administration side of WordPress is a bit of a hassle. You have to know whether to add it in the visual tab or text tab, and you’ll have to preview your page or post in order to see how it would look like when viewed by your site’s visitors.

    Page Builder Sandwich는 실제 사이트를 모두 프론트엔드에서 직접 편집할 수 있도록 하여 작업을 더 쉽게 만들어 줍니다. Page Builder Sandwich를 사용하면 사이트의 콘텐츠를 쉽게 작성하고 편집할 수 있습니다. 다른 사이트의 콘텐츠를 임베드하는 것도 훨씬 더 수월해집니다.

    Page Builder Sandwich를 사용하면 사이트 전면 어디에나 고유주소 또는 iframe 임베드 코드를 붙여넣기만 하면 즉시 임베드된 콘텐츠로 변환되므로, 어떤 탭에 붙여넣어야 하는지 더 이상 알아볼 필요가 없습니다.

    지금 Page Builder Sandwich를 이용해 보세요.

  • 비디오, 오디오 및 기타 콘텐츠 삽입 지원 시작

    Embedding-Video-Audio-and-Other-Content-Now-Supported모두 새해 복 많이 받으세요!

    버전 2.3부터 Page Builder Sandwich에서 oEmbed를 사용할 수 있게 되었다는 소식을 전해드리게 되어 매우 기쁩니다! 이제 YouTube, Vimeo, Twitter, Flickr, Instagram 등의 동영상, 이미지, 스레드 및 기타 다양한 콘텐츠를 임베드할 수 있습니다.

    oEmbed

    지금까지는 프런트엔드에서 (숏코드를 제외하고) 동영상이나 다른 유형의 임베드 가능한 콘텐츠를 추가할 수 있는 방법이 없었습니다. 이제 oEmbed가 완전히 지원된다는 소식을 전해드립니다. 어디서나 oEmbed URL을 붙여넣고 Enter 키를 누르기만 하면 임베드됩니다.

    oembed_cast
    한 줄에 URL을 붙여넣으면 임베드된 콘텐츠로 변환됩니다.

    어떤 URL이 지원되나요? 바로 WordPress에서 지원하는 모든 임베드 URL입니다! 또한, oEmbed 제공업체를 추가하는 플러그인(예: Jetpack by WordPress.com)이 있다면 해당 플러그인의 콘텐츠도 지원됩니다.

    이 새로운 기능의 가장 좋은 점은 임베드로 인해 콘텐츠가 복잡해지지 않는다는 것입니다. 백엔드 편집기에서 임베드된 URL은 한 줄의 URL 문자열로 표시됩니다.

    직접 사용해 보고 싶으시다면 위의 라이브 데모 링크를 클릭하고 거기에 URL을 붙여넣어 보세요!

    기타 개선 사항 및 버그 수정

    • 콘텐츠 유형 도구 버튼(p, h2, h3 등)이 이제 선택된 항목에 따라 강조 표시됩니다.
    • 줄 높이(Line height)가 이제 작은 span 요소 대신 전체 요소에 적용됩니다.
    • 수정됨: 요소에 때때로 불필요한 인라인 스타일이 적용되는 문제
    • 수정됨: 인스펙터가 관리자 표시줄 뒤로 이동하여 드래그할 수 없게 되는 문제
    • 수정됨: 버튼 상태 처리 개선
    • 수정됨: 서식 지정/해제 시 링크된 텍스트가 제거되는 문제
    • 수정됨: strong, em, i, b 태그가 포함된 콘텐츠의 서식을 지정할 수 없는 문제
    • 수정됨: 열(columns) 및 표(tables) 내부에서 일부 서식 도구를 사용할 수 없는 문제